Category: Tiling News and Blog

What is Natural Stone?

Natural stone colors
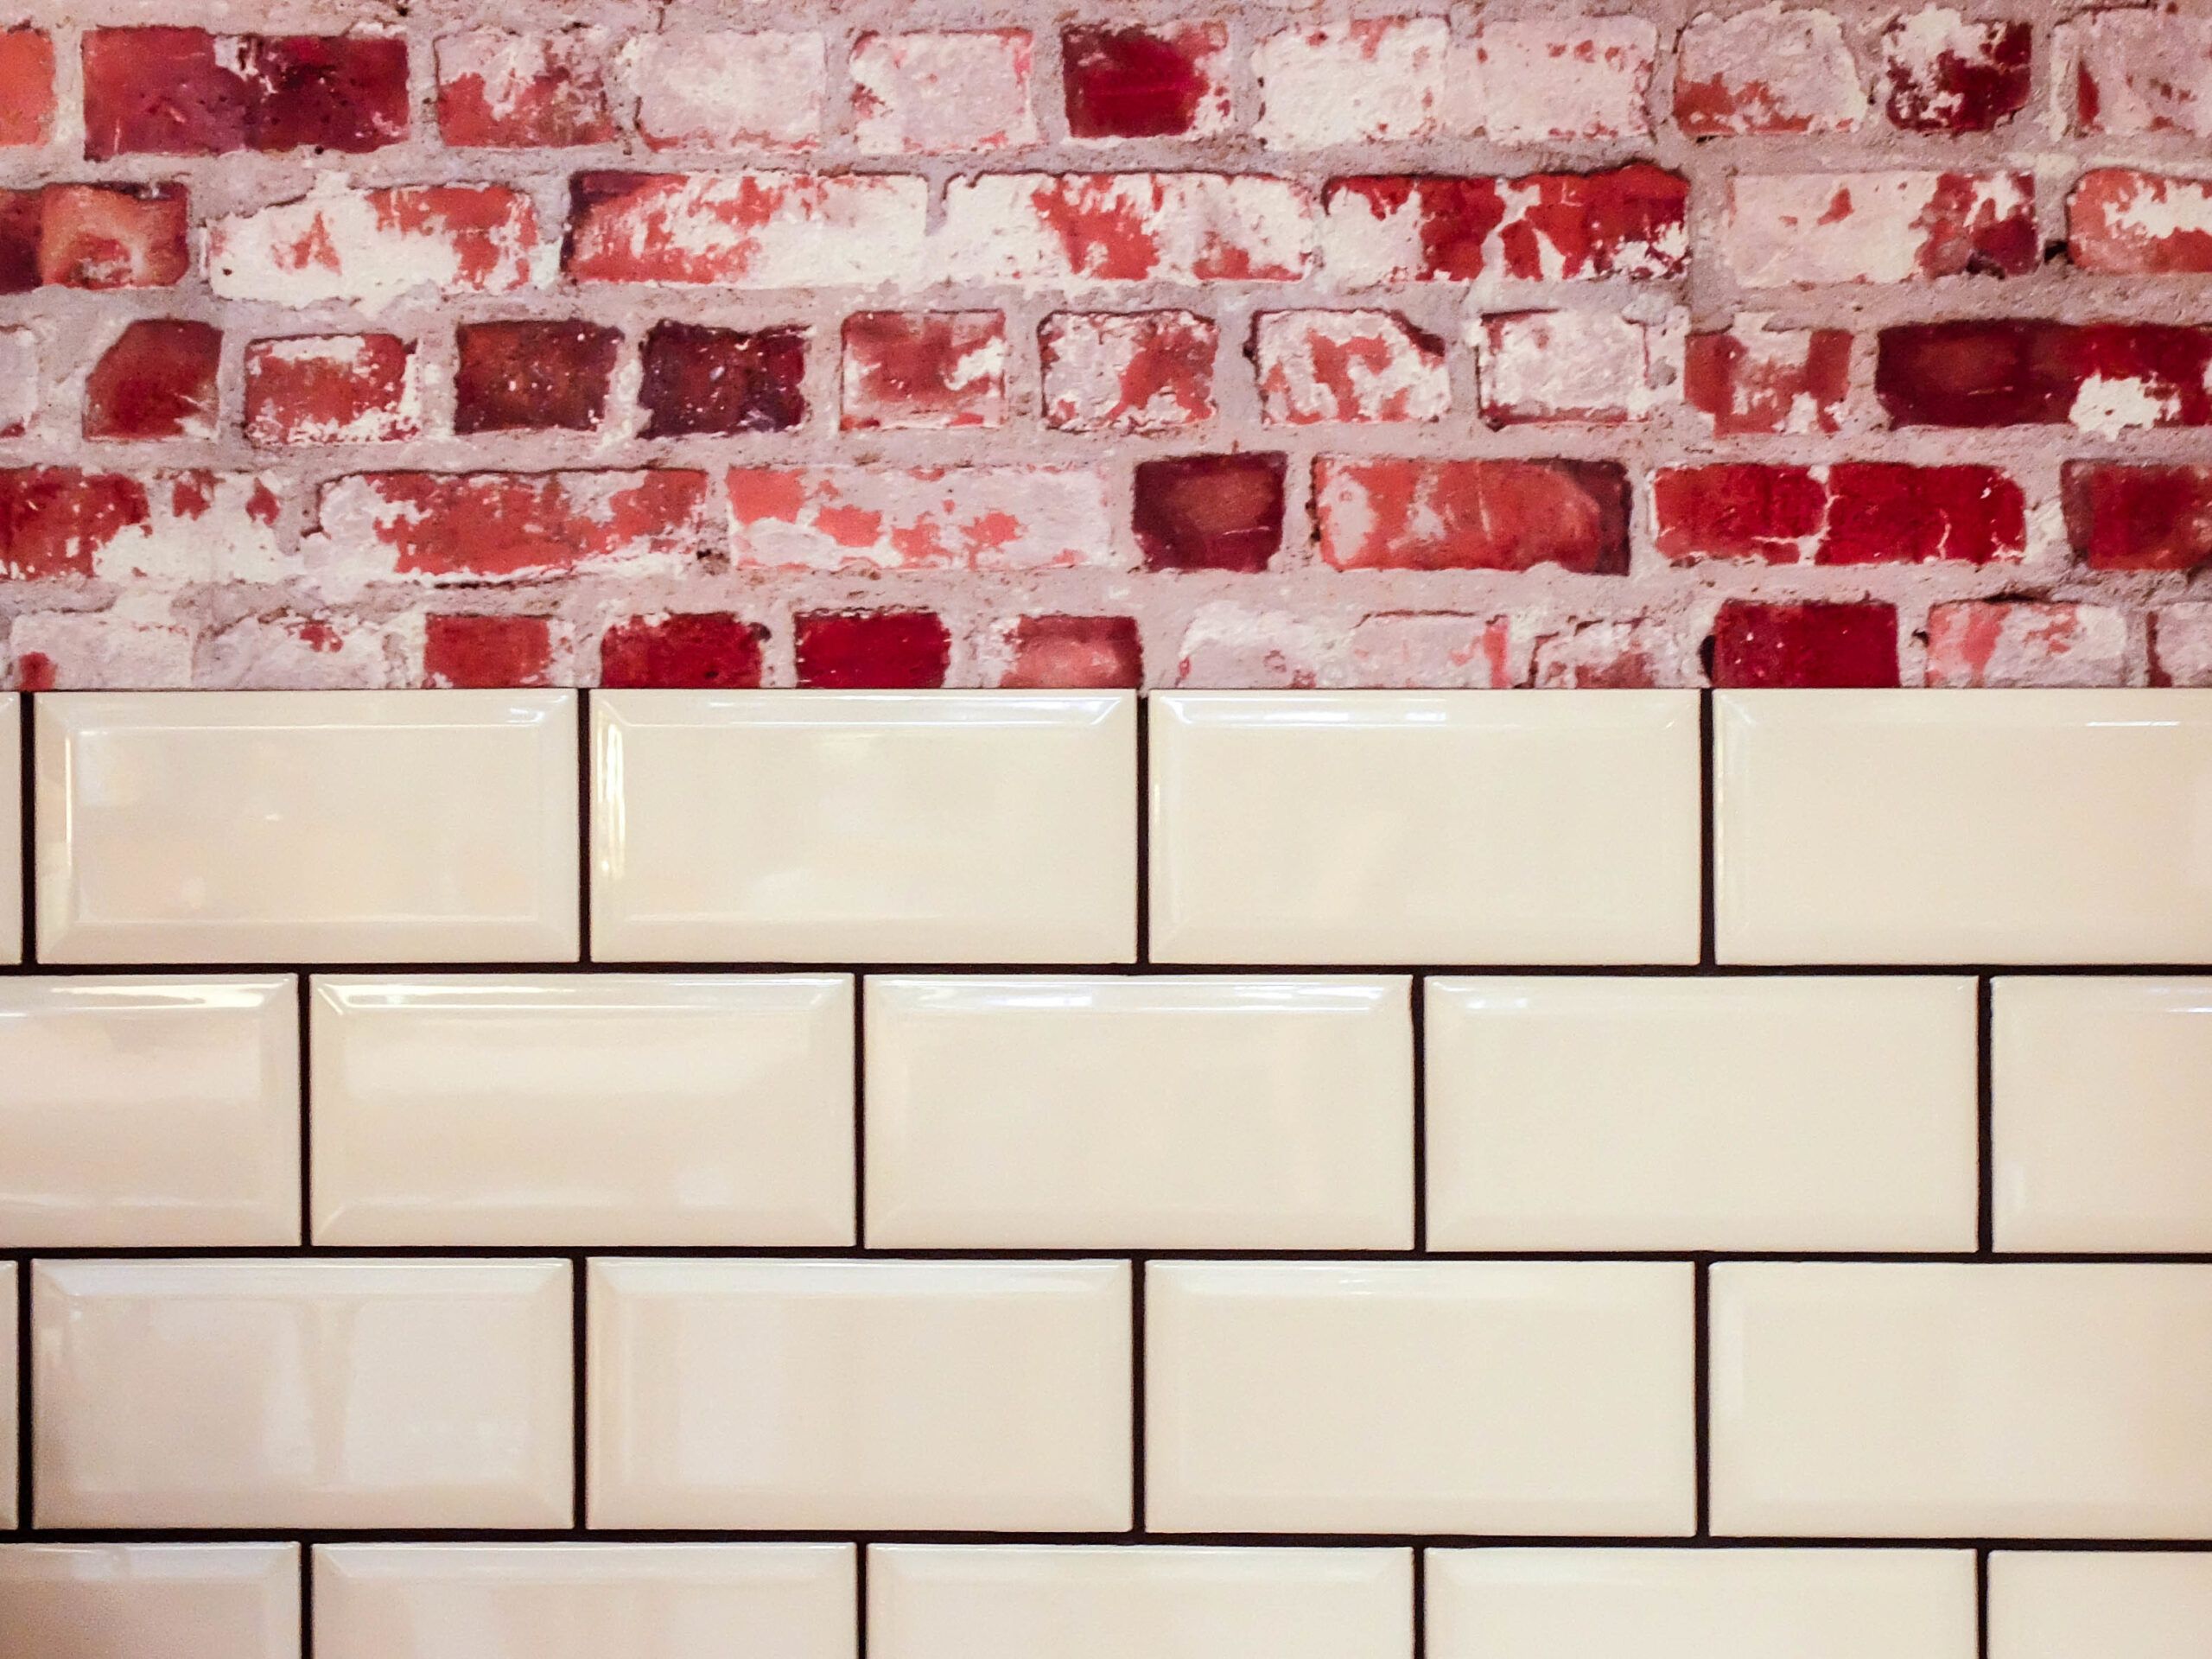
If you are familiar with the tiling industry and different types of tiles, then you’ll have heard about various options of floor and wall tiling that can be used in various applications. Some choices of tiling materials are made from natural stone, rather than manmade materials like vinyl and laminate tiles.

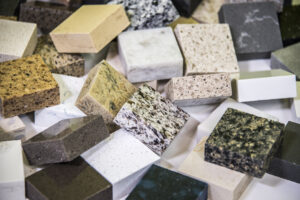
Natural stone tiles are, essentially, one of the more popular tiling applications. Loved for their unique aesthetic and natural appearance, tiling with natural stone is a key skill for tilers to develop and will undoubtedly be a required task in any tiler’s career. We offer a natural stone tiling course for anyone wanting to get into working with natural stone.

However, what exactly is natural stone? And what should you consider before applying natural stone tiles?

Types of Natural Stone

Natural stone is, ultimately, any type of stone that has been taken from the earth and is primarily the stone quarried from mountain ground. The types of natural stone commonly used in tiling are:

  • Slate. Slate is generally quarried in fine layers and ranges in colour from light to dark grey, depending on the type of slate you opt for.
  • Granite. Granite is a highly durable tiling material and is heavily resistant to dirt. Granite is, therefore, a popular material for floor tiles that have heavy use and/or high levels of foot traffic.
  • Limestone. Softer choices of limestone tiles should be used in areas where the floor is not in constant use. There is also the option of harder limestone that tends to be darker in colour than softer limestone choices.
  • Basalt. Basalt shares many similarities with granite. It is a very hard natural stone, sourced from volcanoes, and is dark grey in colour.
  • Quartzite. Quartzite has a sparkling finish and is becoming increasingly popular in kitchen applications.
  • Marble. Marble is known for its beautiful and long-lasting applications. Marble has connotations of luxury and tradition.
  • Sandstone. Sandstone is popular for country-style properties. Sandstone tiles are known for their smooth appearance and natural edge.
  • Travertine. Travertine tiles generally have a lighter appearance and are a popular type of tile for many building projects.

What to consider when choosing your natural stone tiles

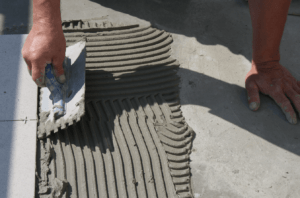
Before purchasing your natural stone tiles, you should ensure to thoroughly research where you are buying from, and that the type of tile is suitable for your particular application.

Ultimately, there is the possibility of some tiles getting scratched easily and wearing down quickly, particularly where an unsuitable material is selected for a particular purpose.

To avoid the excessive wear and tear of brand new tiles, you should consider whether your tiles are being used for indoor or outdoor use and whether the tiles need to withstand heavy foot traffic.

In addition, you should consider the grade of the tiles. Grade 1 tiles are extremely high-quality, while grade 2 can have some chips and imperfections. Grade 3 tiles tend to be significantly flawed.

Another thing to think about is the absorption of the tiles. If the tiles have a high absorption rating, they can be more susceptible to staining and further damage. Vitreous tiles is the name given to tiles that offer a standard absorption rate, suitable for low to medium amounts of foot traffic, both indoors and outdoors.

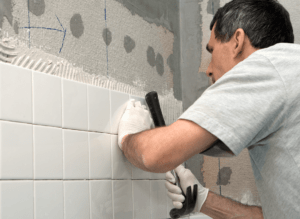
How can a professional tiler help you select your natural stone tiles?

In most cases, a reliable, experienced and qualified tiler can be well-informed about the best place local to you where you can buy natural stone tiles. It is beneficial to buy natural stone tiles from a local dealer, so to keep environmental impact to a minimum.

A professional tiler can also help inform you about the most suitable type of natural stone for your particular project.

Choosing the right tiling training centre

Choosing a tiling training centre

If you”re looking for a career change and your good at DIY then you”re maybe considering a wall and floor tiling course to turn your hobby into a business.

There are a few options to choose from, one is a local college where you would sign up for a two year tiling course, this is a young persons route as if you have bills to pay and mortgage payment to keep up then getting the work in and income will be top of your priorities.

College tends to go at a very slow pace and some colleges have limited resources so materials and tools might be in short supply. College also works towards a qualification and where this might sound good, a lot of your time is spent on passing the actual qualification rather than learning how to tile for a living.

Private Training centres IMG_5423

A private tiling training course is the next option; here you can fast track all the skills required for you to make it in the real world.

Like everything in life there are good and bad so it is essential if your looking at fast track tiling courses that you do your research and find out as much about the provider as possible before you part with your hard earned cash, some courses are just at DIY levels which will teach you only the basics of what to do.

Business

Many people believe that the tiling skills are everything that’s required, These are the people that will fail, the business side of tiling is essential as without the knowledge of how to run a business your tiling skills wont be put to good use as you will have no customers to complete work for.

Tiling Courses

A good quality tiling course will teach you both how to do the job correctly in the fastest time possible but also teach you the self employed business elements of how to take those skills and find your customers along with pricing and measuring their jobs etc.

UK Pro Tiling Training

UK Pro Tiling Training is one of the best in the UK, trading for over 15 years where 1000s of learners from all over the world have attended, every feedback is 5 star positive so if past learners reviews are anything to go by you cant go wrong here.

Everything about tiling for a living is taught at the highest possible standards.

If your looking for a fast track tiling course then check out their website www.tiling-courses.co.uk for more information

How to Become a Tiler

Laying ceramic floor tiles - man hands marking tile to be cut, closeup
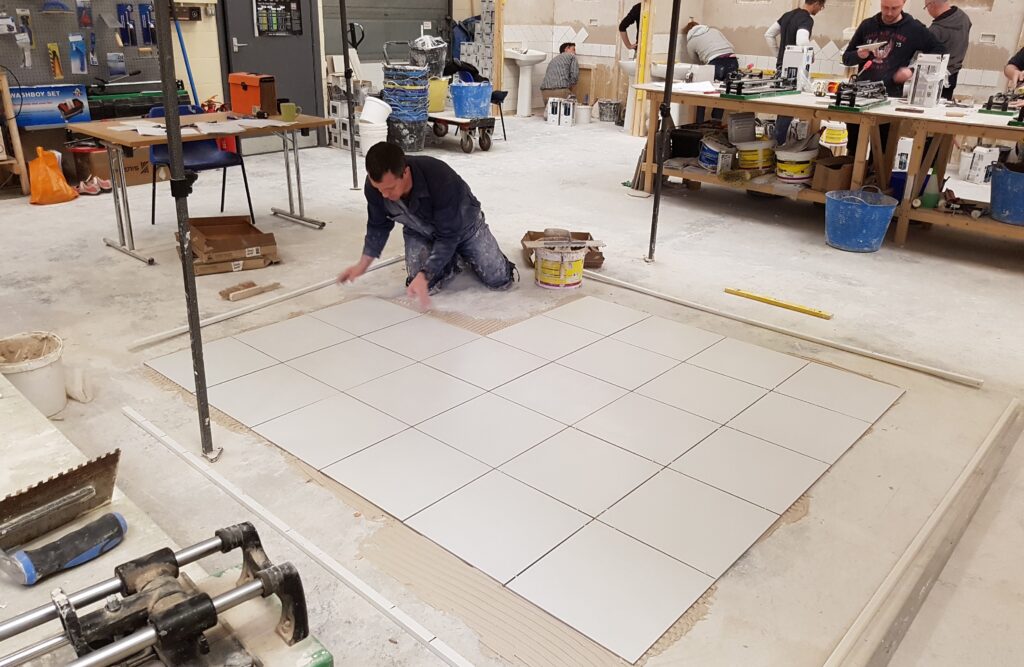
Tiling is often a career that people go into at an older age. After all, the process of laying tiles is not taught in schools. That’s why tiling courses, accessible to those who have been out of the learning environment and trained in other disciplines, are extremely important for those looking to start a new career in tiling.

Tiling is essentially a career that, despite popular opinion, is not just for builders, painters and decorators, neither is it unsuitable for women. In fact, people go into tiling from a range of different working backgrounds and there are many successful and well-established female tilers, as well as tilers who have work backgrounds that are completely disassociated with the tiling industry, like retail and catering. Ultimately, a good tiling course produces great tilers, no matter what their age, background or experience.

If you”re thinking about becoming a tiler, then here’s how to do it.

Do your research

First of all, try to get to grips with what a tiling career actually involves, particularly if you”re planning on setting up your own business.

You may think, at first, tiling is simply a case of buying the tiles, laying them and that’s it, job done. In actual fact, there is a lot of behind the scenes work involved in a tiling project, from establishing a business plan, to gaining clients, measuring up, ensuring you meet client expectation, the tiling job itself and client feedback.

It would be useful to research the day-to-day work of a tiler, how much they tend to earn and what you can expect from a tiling career.

Some tasks involved in tiling are: Setting out the area to be tiled, cutting tiles, preparing the area to be tiled and the tiling process of fixing the tiles itself.

How to become a tiler

Although there are no set requirements to become a tiler by law, it is essential that you have a qualification in wall and floor tiling in order to be able to practice as a reliable and effective tiler.

It is possible to become a tiler by gaining an apprenticeship alongside practical experience, however, many people choose to complete a professional tiling course.

Consider your strengths and weaknesses

There are certain skills that are involved with tiling and, ultimately, you should consider whether you are strong with practical tasks, can follow design patterns, can complete tasks accurately and to a good level of detail, have the mathematical ability to calculate costs and quantities of materials, and can provide good customer service. You’ll also need to be fairly creative and be able to keep your paperwork and accounts up-to-date.

Find a good tiling course

Essentially, a good tiling course leads to a good tiler. At UK Pro Tiling Training, we have an array of professional tiling courses that can stand you in good stead for a tiling career. Many past students often write back to us detailing their experience of building up their tiling business after training with us and their recent successes.

Make an effort

Finding a good tiling course is, of course, just one element of the journey to become a tiler. It is no good half-heartedly turning-up to the practical and theory sessions, instead it is important to make an effort and learn all you can while you have the opportunity.

Be confident

When you have completed your tiling course and qualified as a tiler, be confident to use your skills and expertise. You may need to advise your customers about the best way to deal with the job in hand, perhaps providing advice on materials, costs, complications and how long you think the project will take.

Finally, don’t be afraid to carry out further research when you have qualified and keep enhancing your skills. Additionally, you should feel confident to contact your tiling tutor, even when you are in business, if you feel there is anything they could help you with. At UK Pro Tiling Training, we make sure that we are in touch with our tilers once they are qualified and available if there are any further questions.  Visit www.tiling-courses.co.uk to find out more.

Can anyone Become a Wall and Floor Tiler

Can anyone become a tiler?

Tiling can be a great career choice, just think of all the floors, bathrooms and cloakrooms in peoples businesses and houses, you could be tiling these projects yourself with some quality training under your belt from a professional tiling course.

Skills required to become a tiler.

No prior tiling skills is necessary if you want to take a fast track course but the following skills are good to have.

Patients is a good skill to have as tiling is all about attention to details making sure you get all your tiles fixed squarely and your cuts measured accurately.

Good DIY skills, it is beneficial to have a natural ability to do jobs with your hands as tiling is very manual, thinking out situations and solving problems is also a good skill to have.

General fitness, tiling can get quite physical especially if you have to carry your customer’s tiles and products into their property from your van or from a customer’s garage.

Maths skills, in tiling you will be calculating areas and pricing jobs so being good with numbers is a big help.

Communications skills, talking and having good interpersonal skills will be of benefit when dealing with your potential customers.

Earnings.

Tradesman’s wages are set to rise significantly in the next few years due to supply and demand, currently there is a massive shortfall of professional tilers, couple this up with around 1million houses which need to be built in the next 3 years then you have a trade where people will pay high rates for you to get the work done.

Some tilers are making in excess of £60K per year from a job which they enjoy doing getting satisfaction from seeing the end results from their tile fixing.

How can you learn the tiling trade.

There are a few professional fast track tiling courses, UK Pro Tiling Training is one of the very best, they have pro tiling courses ranging from 1-3 weeks which are suitable for anyone with no prior tiling experience, here you can fast track your way to a new lucrative career, there is also a full business start up program included so you will not only learn how to tile correctly, you will also learn how to find work, price and estimate areas, deal with backgrounds and prepare them all wrapped up in one course.

Interested of becoming a wall and floor tiler then visit www.tiling-courses.co.uk for more information or call 0333 335 0604.

How to find work as a wall and floor tiler

How to find work as a wall and floor tiler

Learning to tile is great and after attending a good quality tiling course you may be wondering what to do next with your skills.

Some tilers can earn up to £50-60K per year, heres what you need to do to find the business.

How to find work

Marketing

The key to any successful business is marketing; here are some ways to get in the business. As you know by now that floors will be the most profitable jobs so concentrate on finding these first, then go for the Kitchen splash backs with kitchen floors, trying to leave bathrooms as the last job you want to do.

When doing the below always make sure you ask for and are talking to the one that can make a decision to give you the business.

Floors

  • Get yourself around all the conservatory suppliers including any window fitters that you can find and pitch your services, you need to make contact with as many tradesman as you can find. If need be offer them a £ kick back for every one they pass onto you. Ask who is the plasterer that finishes off the conservatory as he will be the last tradesman in contact with the owner, give him a £drink for each one he passes on, make sure he has your business cards to give out.
  • Shop fitters, try and find these tradesman who are currently doing or going to refit out a shop, these shops will usually have tiles down on the floors.
  • Floor screeding service tradesman, again like above these tradesman do floors that maybe ready for tiling soon.

Kitchens

  • Kitchen shops are the first port of call here, get into every one you can find and pitch your services with cards and flyers.
  • Kitchen fitters and joiners are the ones here; the customer will always ask them for a tiler after they have finished installing the kitchen.
  • Electricians also rewire a lot of kitchen sockets and bathroom down lighters, tiling will always follow this service, so find those electricians, offer to take their card always and say you will also pass work onto them, this goes for every tradesman.

Bathrooms

  • Bathroom showrooms and plumbers merchants and also the actual plumbing tradesman is how you will get these jobs.

Tile shops

Tile shops obviously sell loads of tiles and will be asked all the time to recommend a tiler, so it is really important that you get in with the sales and counter staff.

  • Facebook. It is absolutely essential that you set up a business page on here and promote yourself with pictures and testimonials, make sure you put your contact number after every post.
  • Church parish magazines (around £20), visit your local church and ask them if they do a monthly mag then ask them about advertising in it, there are a lot of people will trust you from this route as people that are church goes like other people the same.
  • Estate agents / Letting agents, These are always looking for handy men for the property developers on their books as well as the houses that are not selling due to the in need for updating.
  • Insurance companies will always be looking for tradesman to correct damaged properties, fires, floods etc. Ring up the insurance companies and ask who to speak to about getting work sub contracted to you.
  • Checked and Vetted / Rated Tradesman etc. These work very well, ring them up and ask them what and how they charge for getting referrals to customers.
  • Other tradesman, plumbers, electricians, decorators and plasterers.
  • Paper shops, Newspapers.
  • Vehicle sign essential, this is essential get a van and make sure it says what you do which is tiling services and your contact numbers.
  • Google, this is a powerful one now, it creates hot leads, first you need a website that will start to get good natural rankings in Google, this will take time so you can jump the queue and go straight to the top with a PPC (pay per click) campaign.
  • Make sure you offer credit card facilities, look for how you can process card payments with a mobile card machine.

If you get all these above in action you will have more work than you can handle.

UK Pro Tiling Training offer fast track career changing tiling courses where you can learn to tile professionally without the timescales of completing an apprenticeship.

The course offers advanced tiling skills as well as how to run a business, price and find work so you are ready for your customers after you leave.

Please visit www.tiling-courses.co.uk for more information or call Tracey on 0333 335 0604

How To Grout

How Do You Grout Tiles?

Before you start your tiling project, it’s vital you have a strong understanding of how to grout tiles before you even pick up your trowel. After all, the most expensive, pristine and unique tiles can be ruined when they’re grouted in an improper fashion.

Want to add a colourful splashback to your kitchen? Looking to lay tile on your bathroom floor? Its essential you know how to mix tile grout, so you can seal the tiles in place properly to protect them from moisture and dirt. Happily, grout is simple and quick to apply and by reading our easy step-by-step guide on how to do grouting, you’ll achieve a professional finish effectively, in no time at all.

We have all the information you need, right here, all in one place. Read on for tiling expertise.

To clear up any confusion, grout is commonly misspelled ‘graut’ or ‘grauting’. We can confirm the correct spelling is ‘grout’ or ‘grouting’.

Screen Shot 2018-02-26 at 13.20.28

Here at UK Pro Tiling Training, we’re experts when it comes to how to grout tiles. Have a look at the following advice about applying grout to tiles for a professional finish.

Grouting Tiles: The Basics

When it comes to understanding how to grout tiles, grouting tiles is the same no matter what type of tile you’re using and whether you are deciphering how to tile a wall or a floor.

You can buy grout that arrives in powder form and mix it with water yourself or you may want to buy grout thats pre-mixed and immediately ready to use. Whatever type of grout you choose, be sure you have got enough grout to complete the job.

Of course, you will need to use a waterproof grout in areas where its possible for water to get onto the tiles, however, so long as you ensure the joints between the tiles are filled thoroughly, your grout will sufficiently hold the tiles in place, whether you’re using ceramic, porcelain, natural stone tiles or another tile material. 

What You will Need for Grouting Tiles

  • A trowel
  • Grout – either ready-mix or one you mix with water yourself
  • A sponge
  • A small bucket for water
  • A cloth
  • A grout shaper
  • You’ll also need grout cleaner and a grout rake if you are replacing old grout
How to Put Grout on Tile: The Steps

STEP 1  MIX IT

It’s important to know how to mix tile grout. If you are using powdered grout, pour a small amount of water into a bucket. Then use a stick to stir it, making sure you continue adding the grout and stirring until you achieve a consistency that resembles whipped ice cream.

STEP 2  HOW TO APPLY GROUT

When it comes to how to apply tile grout to a wall, firstly, apply a minimum amount of grout to the front surface of the tiles with a trowel and spread it with a grout spreader. The best technique to use is to adopt long strokes that have an upwards and diagonal direction, making sure it spreads completely in between the joints of your tiles.

It’s important you aim to grout all the tile joints as fast as possible, as the grout will start to harden on application.

TOP TIP: Avoid adding water to make the grout spread easily as it weakens the grouting.

STEP 3  WIPE THE TILES

Once you have grouted all the tiles, wipe the tiles with a damp sponge or cloth to remove any excess grout, being careful not to wipe over the grout in the joints. Hard grout will be difficult to remove.

STEP 4  USE A GROUT SHAPER

Once you have removed the excess grout and all the tiles are grouted in place, you can finish off the joints between the tiles by using a grout shaper.

TOP TIP: The best method to adopt when using a grout scraper is to pull the grout shaper over the joints in one long movement. If you notice any small gaps become apparent in the joints, simply press in a small amount of extra grout with the end of your finger. Again, any excess grout will need to be wiped off with a damp sponge. In addition, a damp, soft cloth with wipe off any marks from where your grout has dried for a perfect, and professional, finish.

How to Replace Old Grout

Replacing old grout can instantly make tiles look as good as new, as grout can often become stained due to excess water and soaps in bathrooms, and food spillages etc. in the kitchen.

Screen Shot 2018-02-26 at 13.24.49

Minor stains and bacterial growth can be removed using a grout cleaner. However, tougher stains and seriously worn grout will probably need replacing.

You can replace old grout by scraping out your existing grout with a grout rake, first working vertically, followed by working horizontally. Be careful not to scratch your tiles.

Make sure you remove all the grout, and then replace it with new grout, following the steps on how to grout tiles above if you are unsure of how to use grout.

Need More Tiling Tips?

Whether you want to know how to apply tile grout professionally, how to repair a cracked tile, how to tile with metro tiles or are just curious about how to maximise your earnings as a tiler, be sure to check out our handy how to guides on our website, which cover a wide range of topics.

And keep an eye on our blog for more must-know tips and tricks when it comes to tiling. Discover all sorts of topics, including how do you mix grout to guides on multi-coloured wall tiles.

Tips for Floor Tiling

A successfully tiled floor undoubtedly makes for a great interior, while tiling that is, shall we say, a little rough around the edges can ruin a rooms aesthetics.

Ultimately, the key to a good tiling job is planning, preparation and precision. Therefore, UK Pro Tiling Training have put together the following tips for floor tiling, to guide you through the process of laying floor tiles for maximum tiling efficiency and success.

20170411_101939

Step 1: Make sure you have all the equipment you need before you start.

Have all the tools and equipment you need out and ready-to-hand. Have your equipment organised so that you know exactly where everything is, and it isn’t all spread out across the room.

After all, the last thing you want, is to begin tiling and realise you don’t have an essential tiling tool in your tool box. Neither will you want to walk over your freshly laid tiles to pick up a piece of equipment.

You’ll need the following checklist of equipment for laying floor tiles:

Materials

  • Floor tiles
  • Grout
  • Silicone sealant
  • Cement floor tile adhesive
  • SBR Acrylic primer

Protective Kit, PPE

  • Safety goggles or glasses
  • Dust/respiratory mask
  • Knee Pads 

strong>Tools

  • 10mm or 12mm notched trowel
  • Tile marker
  • Tile spacers
  • Tile file
  • Tile cutter (manual and electric)
  • Grout float
  • Grout finisher/shaper
  • Spirit level
  • Sponge
  • Soft cloths
  • Junior hacksaw (for door thresholds)

Step 2: Prepare your existing floor.

As with all DIY projects, preparation is a key part of laying floor tiles and can make the difference between well-laid floor tiling and a mediocre job.

Calculate the number of tiles you need

Firstly, you should calculate the correct quantity of tiles to buy. You can do this by measuring the length x width of the room in metres, positioning the key tile before you get started for a view of tile size. Whats more, you should always buy 10% more tiles than you need to allow for any errors, wrongly cut tiles or underestimated measurements. You do not, after all, want a beautifully tiled floor that has tiles missing.

Clean and prepare the floor for tiling

Next, you should clean the concrete that will form your floor base, and strengthen any timber flooring with 6mm cement boards or 12mm exterior ply screwed down every 300mm.

If you have existing floor tiles, don’t forget that new tiles can be laid over old vinyl tiles, as long as you coat the old tiles with a suitable acrylic primer.

Step 3: Laying the floor tiles

When laying your floor tiles, you should start in the centre of the room, and plan to finish by the exit, so that you don’t need to walk over your freshly laid tiles when the floor is covered.

It is worth noting that, if you need to keep using the room that you are tiling, (perhaps it is your kitchen, for example), tile half the room at a time.

Before applying the adhesive, you should place the tiles on you floor so that you can see how they are going to sit. This prevents mistakes from the beginning of the process. After all, you don’t want to apply the tiles unevenly.

Spread the adhesive

When you are ready to apply the floor tiles, spread the adhesive evenly across the floor, over roughly a square metre of the floor surface, using a 10-12mm notched trowel. Spread the adhesive with the smooth side of the trowel, then use the serrated edge to lay the tiles.

Lay the floor tiles

Start by placing the key tile securely, then work outwards working in blocks of four. Fit plastic tile 3mm spacers between each tile to ensure an equal gap between each, really press them in so they are hidden and below the surface.

Don’t forget, if you are using wider tiles, you’ll need a wider space between them up to 5 mm.

Use a spirit level

Check that your laid tiles are level using a spirit level.

Continue tiling until you have covered the area of the floor you set out to cover, and use a sponge to wipe off adhesive as you go (before the adhesive dries onto the tiles). 


Step 4: Cutting tiles and fitting edges

Use the correct PPE

Before cutting any tiles, make sure that you are using the necessary Personal Protective Equipment (PPE) and think primarily about your safety.

Measure the required tile size

In order to know the size that you’ll need to cut your edging tiles to, you’ll need to measure how large the edging tiles need to be. You can so this by drawing a line with a tile marker.

Cutting and filing the tile

Cut along marked line with tile cutter and smooth the edge with tile file. When laying the edging tile, you can use tile spacers for alignment, just the same as the process of laying the whole tiles. 


Step 5: Grouting the floor tiles

Use a grout float

When it comes to grouting your laid floor tiles, make sure you have enough grout for the whole surface area of your floor. Apply the grout to the spaces between the tiles using a grout float, use the rubber surface to press the grout downwards so it is level.

Wipe off surplus grout

It is important to wipe away surplus grout with a damp sponge as you go. You can also smooth the grout over with a grout finisher.

Allow grout to harden

When you have grouted the whole floor, it is essential that you avoid walking on the floor until the grout has hardened.

Apply silicon sealant

When the grout is dry (check the instructions of the particular grout that you are using for the required period of drying time), clean your floor again and apply the silicon sealant. You only need to apply the silicon sealant between the tiled floor and the edge of the wall or skirting board. The sealant will prevent openings between the tile edge and the skirting board and produce a neater finish.

Doorways

A door threshold can be screwed down to cover the edging join at doorways, or be fixed in place using a suitable adhesive. You may want to use a junior hacksaw to cut down and fit wooden, or metal, thresholds.

Polish the floor

Polish your completed floor, to remove any dust, grout, adhesive or other unwanted dirt. Until your freshly tiled floor is completely dry, it is best to avoid constant and heavy use. 

Contact us at UK Pro Tiling Training

If you would like any more information about floor tiling or have any questions about our floor tiling tips, then please do not hesitate to contact us!

7 Common Tiling Mistakes to Avoid for Top Tiling Practice

Tiling is a skill that takes lots of practice to master. Thats why, many people opt for a professional tiler to ensure the job is completed to a high standard. After all, a tiling job done right looks fantastic, while a botched tiling job can ruin the interior of a room.

Take a look at the following 7 common tiling mistakes that DIY tilers often make. Avoid these pitfalls and you’ll be sure to offer a professional tiling service that is sure to impress the customers.

Calculate the number of tiles you need accurately

Avoid the embarrassing situation of running out of tiles by accurately calculating the number of tiles you need by measuring the space you need to cover and allowing for 10% extra.

Think about whether you/your customer needs to use the room

If the room that you are tiling is a room that requires constant use, the kitchen or only bathroom, for example, you will probably want to tile half the room at a time. This will avoid the tiles being unsettled and moving during the application process.

Choose the correct adhesive

Make sure you apply the correct adhesive to the correct area of the room. Although it sounds glaringly obvious to a professional tiler to ensure the tiles around shower, bath or sink are applied with waterproof adhesive. A simple lack of concentration can lead to mistakes being made.

Space tiles evenly

Using a spacer to ensure tiles are evenly spaced means that the tiles will not only look to be applied much more professionally, it means that they are far less likely to move or twist on application.

Wait an ample of time before grouting tiles

Both DIY tilers, and some unreliable professionals, can grout tiles too quickly in haste to get the job done which does not give the tiles ample time to set sufficiently. Tiles should have at least 24 hours to set before being grouted.

Make sure you use a sealant

Using a sealant between tiles and a bath tub or kitchen sink will prevent any leaks and are necessary in areas where water is used.

Don’t cut corners

If you are a professional tiler, allow yourself enough time to complete each job properly, to the highest possible standard. Although you may be looking to earn the maximum amount of profit possible in a week, you’ll gain repeat custom and far more credibility from jobs that are finished to fantastic standards.

A course from UK Pro Tiling Training can help ensure you know how to avoid tiling mistakes and complete all your jobs to a high standard.

Tiling With the correct adhesive

Tiling with a cement adhesive

When undertaking any wall and floor tiling work you should choose your products carefully as wrong adhesive selection will cause the job to fail.

Ready mixed adhesives.

These products are usually sold in a 10 Lt pot and is ready mixed for ease of use, however it is very limiting.
Generally it is only good for fixing small ceramic tiles under 12 inches wide or 300mm, anything bigger should be fixed with a 8 or 10mm trowel with a cement adhesive. Ready mixed adhesive should not be used for fixing floor tiles to the floor. A ready mixed adhesive should be grouted at least 24 hours after tile installation, the adhesive will take 4 days to fully cure.

Standard cement adhesive images-4

Standard cement adhesives are usually sold in 20kg bags and have a fast work time of 20 minutes and fully sets in 3 hours. This adhesive is used to fix large ceramic tiles on a wall or ceramic tiles on a concrete floor. A suitable acrylic primer diluted should be used prior to using cement adhesives.

Flexible cement adhesives

Flexi cement adhesives should always be used to fix porcelain and natural stone or any surfaces that may be subject to slight movement like a plywood overlay, they are sold in the same 20kg bag and have the same setting times as above. A flex cement adhesive will work on any tile installation on any surface as long as it is suitably prepared and primed.

Training Courses

If your looking to take on your own tiling work or even turning your DIY skills into a business, there are many tiling courses that offer fast track instruction.

One of the only dedicated tiling training centres in the UK is UK Pro Tiling Training, here you can learn all about background, preparation and fixing of tile in one course. Visit www.tiling-courses.co.uk to find out more

New Year, New Career In Tiling

Have you got the January blues since starting work again after the Christmas period?

If you have dreamed about being your own boss but never thought it possible, wondering what to do, then a lucrative career in wall and floor tiling could be the answer.

Tiling Coursesweb-pics-032

There are some great tiling courses which can fast track you all the trade skills as well as the business skills required to become self employed and run your own tiling business.

Earnings as a tiler

Good tilers can earn up to £50K per year with the average metre price now being around £25 per metre for installation of tile, that equates to a 12 square metre basic floor coming in at around £300 for roughly a days work to complete, on top of this extra money can be earned through supplying tiles and adhesives.

Shortfall

There is currently a shortfall in the UK at present with average wait times of 3 to 4 weeks to get a tiler so now could be a great time to turn your DIY hobby into a business for yourself in 2017.

Training Courses

One of the best tiling courses in the UK is run at UK Pro Tiling Training, a IMG_5353dedicated tiling training facility which covers various fast track courses on how to tile and run a tiling business, it is a one stop shop where you can walk out the door after your training and start your new venture off with confidence everything from learning how to tile, keeping accounts, advertising, pricing jobs, selling your services etc is covered. you can look through their website by visiting www.tiling-courses.co.uk to find out more info.

2017

What are you waiting for, 2017 could be your year to break free from being employed and taking direction from someone else and become your own boss and start making money for yourself instead of someone else.