Whether you want to learn to tile floors or tile the kitchen, bathroom or living room, we’ve put together a quick basic guide so you lay the perfect floor and wall tiles. For more in-depth information, our how to tile courses will teach you all you need to know so you can acquire all the right skills, Thinking of a career in tiling, we also cover this on our professional courses
From planning out your tiles, to spreading out an even bed of adhesive to advice on where to place your tiles, we will take you through the professional process so you nail the task simply and efficiently.
What You will Need for a basic tile installation
Learning to tile floors and walls requires the right tiling tools. Here are the bare essentials you’ll need to crack on with the job:
- Tiles
- Spirit level
- Pencil
- Adhesive
- Notched towel (8mm and 10mm)
- Tile spacers
- Grout
- Score and snap tile cutter
- Electric diamond wheel tile cutter(optional)
- Tile nippers
- Rubber grout float or squeegee
- Sponge
- Cloth
- Silicone
- Prepare the Wall
If you want to learn to tile properly, then first things first. Wall or floor preparation is key make sure its dry, clean as well as free of dust and dirt. Tiles can be set to most surfaces, such as skimmed plaster, tile backer boards and plasterboard as well as most floor types. Use an acrylic primer or SBR to prime the walls to provide a key for the adhesive to bond.
- How to Lay Tile
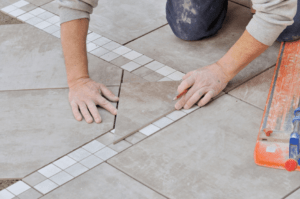
Using a pencil, for a basic and simple wall set out you would mark a vertical and horizontal line on the middle of the wall you want to tile using a spirit level. Starting from the centre, dry lay your tiles working your way towards the edge of the wall. You want your outside tiles to be around the same size which may mean moving your middle vertical line so you get the perfect position.
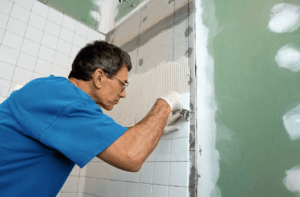
- Set the Tiles into Place
So far, laying tile isn’t all that scary, is it? The next step involves fixing your tile adhesive to the wall, beginning from your middle vertical line. Use around one metre squared at a time using a notched trowel (6,8 or 10mm) at a 45-degree angle to the wall. Using a gentle sliding motion, securely press the tile into the adhesive and arrange the tile spacer in between each tile on all sides so it has an evenly sized grout line.
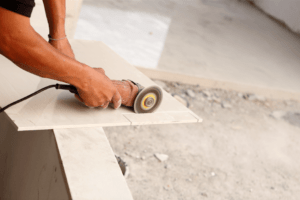
- How to Cut the Tiles
Its easy to cut ceramic tiles to size just use a score and snap tile cutter. For trickier cuts like around plug sockets, opt for a diamond wheel tile cutter or angle grinder alternatively you can nip or nibble pieces from the tile until you get the shape you want.
- How to Grout
And the good news? You’re one step away from completing the how to lay tile process! Next, its all about the grout. You’ll want to leave the tile adhesive to dry for 24 hours before grouting. Following the instructions on the packet, mix the grout until you achieve an even paste. Spread the grout onto the tile adhesive using a rubber float or squeegee at a 45-degree angle to the wall be sure to press the grout firmly into the gaps.
Using a damp sponge, wipe off any left-over grout from the tile face, making sure you don’t remove grout from the grout line itself. Wait 30 minutes then clean the tiles using a dry, soft cloth to get rid of traces of grout. You can repeat this process until the tile face is completely spotless.
- And Finally
To prevent any cracking from movement, internal corners (both horizontal and vertical) should have a matching silicone applied
We have lots of other learn to tile guides on our website, including how to grout, how to measure up a tiling job, how to repair cracked tiles and much more. If you want to learn more information about the tiling trade, investing in one of our how to tile courses will enable you to acquire the skills needed to become a professional tiler. Discover our courses here www.tiling-courses.co.uk at UK Pro Tiling Training