Advice on choosing tiles and techniques for small or awkwardly-shaped bathrooms
Embarking on a bathroom revamp can feel like you’re navigating through a labyrinth, especially when the space is as compact as a broom closet. But fear not! The art of tiling can transform even the most cramped water closet into a seemingly spacious sanctuary. So, let’s dive into the nitty-gritty of tiling in tight spaces, shall we?
The Illusionists: Tile Selection for Small Bathrooms
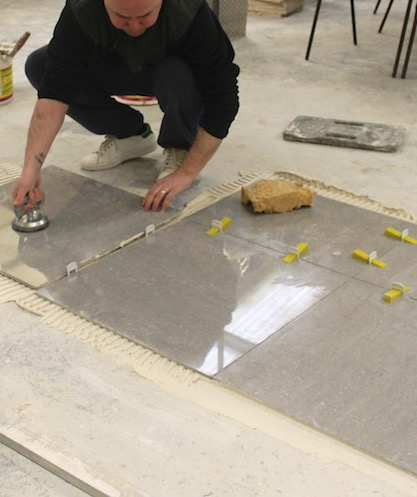
First off, the tiles you choose are like the opening act of a magic show. They set the stage and, if chosen wisely, can create an illusion of space. For instance, large-format tiles with minimal grout lines can give your tiny bathroom a seamless look, tricking the eye into perceiving a larger area. On the flip side, if you’re a fan of the mosaic look, those tiny tiles can add character without overwhelming the space, as long as you keep the color palette restrained.
Now, let’s talk color. Light hues are your allies in the battle against claustrophobia-inducing walls. Whites, creams, and pastels reflect light, making your bathroom feel airy and open. But don’t shy away from dark tiles if they tickle your fancy! A well-placed strip of darker tiles can create depth, or even a focal point, drawing the eye and adding dimension to the room.
The Craft: Tiling Techniques for the Spatially Challenged
Moving on to the actual tiling process, it’s akin to playing Tetris on expert mode. Every piece must be meticulously planned and placed. For the corners and edges, where a full tile might not fit, you’ll need to cut tiles to size. This is where a quality tile cutter becomes your best friend, allowing for precision cuts without the risk of fracturing your precious porcelain.
But wait, there’s more to it than just cutting tiles to fit. The direction in which you lay the tiles can perform visual alchemy. Vertical patterns can heighten low ceilings, while horizontal layouts can stretch a narrow space wider. And if you’re feeling particularly bold, diagonal patterns can add a dynamic energy to the room, leading the eye on a merry dance across the floor.
The Secret Sauce: Grout and Finishing Touches
The grout might seem like a mere afterthought, but it’s actually the secret sauce that can make or break your tiling project. A grout color that contrasts with your tiles can frame each tile, creating a grid that may make the space feel busier and smaller. On the other hand, a grout that blends with the tiles can unify your design, contributing to a more expansive overall effect.
And let’s not forget the finishing touches. Trim and edging can give your tiling work a neat and professional look. They’re like the punctuation at the end of a sentence; they may seem small, but they’re essential for making sense of the composition.
The Final Act: Maintenance and Upkeep
Lastly, maintaining your newly tiled bathroom is crucial. After all, what’s the point of all that hard work if it’s going to be hidden under a layer of soap scum? Regular cleaning keeps your tiles sparkling and your grout from turning into a science experiment. Plus, it ensures that your bathroom remains your personal oasis, no matter how small it might be.
Should you find yourself in need of further guidance or seeking to sharpen your tiling skills, consider exploring the wealth of knowledge and courses available at Tiling Courses. From beginner tips to advanced techniques, they offer resources that could elevate your tiling game to professional heights.
In conclusion, tiling in tight spaces is a challenge, but it’s far from impossible. With the right tiles, techniques, and a bit of creativity, you can turn your cramped bathroom into a masterpiece of design. Remember, it’s not the size of the canvas that matters, but the magic you create within it. So go forth, wield your tiling tools with confidence, and make that tiny bathroom a testament to your ingenuity and style!
