Waterproofing Essentials – Preparing for Bathroom and Wet Room Tiling
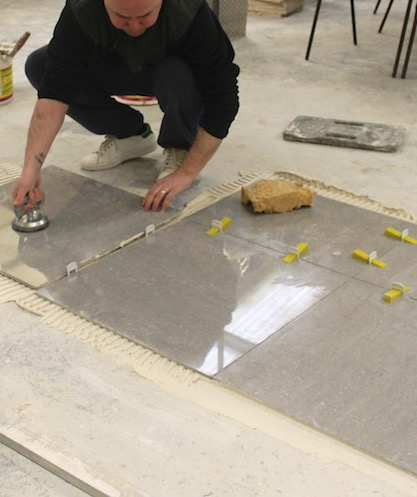
Bathroom renovations bring a unique sense of excitement! Whether you’re sprucing up your existing bathroom or starting from scratch with a wet room, one thing’s for sure: waterproofing is an essential step in the tiling process. Sure, it may not sound like the most thrilling aspect of the project, but trust me, it’s crucial if you want to avoid future water damage and leaks.
In this blog post, we’ll explore some key waterproofing essentials to ensure your bathroom and wet room tiles stay looking good and dry for years to come.
1. Assess Your Space:
Before diving into the world of waterproofing, it’s important to assess your bathroom or wet room space thoroughly. Take note of any existing water damage, cracks, or areas prone to moisture build-up. This will help you identify the areas that require extra attention during the waterproofing process.
2. Select the Right Waterproofing Products:
There are various waterproofing products available on the market, but not all are created equal. When choosing your waterproofing materials, make sure they are specifically designed for bathrooms and wet rooms. Look for products that are flexible, mold-resistant, and capable of withstanding constant exposure to moisture. Talk to an expert at your local hardware store for recommendations based on the unique needs of your space.
3. Seal the Foundation:
Before installing your tiles, it’s essential to ensure a waterproof foundation. This means properly sealing any cracks in the walls or floor using a high-quality waterproof sealant. Pay close attention to corners and joints, as they are common trouble areas for water seepage. Be generous with the sealant to create a watertight barrier.
4. Apply a Waterproof Membrane:
To provide an extra layer of protection, it’s advisable to apply a waterproof membrane on the entire surface that will be tiled. This membrane serves as a barrier against water penetration and helps prevent any potential leaks. It’s recommended to use a liquid or sheet membrane, depending on your preference and the specific requirements of your project. Don’t forget to apply the membrane to the walls, floor, and even the shower niche if applicable.
5. Ensure Proper Sloping:
Proper sloping is crucial for effective water drainage in your bathroom or wet room. Without it, water may pool instead of flowing towards the drain, leading to potential damage. When preparing your subfloor, ensure that it slopes towards the drain, allowing water to naturally flow away. This will prevent stagnant water and potential mold or mildew growth.
6. Test for Leaks:
Once you’ve completed the waterproofing process, it’s essential to test for any leaks before proceeding with tiling. Fill the shower tray or wet room floor with water and let it sit for at least 24 hours. Check for any signs of leakage, such as water seeping through walls or floors. If you notice any issues, address them immediately before moving forward.
While the idea of waterproofing may not initially excite you, it’s a vital step in ensuring the longevity and functionality of your bathroom or wet room tiles. By taking the time to properly assess, select the right materials, and follow these essential waterproofing steps, you can prevent water damage, leaks, and future headaches. So, next time you embark on a tiling project, remember to prioritize waterproofing – your tiles will thank you!
