Month: May 2020

Tiling Around A Window

Tiling large, flat space can seem straightforward, but its the slower, tricky areas, like around windows which could ruin the finish if care isn’t taken.

Windows present us tilers with a whole set of potential problems. Inevitably every tile around the window, and in the window reveal, will need to be cut. These cuts are the most important you will make, as tiled walls and reveals around a window, which aren’t square with the frame, will draw a critical eye from anyone walking into the room.

Adjusting Wall TilesSymmetrical tiling

There will be very few occasions when a window doesn’t look best sitting central to the tiles around it. Find the centre point of the window recess and use a wooden batten or similar as a temporary support as you work. If there is no sill, the lower edge will need to overlap (the thickness of a tile plus adhesive) to be able to fit the trim flush and square.
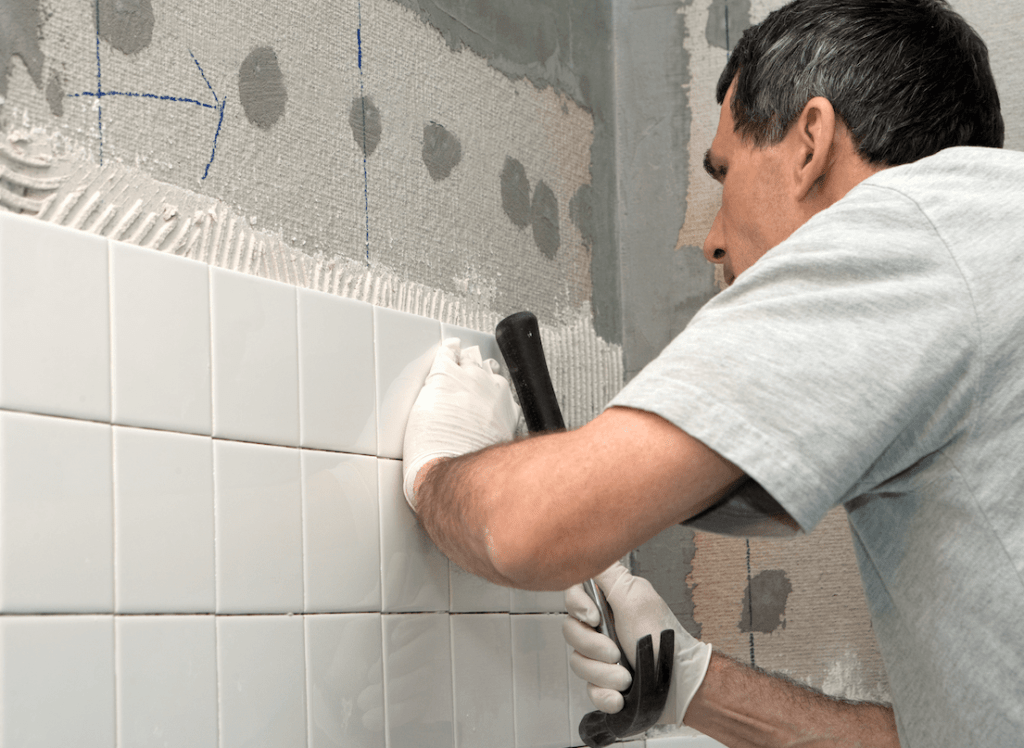
Laying the tiles

Work outwards. This way you’ll be starting with whole tiles, giving a much fuller, less ‘bitty’ look when finished. Remember, on all reveals, allow for a tile plus adhesive on the facing wall. Accuracy is so much more important than speed. Very few window reveals will be square, take time to measure all surfaces and work out which is the truest. Take your levels and measurements from the best surface and vary adhesive thickness to match the other sides. For complicated, multi sided cuts, its best to make jigs and get them 100% accurate before tackling the tiles themselves. Time spent getting this stage right will pay dividends and guarantee customer satisfaction.

Using trim

Wherever possible, use a decorative trim to the angles of the window recess. This not only gives a slick, professional finish, but also allows unsightly cut edges to be hidden from sight. The trim will need to be absolutely true, both vertically and horizontally. Mitre the joints at 45 degrees for a professional finish. Adhesive can be used to hold the trim in place whilst the tiles are set behind.

The top reveal

Gravity will be determined to play havoc with your beautiful tiling around the window. Be prepared before applying adhesive. Check and double check all the cuts and trim lengths. Using a board, or plywood and some supporting battens, the tiles can be stuck with adhesive and then immediately supported. Tiling the top reveal is best done before the sill, meaning you don’t need to worry about disturbing the sill when you wedge your supporting battens there. Take your time, the top reveal should be perfectly parallel with the top of the window.

Finishing off

Tiling around a window can be messy and fiddly, cleaning as you go is essential. Ensure all adhesive is cleaned off before starting to grout, taking particular care around the trim. Grout as normal, but, as we’ve said with the rest of the window project, take your time. A symmetrically tiled window which sits true to the rest of the wall gives an impressive professional image.

As you start planning getting back to work when restrictions are eased, why not consider one of our courses to expand, or just refresh your tiling skills. Get in touch today to find out more.

Tips For A Professional Finish To A Wetroom

Wetrooms (or walk in showers) have grown hugely in popularity over recent years in both domestic properties and commercial properties and have always been a popular choice for homes in mainland Europe. Wetrooms and walk in showers are an essential choice for hospital and care home settings but we are seeing more of these opulent walk in showers in more prestigious hotels and luxury accommodation.  And in domestic homes, more and more of us are looking for the luxury and practicality of a large shower room over, or in addition to,  the traditional bathroom.

Wet rooms can be installed on any floor of the building – not just contained to the ground floor and the great advantage of the wetroom is not having a step-in shower tray to negotiate as the floor is set at one level.

The key is to ensure the wetroom is waterproofed properly so when tiling the wetroom, it is important to remember not to compromise the contoured natural slope of the wet room base, otherwise the water will not drain away quickly enough.

So when it comes to choosing the best grout for your wetroom, an epoxy grout is probably the best option to go for, as epoxy grouts are fully waterproof, hardwearing and great for resisting those powerful jets of water, extreme temperatures and humidity.

To ensure that you get a professional finish to your tiles, make sure the grout lines are clean by using a damp sponge to clean the surface of the tile and the grout lines. Why? Because if the adhesive and the grout come into contact it could discolour the grout.

And it may seem an obvious trick,  but it is absolutely essential the adhesive has completely dried before you move on to removing the spacers and finally applying your grout.  Another consideration is that if you are going to be working in temperatures of over 25 degrees Celsius – just dampen the grout lines with clean water beforehand.

Before applying your grout, it is good practise to check for potential damage or staining, so it is advisable to to select a small ‘trial’ area to test whether there is any discolouration or if it is difficult to remove excess grout from the tiles.

When applying the grout in the wetroom, work in smaller areas completely filling the tile joint with your mixed grout and compact it well ensuring you remove any excess grout from the tile surface as you work.

After the wetroom has completely been grouted and you are ready to clean off all excess grout, use an emulsifying pad or scotchbrite pad with clean water working in a circular motion which should result in uniform grout lines. Then take a clean sponge and remove any further residue by cleaning diagonally to the grout lines.

The key to any professional tiled finish is not to leave any surplus grout or haze on your newly tiled surface for more than 24 hours, so clean the surface down with clean water and an emulsifying pad within this time frame.

Your finished wetroom will then need to be left for at least two weeks before it can be used.

Working with luxury tiles

It is, of course, possible to get a luxury tiled finish without breaking the bank. After completing your training with us, you’ll be looking for a perfect, classy finish to every tiling job. But, there are some tiles available which are guaranteed to attract admiring glances.

Let’s have a look at a few which you really wouldn’t want to drop or crack when cutting them.

What better place to start than with the LuxTouch diamond encrusted, mother of pearl laden beautiful floor tile. We haven’t seen one in the flesh unfortunately (they are reportedly only used in 5 settings around the world) but have no doubt they are something to behold. At $1,000,000 per sq. meter, they are unlikely to be popping up in your local DIY store.

That extravagance may seem ridiculous to us, but we can look to offer an exclusive look without needing a lottery win.

Italian Marble – Marble has a history of adorning palaces and the residences of the rich and famous. Originating in mountains and sliced, processed and polished to become the fine tiles we end up working with. Being completely natural, there will not be two tiles which are exactly the same. This gives customers the feeling of exclusivity when their homes sport some beautiful marble. Installation needs to be perfect the first time, removing and replacing marble tiles is unlikely to go unnoticed. Floors should be protected and sealed to prevent moisture ingress, staining or scratching.

Colored TilesGranite – High quality granite tiles are also farmed naturally and therefore offer a level of individualism. Granite might not quite have the deep lustre of Marble, but there are so many variations in colours and patterns naturally occurring, they can feel just as special. Granite is tougher too, a lot less prone to chipping or scratching. That said, polished granite will need to be treated and re-polished periodically to preserve its luxurious appeal.

Brazilian Black Slate – Slate is naturally non-slippery and can be used for indoor or outdoor projects. The primary method for creating slate tiles is to split and then cut huge pieces of quarried slate. This can produce uneven and unpredictable sizes, making laying the tiles more awkward. The very best slate is machined to achieve a more uniform size and less variations in the thickness of tiles. Slate needs to be treated and coated as it is naturally porous and likely to stain. Slate not only works well on floors, a feature wall of slate can add another dimension to a bathroom or kitchen.

Whatever price range the tiles you lay come from, the ultimate goal is to achieve a faultless, top drawer finish. Any of our courses will get you on the way towards reaching that goal.

Get in touch today  to book onto one of our comprehensive tiling courses.