How To Install Mosaic Tiles

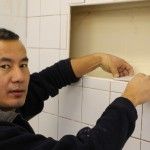
While mosaic tiles may be tricky to work with, they look fantastic when they’re applied.

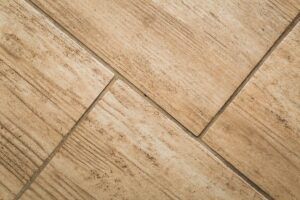
Mosaic tiles tend to be supplied as sheets already fixed to a soft mesh backing. Ordinarily, these sheets are 300mm square, enabling large areas to be tiled without worrying about spacers between the individual mosaics.

 bathroom

When you first discover these sheets, you’ll probably breathe a huge sigh of relief! However, just because you don’t have to juggle thousands of mosaic tile pieces all the time, it doesn’t mean that installing mosaic tiles is always a simple task.

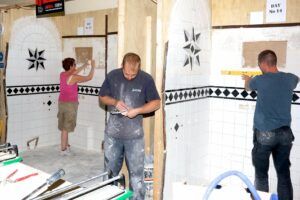
There are advantages and disadvantages to applying mosaic tiles both individually and on a backed sheet.

One downside to applying mosaic tiles using a backed sheet is that it can be challenging to apply even pressure across the whole sheet. The result could be that some tiles sink too deeply into the adhesive, whilst others are falling away.

Professional tilers will, no doubt, have accumulated methods of avoiding this issue, however, that is not to say all tilers (no matter what their experience) shouldn’t bear potential issues with mosaic tiling projects in mind.

Some tips for overcoming a sinking backed sheet (aside from having enormous, flat and extremely steady hands!) may be to invest in some rigid mesh backing sheets. These sheets are usually self-adhesive and applied straight to the back of the sheet of tiles. They can then be handled like a larger tile and will have a flat, professional look.

Putting some time into the preparation of the walls, starting with a completely flat surface will save a lot of work and time as you start to apply the mosaics.

If you are not used to working with mosaic tiles, don’t be daunted or put off!

Here are some exclusive tips for mosaic tiling:

  • Turn the sheets over to cut them – if sheets of tiles need trimming, turn them over and trim with a sharp utility knife.
  • Avoid cutting tiles – think ahead and spread the gaps, or squeeze them, to ensure a full mosaic tile fits the final gap.
  • Use professional equipment – if tiles do need cutting then aim to use the best cutter you can afford to buy or hire.
  • Clean as you go – adhesive lumps protruding through the grout spaces may end up being visible. As the adhesive starts to harden it is worth going over the gaps with an old toothbrush before grouting.
  • Go easy on the grout – with potentially hundreds of edges to be cleaned after grouting, it is worth taking more time grouting the mosaics than might be the case with larger tiles.

Mosaic tiles are commonly found used as a decorative feature, often breaking up a wall of plain tiles in a bathroom. When planning a bathroom or kitchen it might also be worth considering a mosaic splashback.

Above a sink, behind a cooking hob or kitchen worktop, a mosaic splashback can transform a room. As well as boosting the aesthetics of a home, mosaic tiles create a washable surface where water or food could stain a plain wall.

It’s not just walls that would benefit from mosaics. Consider adding a glamorous touch to the bathroom by tiling the shower floor with glass mosaic tiles. Whilst large glass tiles might be too slippery for floors, the network of grout lines on a mosaic floor will provide substantial grip.

A bathroom designer could create endless patterns with mosaics by laying them individually, maybe have a sea life scene on your shower floor.

The challenges of tiling with mosaics are almost certainly out weighed by the potential impact on your home’s charisma.

If you’d like to master your skills when it comes to tiling with mosaics, UK Pro Tiling Training can help.

How To Tile Around Windows

Tiling around a window is no easy task and that’s why it is a job most often left to a tiling professional.

After all, if mistakes are made it can be costly to put right and, ultimately, without paying significant attention to detail and doing a decent job, the end result can look terrible, leading to leaks, mould and cracks in the tile.

A tiling professional, however, is trained to tile around challenging points in the wall and can apply tiles around a window flawlessly so they look elegant and sophisticated, while offering water resistance and durability.

At UK Pro Tiling Training, we train our tiling students to tile any project with accuracy and efficiency. We, of course, instruct our students on how to tile around windows.

windows

Here’s our step-by-step guide for how to tile around windows.

Before starting the job

  • Plan the project!

Make sure you plan out the tiles and grout lines on the surrounding wall and window to make sure they all match up before applying any tiles.

  • Collect the tools and materials you need, making sure they are accessible
  • Tape measure
  • Wall spacer
  • Sponge
  • Felt tip pen
  • Mitre Block
  • Grout spreader
  • Adhesive spreader (Notched trowel)
  • Adhesive (suitable for the room)
  • Grout
  • Tiles
  • Tile nipper
  • Tile trim
  • Tile cutter
  • Gloves
  • Safety Goggles

Tiling around a window

Measure the depth of the recess up to the edge of the window.

  1. Measure each tile gap using the tile spaces.
  2. Cut the tiles to fit using a tile cutter, you can use a tile cutting machine or tile nipper.
  3. To finish the corner tiles, use a tile trim and cut at a 45 degree angle.
  4. Starting from the bottom, spread the adhesive and apply the tiles.
  5. Work up the sides and finish at the top.
  6. Use a wooden support structure to hold the tiles (specifically the top tiles) in place.
  7. Leave the adhesive to dry for 24 hours. Once dry, the tiles will be fixed in place.
  8. Apply the grout.
  9. Wipe the tiles clean with a damp sponge.

After applying the tiles

Once applying the tiles and the grout and all has dried, it is a good idea to spray the tiles around the window with grout protector spray. This will protect the tiles from any moisture, damp, mould and general wear and tear.

More advice from UK Pro Tiling Training

Learn more about tiling with UK Pro Tiling Training.

Guide To Multi-Coloured Wall Tiles

20160927_181539-1 20160927_181539-1 hi web-pics-032 Kensington 20160927_181539-1 20160927_181539 20160927_181539 20160927_181539 img_5642 img_5642 tiles-career-2017 tiles-career-2017 20161201_113311 20161201_113311-1

Very nice new multi-colored tiles with a lot of colors

A home is a place of character, as well as function and, ultimately, there is nothing that makes a house more plentiful than colour.

Whether you usually opt for splashes of colour amongst the decor, block walls, bright wallpaper or opt for colour on all walls of the house, colour makes a big difference to a home and often defines a property’s overall style.

The impact that colour has on a property means that many home owners often think twice when it comes to choosing multi-coloured wall tiles. And with good reason.

After all, when you choose multi-coloured wall tiles, you need to consider what colours will suit your home, the tile pattern, the price of the project and how you”d like the tiles arranged.

That said, when thought about and planned properly, multi-coloured wall tiles make for a fantastic interior addition to a home. Therefore, here’s our guide to multi-coloured wall tiles:

What to consider before investing in multi-coloured wall tiles

Will multi-coloured wall tiles suit your project?

We”ve all seen those bathrooms that feature black and white tiles in a checkerboard pattern that simply look horrific in some properties. In others, however, this pattern of tile looks luxurious and sophisticated. This could be due to many reasons. Dark colours don’t always work well in a room that doesn’t receive enough natural sunlight, it may also be because it is too small or because it has an unusual shape for dark and/or patterned tiles. Essentially, there are many factors to consider before investing in your multi-coloured tiles.

You’ll need to think about:

  • The shape of your room and the area to be tiled
  • How much sunlight the room receives
  • The style of your property’s interior

How you will choose your colour

Some people out there will be lucky enough to have the means to ask an interior designer their views on colour, however, the rest of us out there will simply be equipped with a Dulux colour guide, the internet, a tester paint pot and sample tiles.

Therefore, a good way of considering colour is referring to a colour wheel. This can help compare colours and help you choose colours more precisely. Essentially, you’ll find different shades of the colours you are looking for and match accordingly.

Will you DIY or invest in a professional tiler?

There is something much more impressive and accurate about have professionally installed tiles, when the job is completed by a well-trained tiler. What’s more, when it comes to multi-coloured tiles you”d benefit from the knowledge of a professional tiler when it comes to laying the tiles in a pattern. Although you may have a strict budget, employing a professional tiler can help you save money on the initial cost of the tiles (as they may have a trade account with a tile dealer) and can also minimise the amount of excess tiles.

If you are doing a DIY tiling job, however, feel free to browse our guides for help when installing your tiles. As we”ve said, however, it is particularly recommended that multi-coloured tiles are laid by a professional tiler for accuracy, precision and an excellent finish.

How will the tiles be arranged?

There are many tiling patterns you may wish to choose from when it comes to installing your multi-coloured tiles. You may choose to accentuate certain features of a room, or choose a mirror-image pattern style.

You may want to refer to our guide to installing multi-coloured kitchen tiles or our guide to common tiling patterns for some more inspiration!

What All Tilers Should Know About Wood Effect Tiles

Close up of wood-like floor tile. Ceramic tile with wooden structure in close up - useful background.

Wooden floors are a popular choice amongst many homeowners, often chosen instead of carpet for their sophisticated appearance and ease of cleaning. Wooden floors are effective in modern homes with a contemporary interior, as well as more traditional interiors.

What’s more, the up and coming trend for interior flooring is wood-effect tiles. Favoured for their elegant appearance and ease of maintenance, floor tiles that look like laminate flooring planks are setting a new interior property style that everybody is after. As a result, these wood effect floor tiles are a big thing at the moment in the tiling world and if you”re not aware of them as a tiler, you”re missing a trick.

In fact, these wood effect tiles are really exciting and allow tilers to work on projects in the home beyond the realms of the kitchen and bathroom. After all, some people would like wood effect tiles throughout the whole downstairs of the house, while others choose them for the lounge, bedrooms, conservatories and more.

So, how do you lay wood effect tiles and what variations can we expect to see in this up and coming range of tiles?

Variations of wood effect tiles

Wood tiles come in various types of wood and tiling styles. Long floor tiles are a particularly favoured style of wood tile, due to the fact they leave a chic and sophisticated look, as well as being simple to install. Essentially, wood effect long floor tiles are popular for their practicality and how close they are to real wood floor.

Choose from a range of wood types: Oak, ebony and pine, to name just a few. What’s more, you can choose from different shades of woods and colours, which can again, enhance the type of tiling pattern you opt for.

Of course, more intricate tiling patterns will require smaller wood effect tiles, however, many people favour the long floor tiles to be as similar as possible to genuine wood floor.

How to lay wood effect tiles

There are various wood effect tiling styles, all of which have something different to offer in terms of their overall look. Take a look at just a few of the tiling patterns possible with wood effect tiles.

Brick

Often the favourite tiling style in properties where the owner would like a wider-looking floor, opting for long wood effect floor tiles and having them laid in a brick pattern is a sure-fire way to a make a room look more spacious and is ideal for open plan areas.

Herringbone

The Herringbone pattern is an intricate tiling pattern that consists of rectangular tiles positioned in a parallel line at a 45-degree angle, the pattern then features another row of tiles lined up in a mirror image next to them.

Random

Many customers may choose a random pattern to go with the shape of their room, or may have a preference of how they would like the wood floor tiles placed.

More information from UK Pro Tiling Training

We will, of course, cover long floor tiles in our advanced courses at UK Pro Tiling Training. However, if you are a past student or would like some more information about this up and coming trend, please do not hesitate to contact us, we”re happy to help!