Category: Tiling News and Blog

Why Wall Tiles in the Kitchen Are Better Than Paint or Wallpaper

Decorating your home allows you to put a stamp on your property. While some people prefer traditional decor, others might go the contemporary or theme route. But colours and overall style are just two elements you should consider when updating your kitchen. 

Kitchens are high-traffic areas that are central to daily living. We socialise in them, cook in them and use them as a passage to any outdoor areas. Decorating your kitchen is a different experience from decorating a living room or bedroom because you need more durable materials. 

In general, you have three options for kitchen decor: paint, wallpaper or tiles. This post will reveal why wall tiles in the kitchen are better than paint or wallpaper. 

Tiles Are More Versatile

As time goes on and your needs and wants change, you’ll naturally want to ensure your decor matches your personality and style preferences. A common misconception is that it’s easy to paint a wall, but that’s not the case. 

Not only will you have to use a base coat if the wall is too dark for your paint colour, but you’ll need to do at least two covers of paint – which takes a long time. We don’t need to tell you how difficult it is to hang wallpaper! 

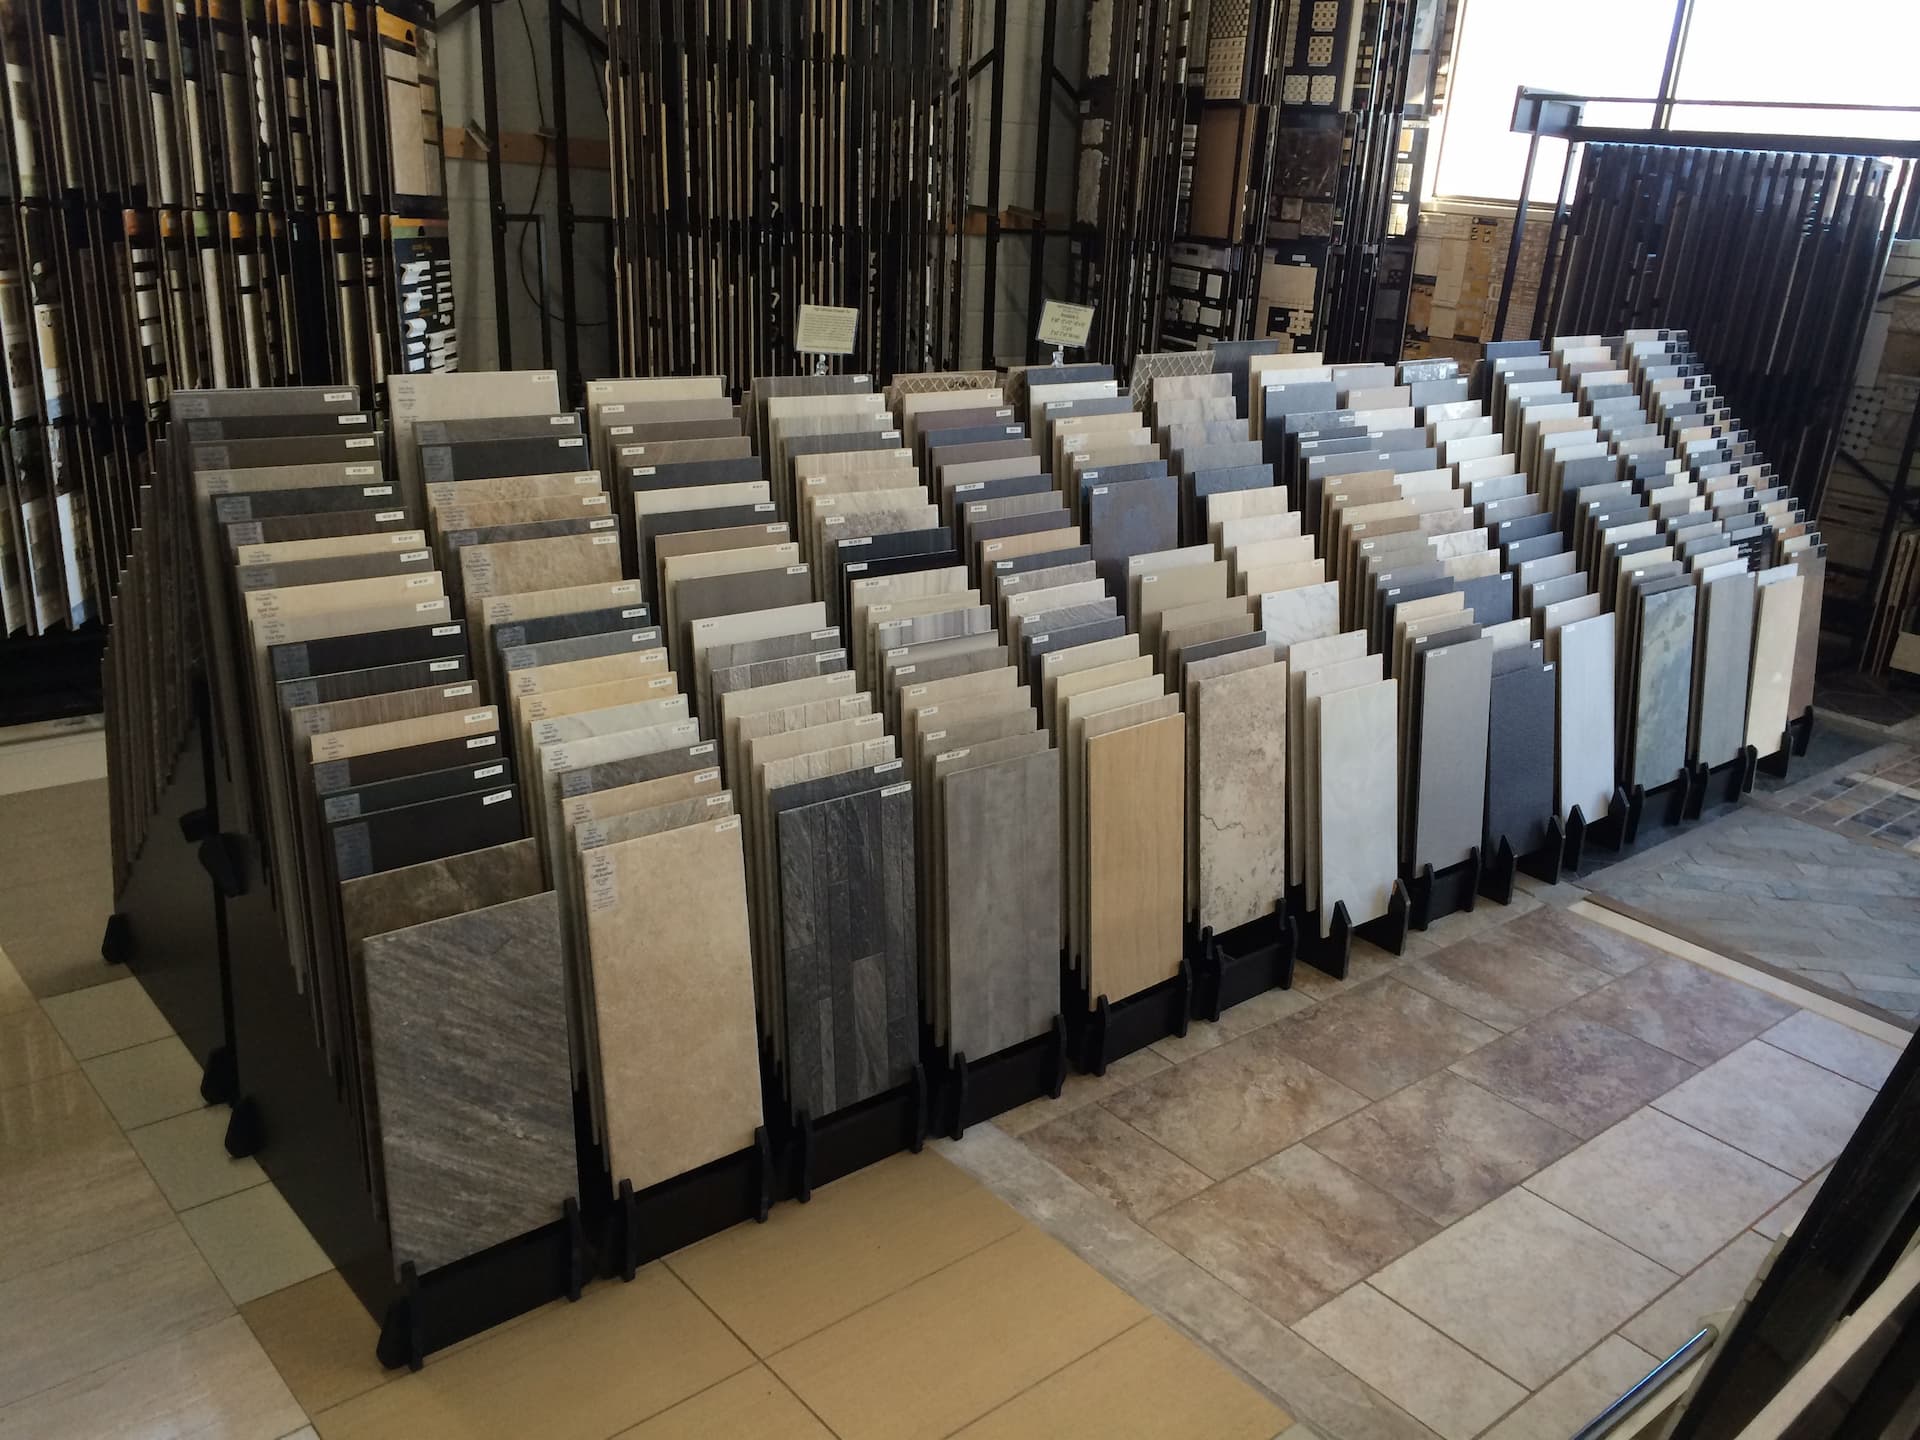
Tiles, however, offer a lot of flexibility in their design. Both porcelain and ceramic tiles come in a range of colours, sizes and designs. If you want to change your kitchen fittings, most tiles will fit seamlessly into the new decor. 

They’re Easy to Clean

There’s no way to avoid it; kitchens get messy. Pets and children spill food, and cooking and washing the dishes cause splashbacks, so it would be unrealistic to think that your kitchen will remain spotless. 

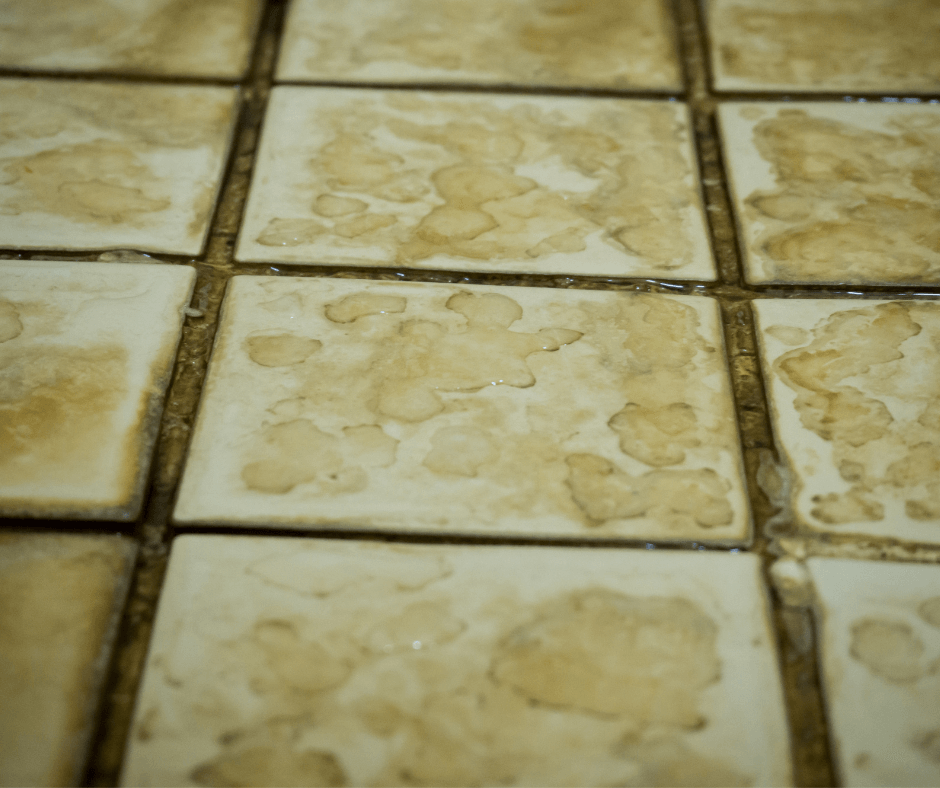
When a painted or wallpapered wall becomes stained, it’s difficult to remove them without potentially damaging the wall. Wallpaper is also susceptible to water damage, and due to its high cost, we always recommend you leave it for other rooms. 

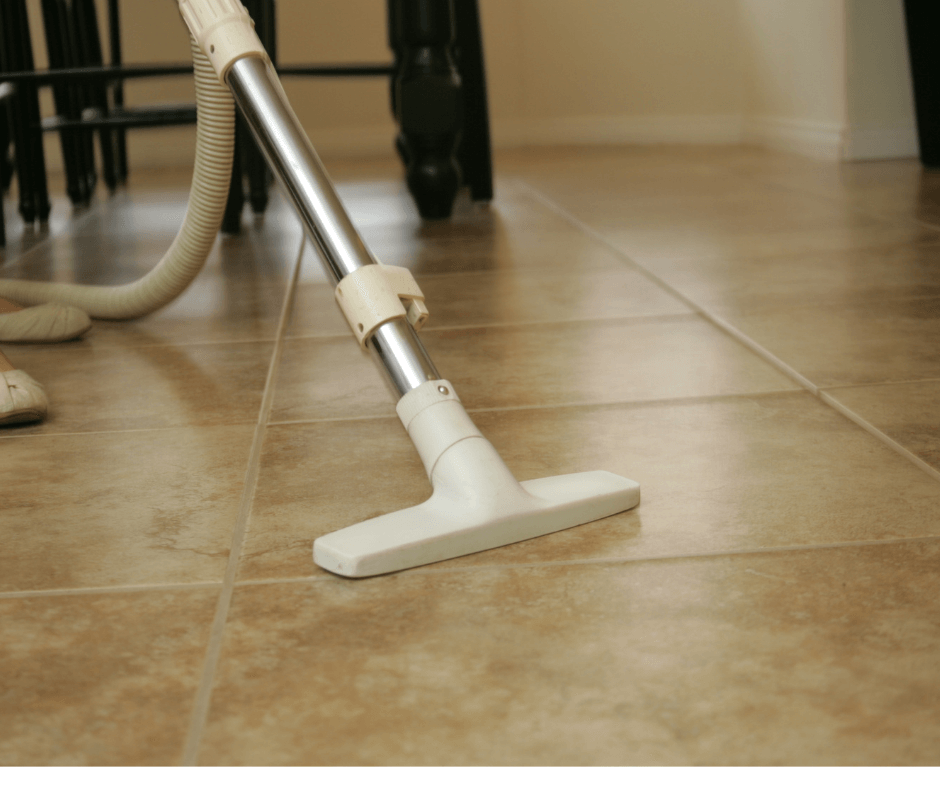
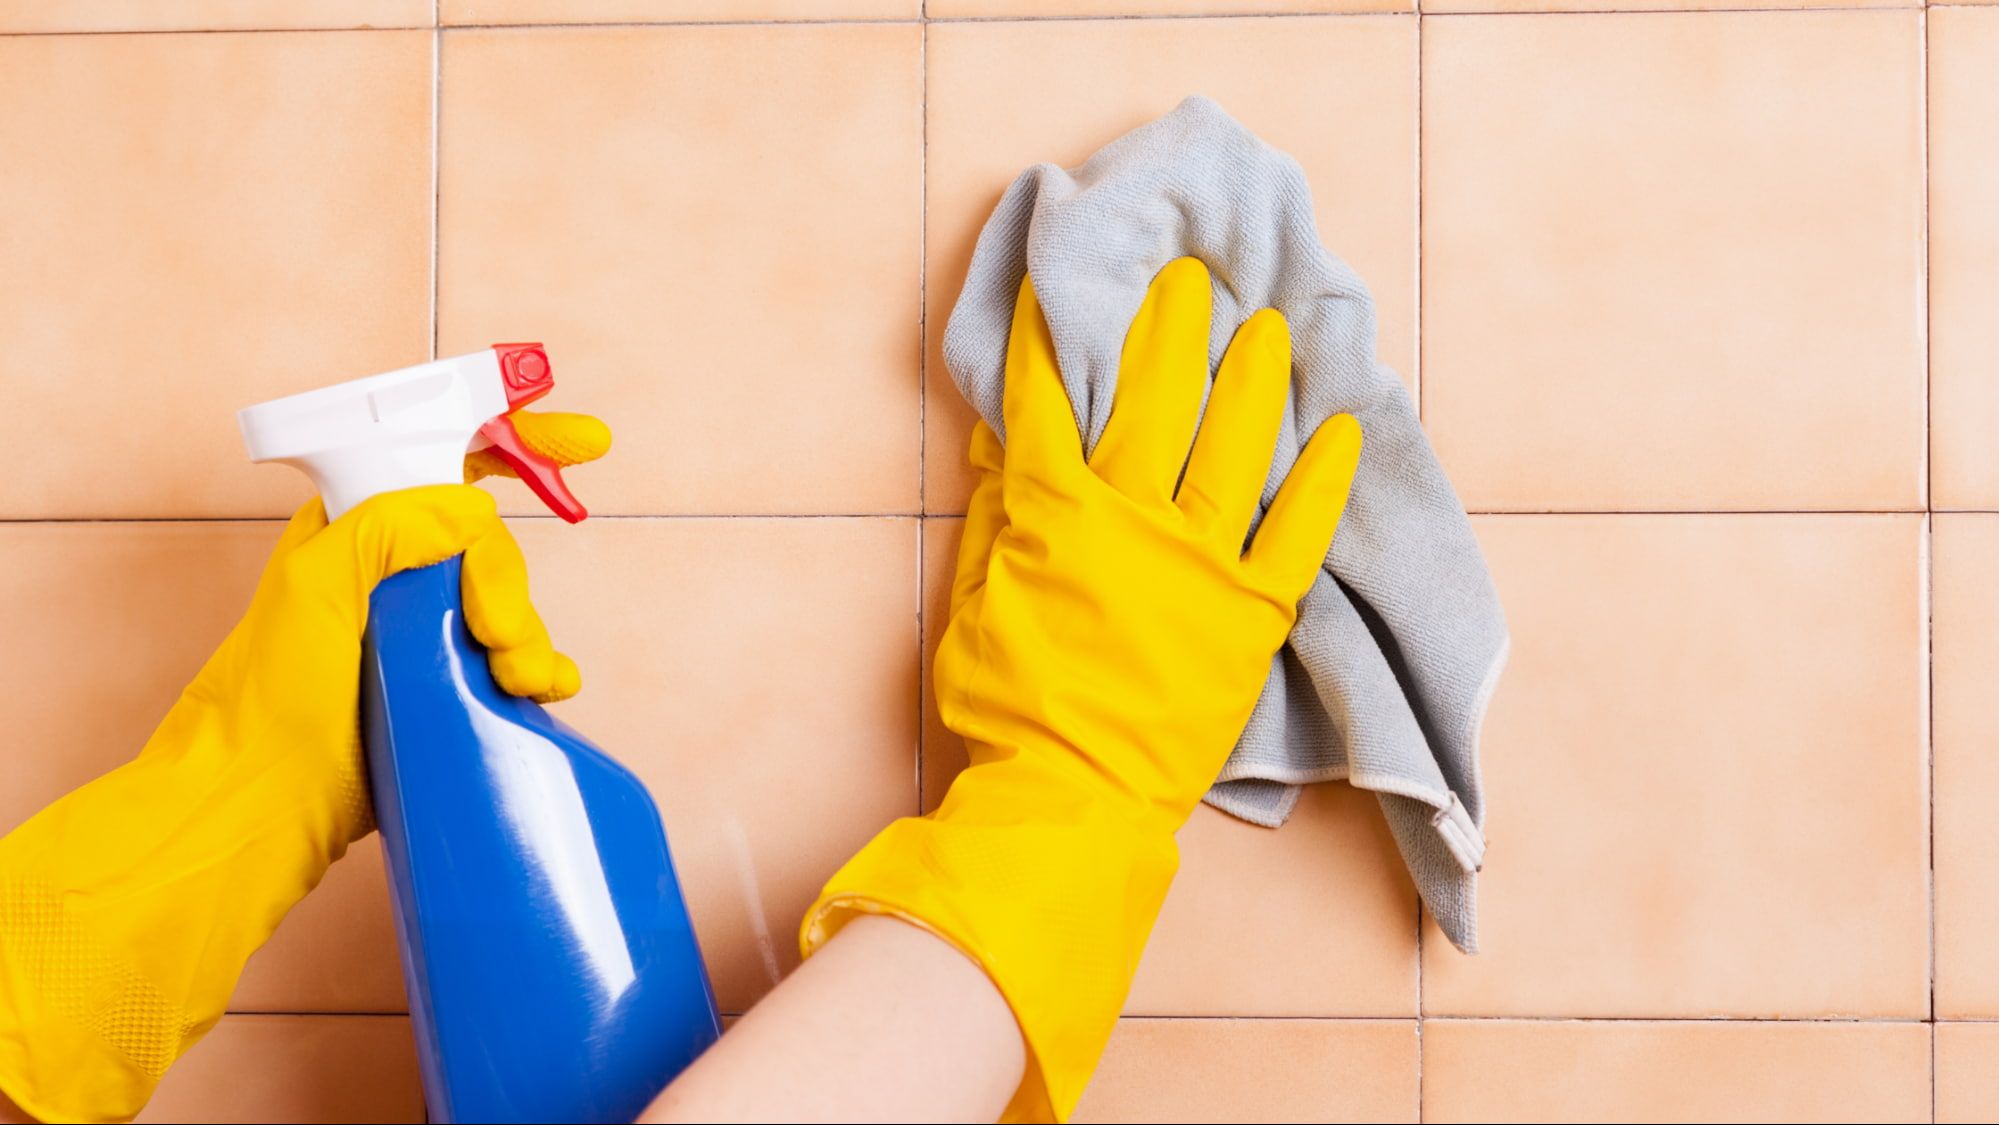
Tiles are easy to clean and maintain, which is why the majority of people use them in kitchens and bathrooms. 

A wet cloth and some water will remove any stains in most cases, but you can also buy specialist tile cleaners to polish up your decor and keep it looking new. 

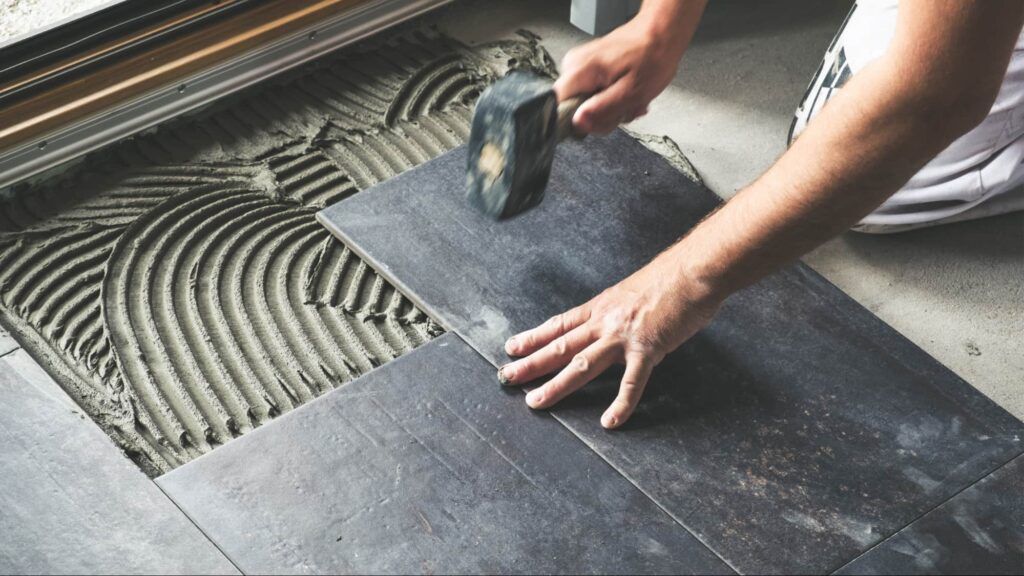
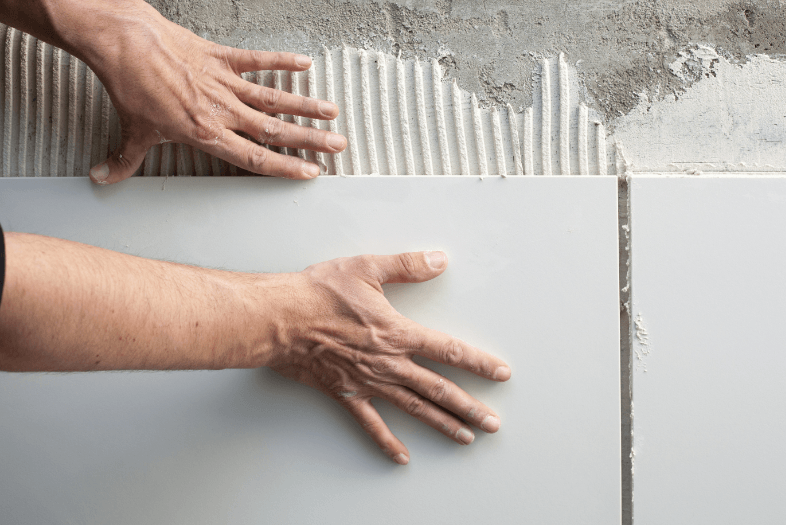
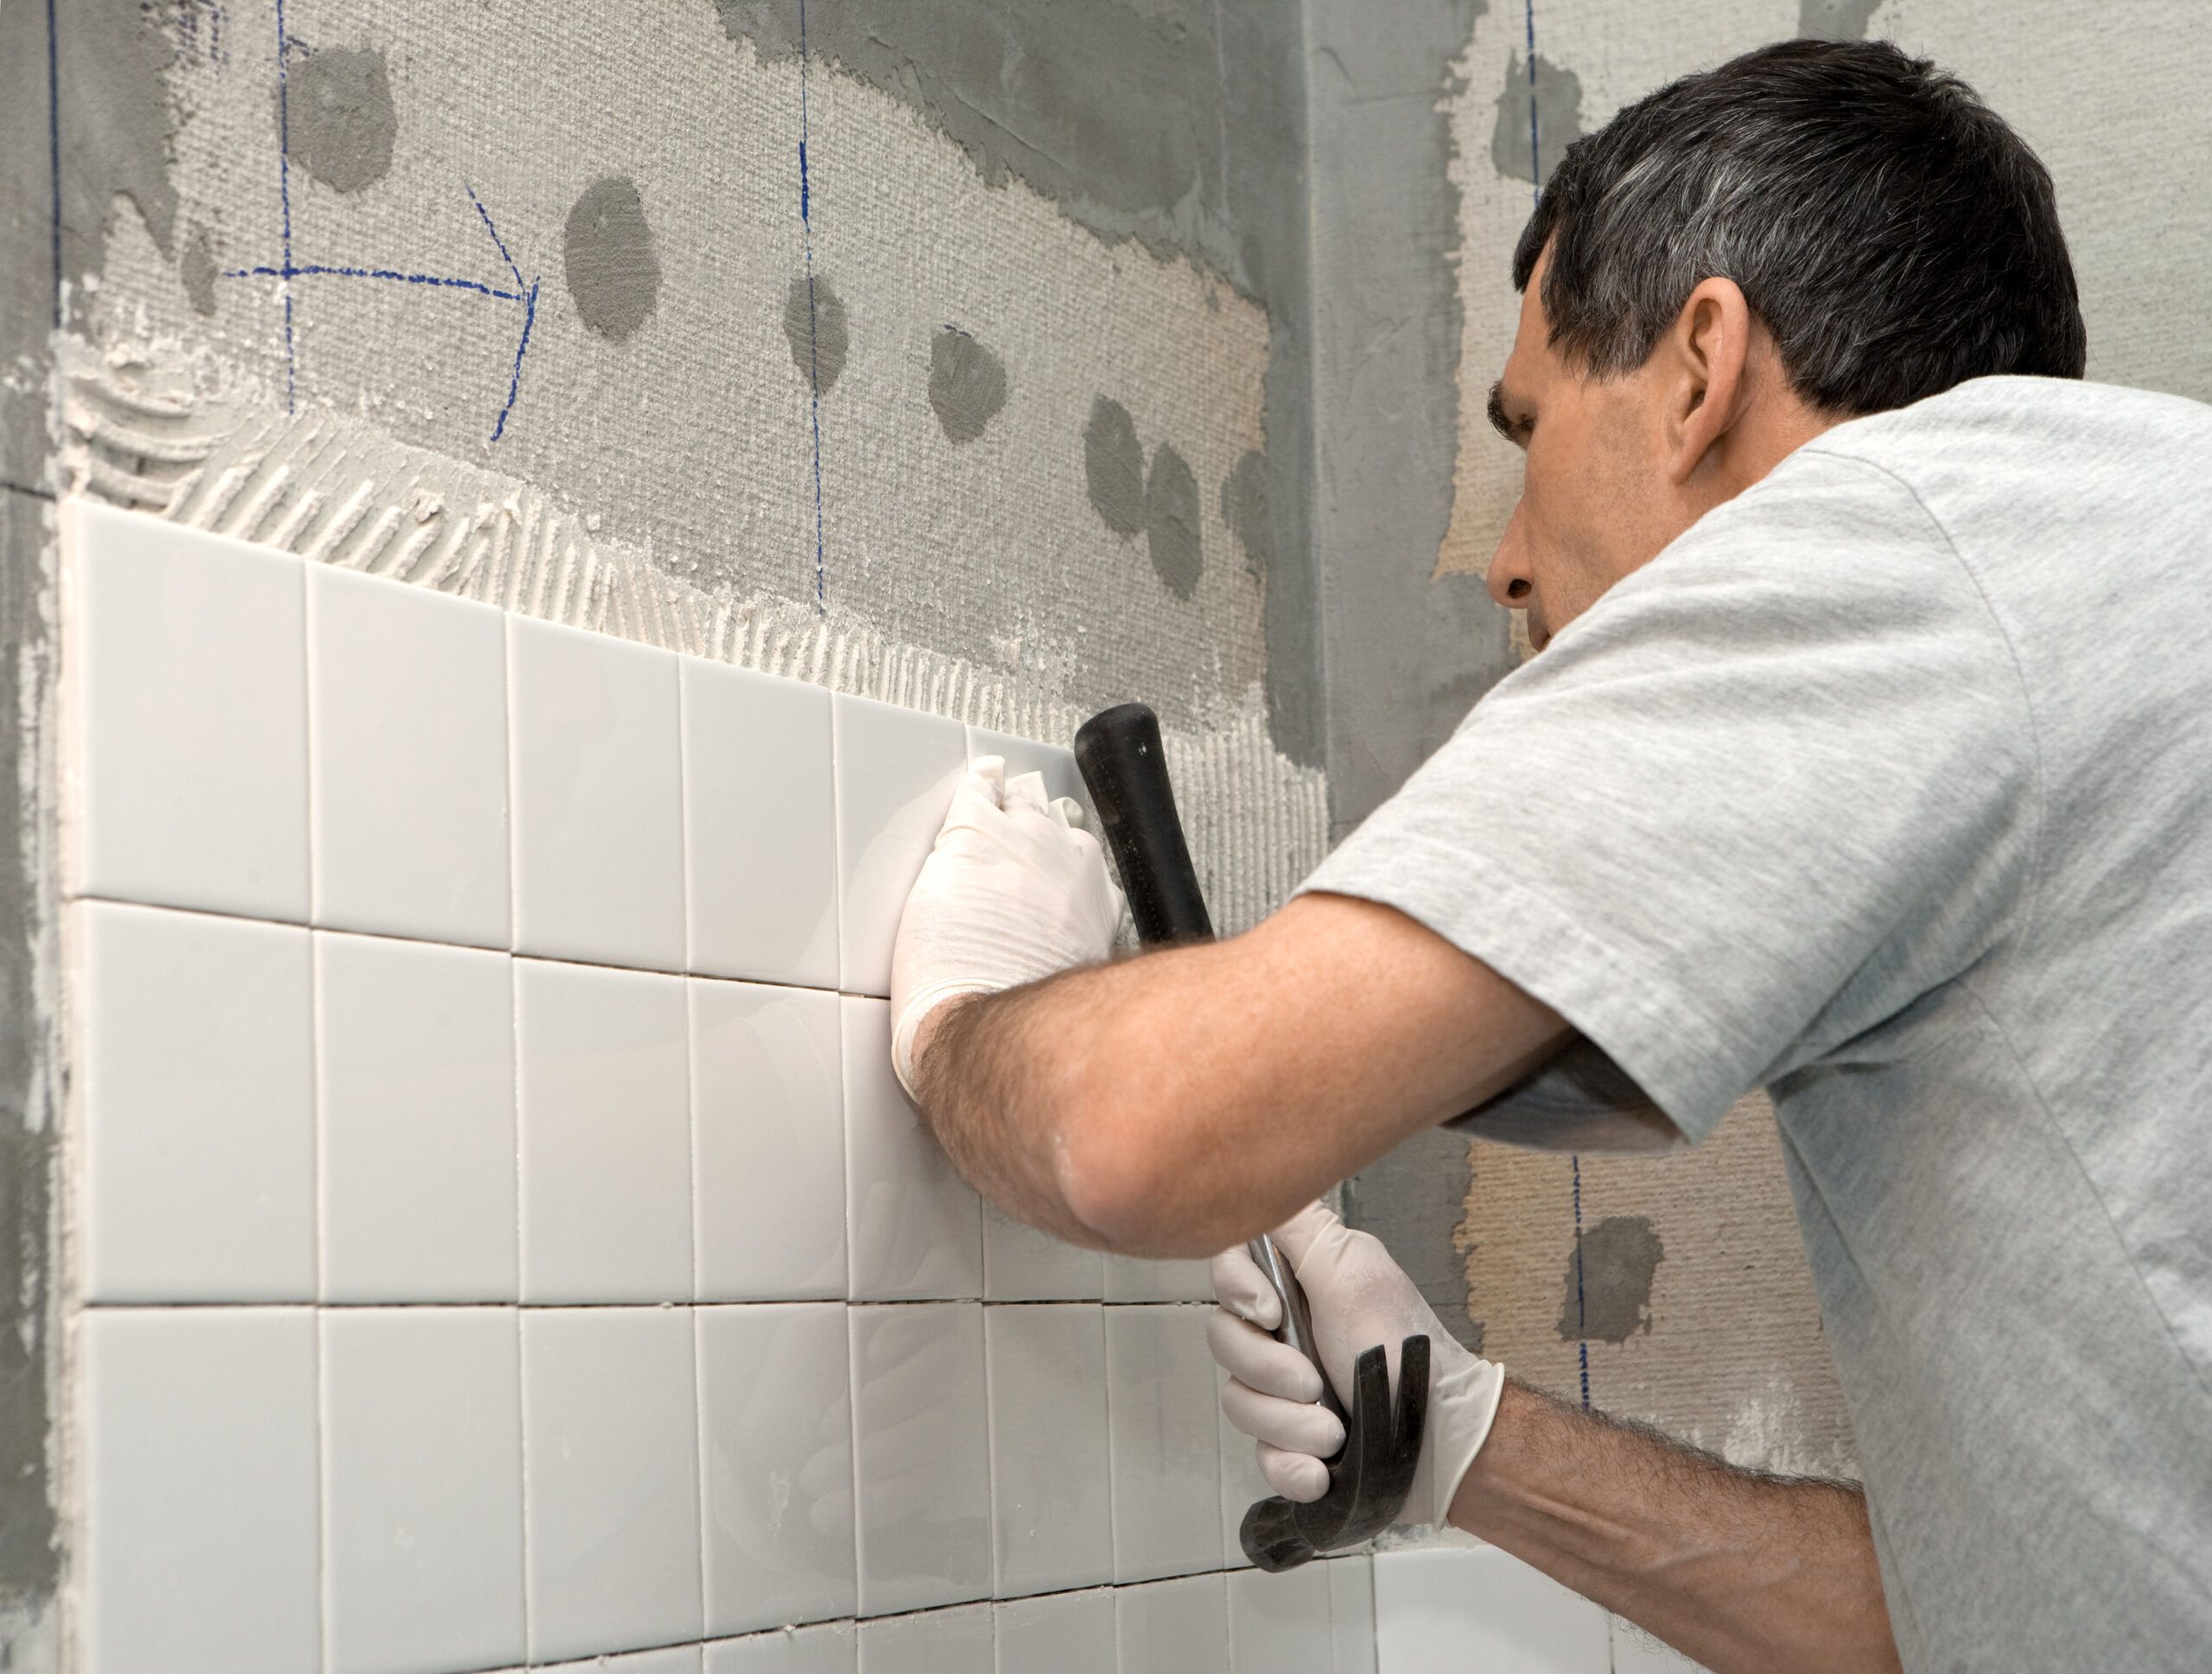
Tiles Will Last Longer

Paint fades, especially in kitchen areas, and you’ll find that you need to repaint the walls every two years. If you’re looking for a low-maintenance solution, tiles are the best for your needs. 

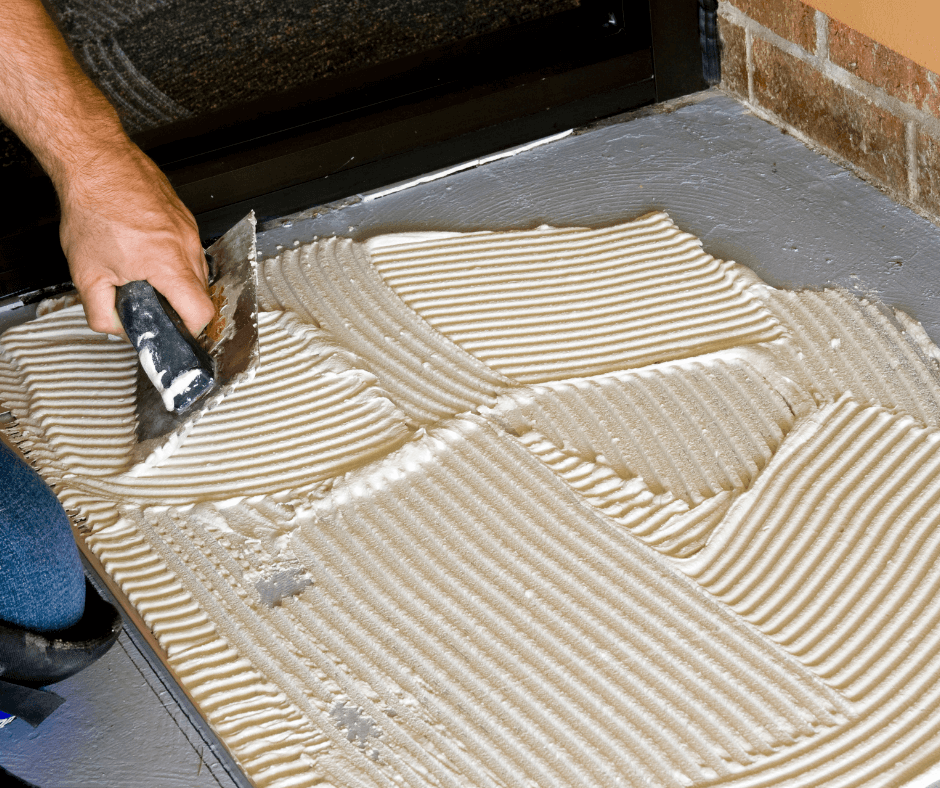
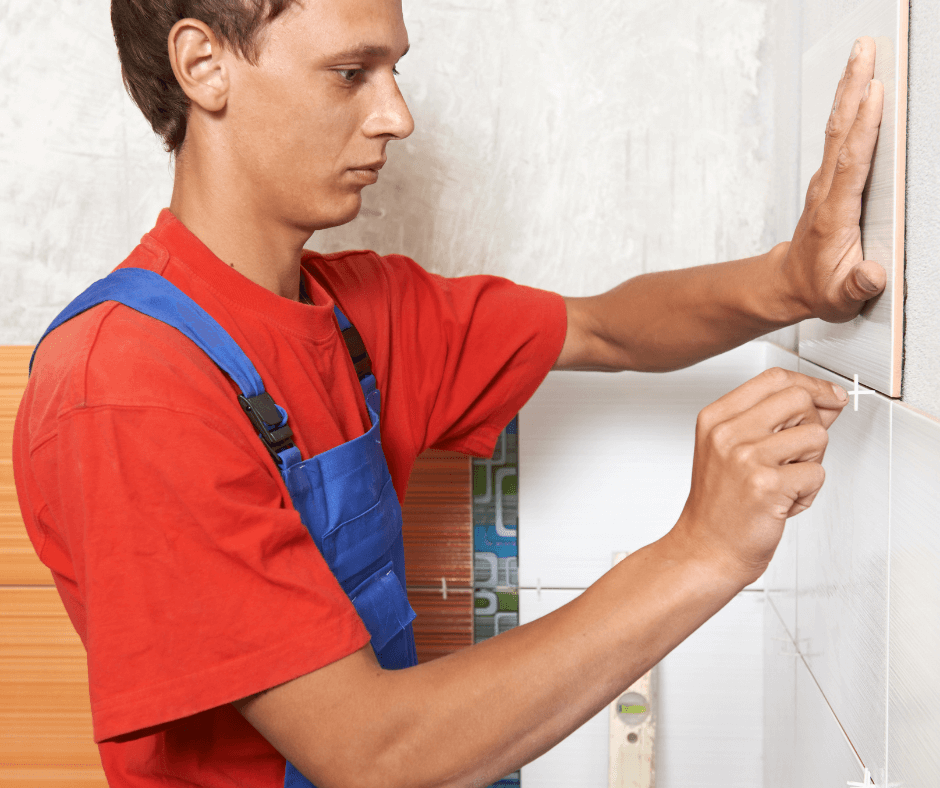
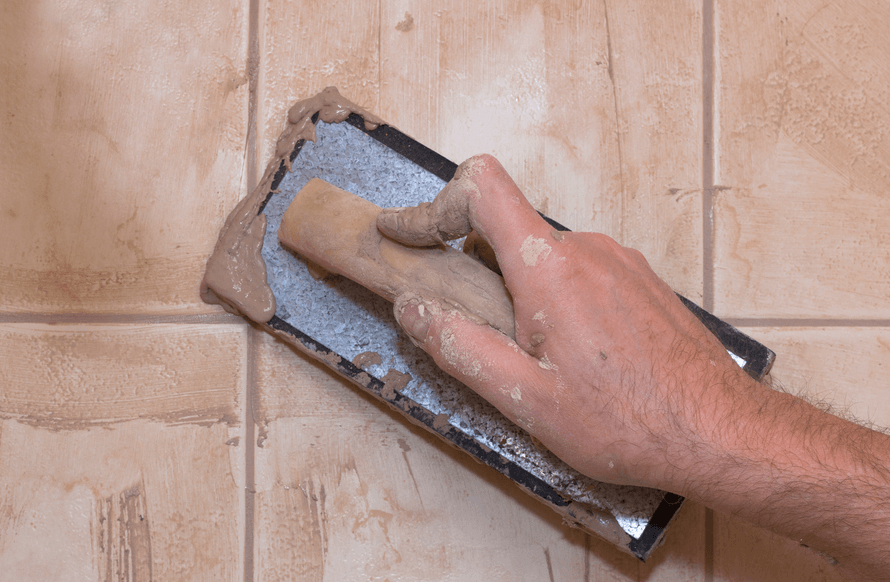
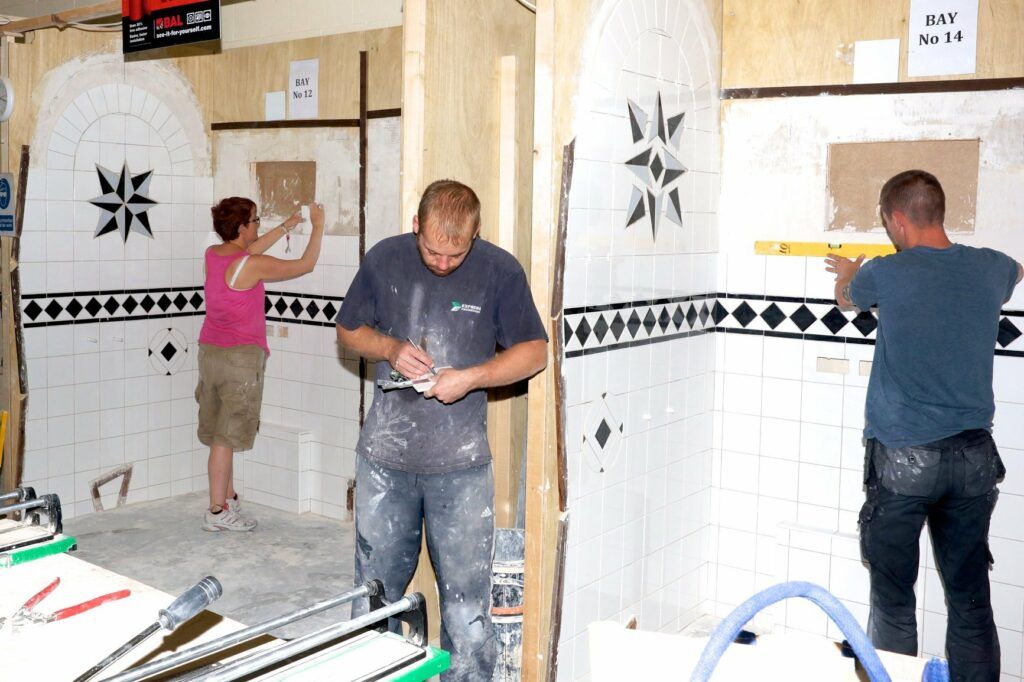
While an initial installation cost is involved, tiles will last for a long time, so they’re worth the investment. If you’re more of a DIY person, you can take advantage of a one-day tiling course

A specialist will go through essential tiling techniques, and you’ll learn how to achieve the best finish for your DIY projects. 

They Protect Your Walls From Mould

Mould on the Wall

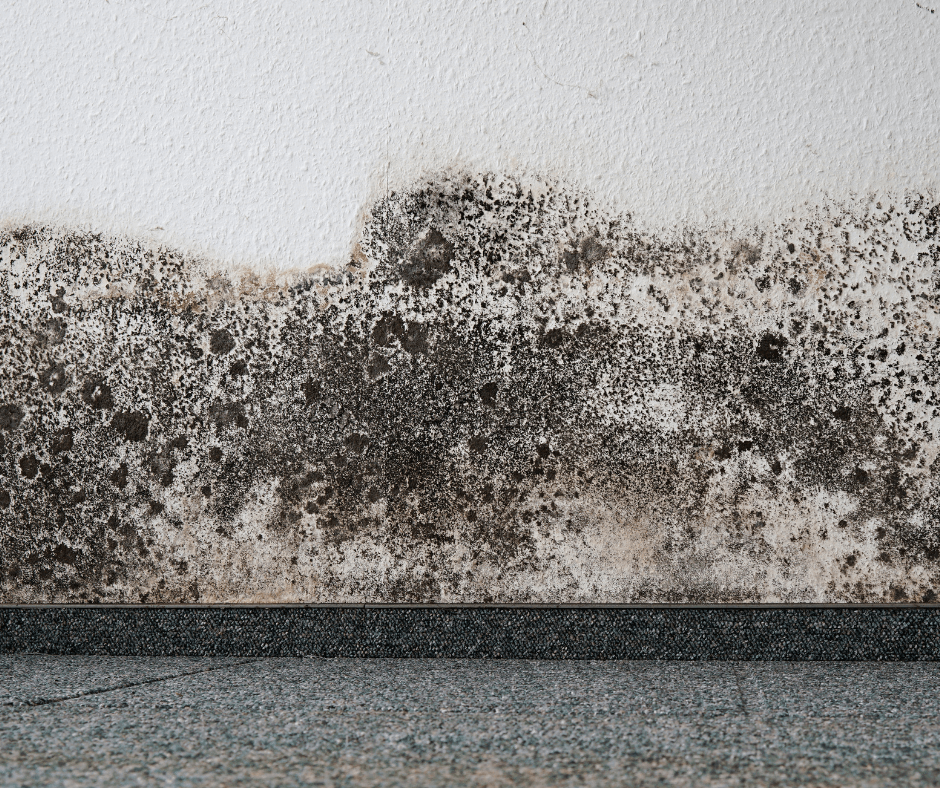
Kitchens and bathrooms are a real nuisance when it comes to condensation. They’re the rooms most susceptible to water damage – and condensation – which causes black mould. 

As you can see, it’s a vicious cycle, and mould can impact your home, health and quality of life. It often creates a lingering musty smell, and if you don’t take steps to deal with it, you’ll find the mould will spread. 

People with respiratory problems and allergies should also do everything to avoid condensation, as humid conditions can make their symptoms worse. 

Wallpaper and paint in your kitchen are going to attract condensation and mould growth. In contrast, tiles offer excellent waterproofing features, and they’re easy to maintain. 

As long as you give them a quick wipe down, you’ll reduce the risks of mould growth – which is especially important in the kitchen where you prepare and eat food. 

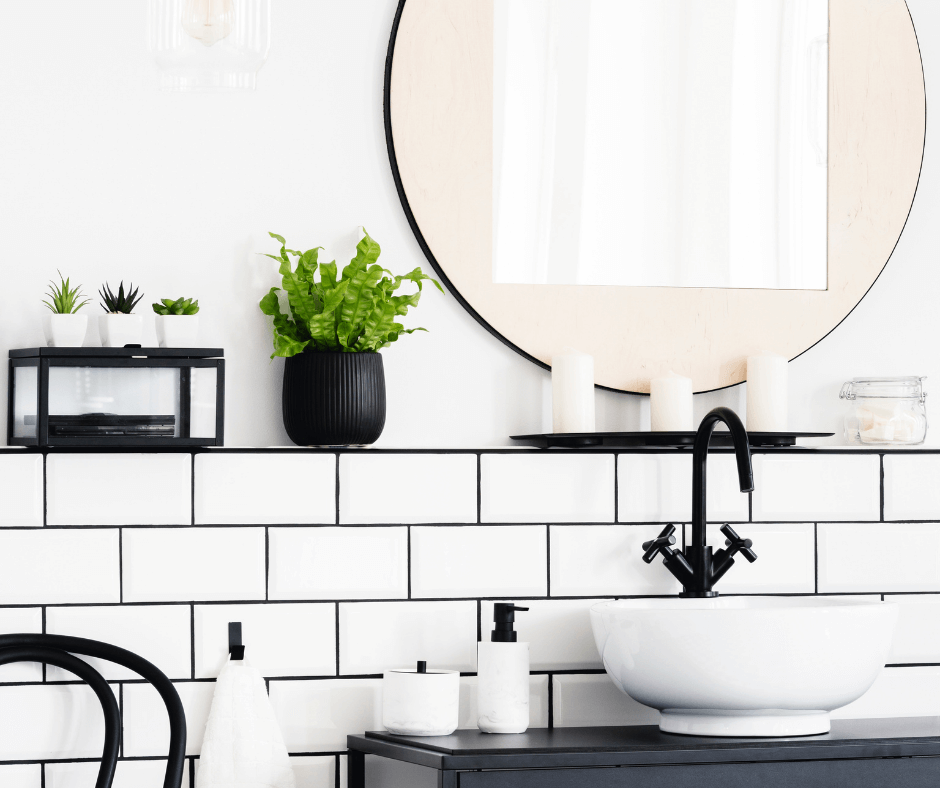
Tiles Create an Impact

When it comes to making a style statement, tiles are ideal. With so many designs available, you can find tiles that suit your preferences and match the rest of the room. 

While some people prefer basic designs, which focus more on colour, others might choose intricate patterns that follow a theme. 

Most tiles are inexpensive, so they’re perfect if you’re on a budget but want to create a luxurious appeal. 

The Most Popular Wall Tiles For Kitchens

Your kitchen is the place you prepare meals, and hob splashbacks can be a significant issue. Most tile manufacturers create specialist tiles that will withstand splashbacks, so it’s important to check whether the design you like is suitable for kitchens. 

Here are some of our most popular wall tile designs for kitchens. 
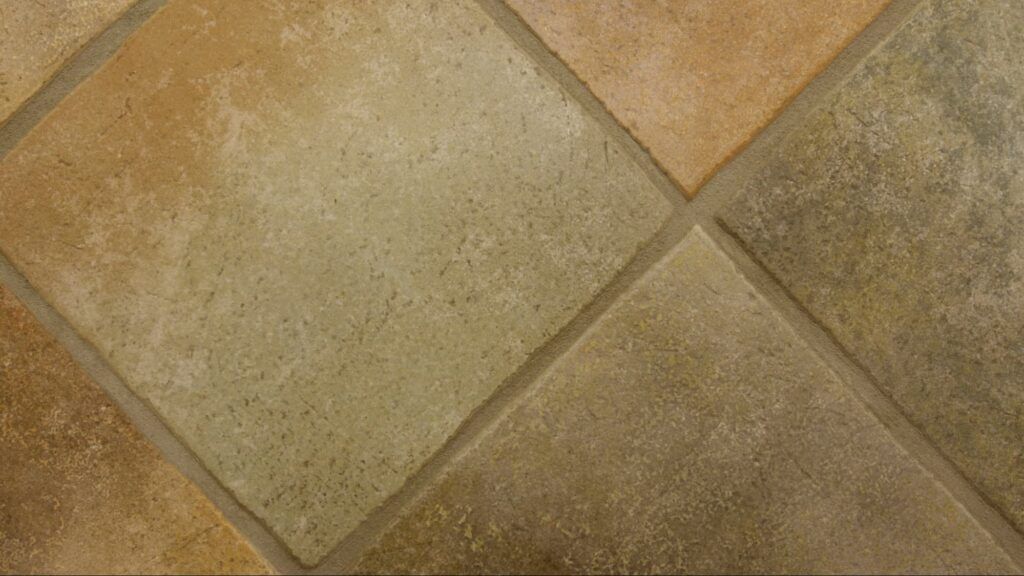
The Rustic Appeal

For some people, nothing beats the rustic appeal, and there’s plenty of decor trends that keep the tradition alive. Go for classical white tiles with a subtle pattern, or mix and match different neutrals to go with your dark wooden cabinets. 

Contemporary Feel

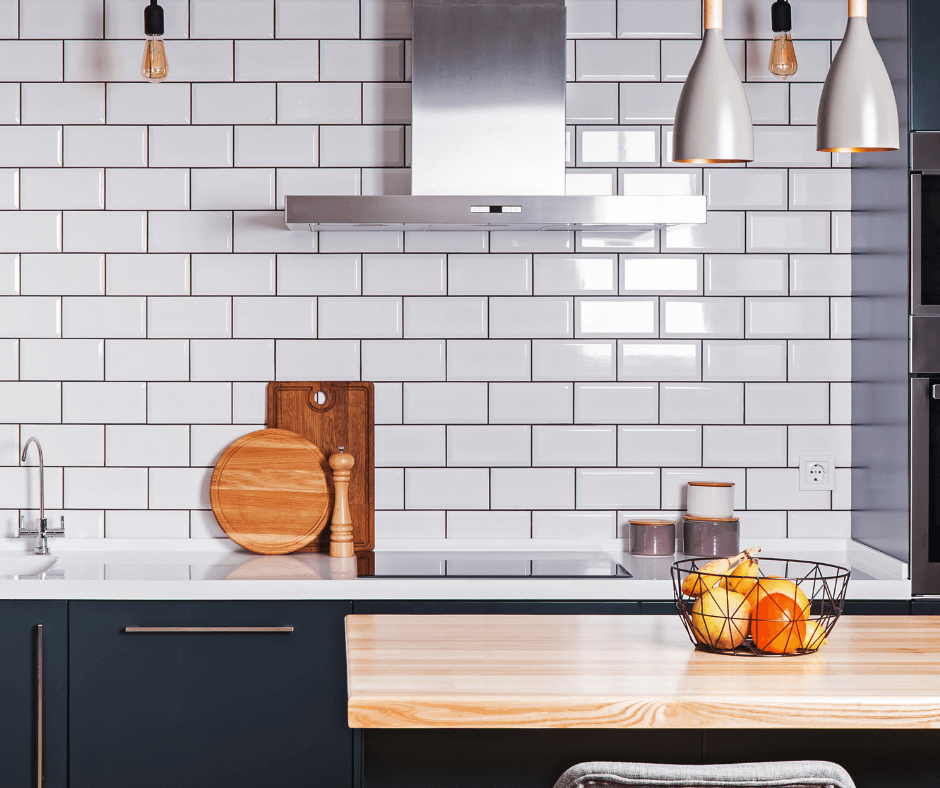
Contemporary wall tiles enable you to mix dark tiles with lighter kitchen elements or choose patterns that emulate a particular style trend. For example, metro tiles seem simple, but they look incredible when combined with the right kitchen trimmings.

Black Tiles

Nothing says sophisticated yet contemporary like sleek black tiles. They add some shine to your kitchen while being effortlessly cool. If black is too dramatic for you, greys will tone it down but still achieve the same look.
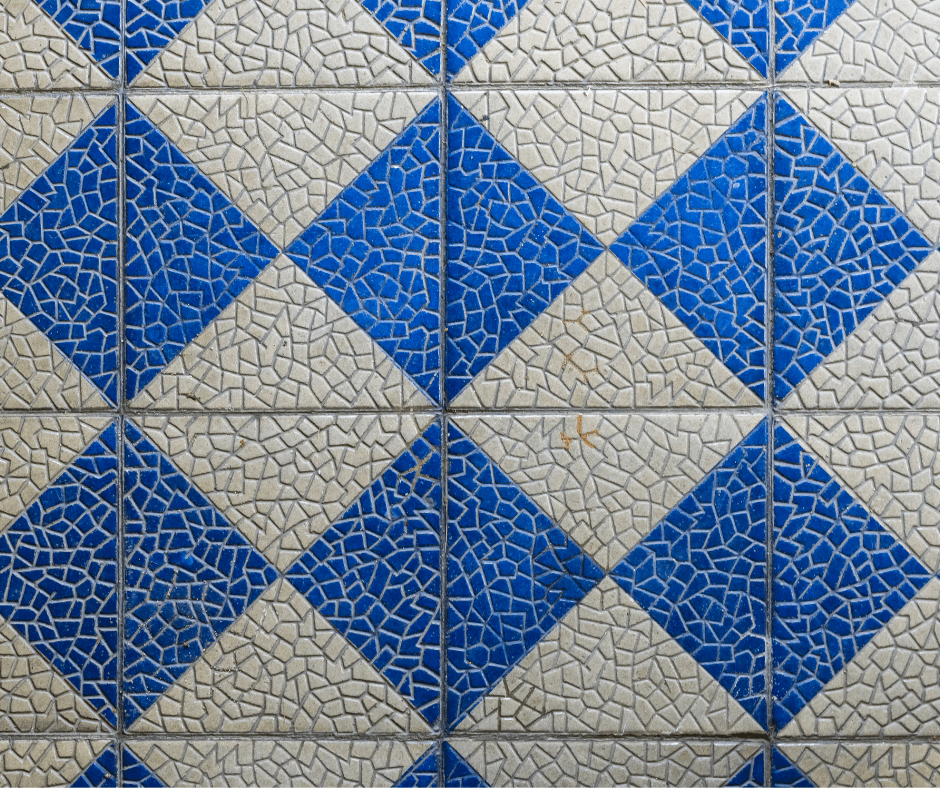
Mosaics

Mosaics have their place in history and contemporary design. When it comes to different styles, they have so much to offer. You can go for understated patterns in modern kitchens or brightly coloured patterns for a cheerful look.

The Bottom Line

Choosing wall tiles for your kitchen is a worthwhile investment and a low-maintenance option compared to paint and wallpaper. With so many tile designs available, you can create a traditional, rustic kitchen, a chic contemporary feel or a Moroccan theme.

Whatever you decide, tiles are the best option to prevent mould growth and enjoy your kitchen without the added maintenance stress.

Whether you’re new to the world of tiling or a seasoned pro, follow our blog to get the latest tips, techniques and access to the UK’s premier in-house tiler training centre.

What Is The Best Cleaning Product For Tile Floors?

It’s a great feeling when you finally finish laying those tiles and can admire your work. Tiling takes a long time, but it’s worth it because they’re sustainable and easy to clean. The key to maintaining your tiles is cleaning them regularly, but a small amount of soap and water won’t do the job.

In this post, we’ll reveal some of the best cleaning products for tile floors. From specialist brands to all in one cleaner, there’s something for every purpose.

LPT Porcelain Floor Tile Cleaner

One of the most effective tile cleaners available, LPT will remove dirt and grime without leaving a nasty smell. With a fresh-smelling fragrance, you can apply the cleaner and won’t have to worry about rinsing afterwards.

Better still, this product will last a long time – so it’s excellent value for money. The only drawback with LPT is that while it performs well, it’s not a heavy-duty tile cleaner.

If you live with children and pets, it will shine on your floor but might not be able to remove stubborn stains.

Ecoprotec Natural Stone & Porcelain Cleaner

If you’re looking for an environmentally friendly tile cleaner that does the job, then look no further. Ecoprotec is specially designed for natural stone and porcelain, which means it’s a gentle cleanser – but still very effective.

You can use it indoors and outdoors, and the lemon fragrance means you won’t be left with an undesirable chemical aroma. Overall, there’s nothing to fault with this product. It cleans porcelain and natural stone – all at a low price.

HG Shine Tile Restoring Cleaner

HG Shine is a one-size-fits-all solution because it works on a range of tile types and is known for its restorative value. The no-frill brand is designed for quick cleaning, and one litre will last you for at least 20 washes.

If preserving the planet is essential to you, then HG Shine is a fantastic choice. The company is climate pledge friendly, and you can use the cleaner to add a lovely shine to your tiles.

FILA Surface Clear Solutions

While many household tile cleaners will do the job, professionals often choose one with more capabilities. If you’ve just finished – or are thinking about doing a tiling course, then the clean up is a central part of the role.

People should have a great experience when they see their new tiles, and using FILA will achieve that result. While the cleaner is light, it easily cuts through any dirt or tough stains, and you can make it last for up to 40 washes.

Tile Doctor Neutral Cleaner

Tile Doctor is ideal for any tile type, but it seems to work particularly well on ceramic tiles. The PH neutral formula is excellent for removing dirt and grease from your floor, and it’s a gentle cleanser so that it won’t cause any damage.

If you’re not a fan of citrusy smells, then you’ll love Tile Doctor even more. Each time you use it, you’ll be greeted with a fresh mint scent, which immediately refreshes the entire room.

Dr Beckman

Dr Beckman is specially formulated to remove dirt from ceramic, porcelain and stone tiles. The strong cleaner is ideal for tough stains, and it offers a layer of protection between your tile and any contact.

Households with pets and children should use the cleaner because it comes in at a low price but has an excellent track record of removing dirt.

The Pink Stuff

It’s incredible that something so cheap could be as powerful as The Pink Stuff – but people swear by the all in one cleaner. Not only is it cost-effective, but you can also rest assured that it’s completely harmless for children and pets.

Perhaps the best thing about The Pink Stuff is its ability to clean tough stains without leaving a residue. While the cleaner isn’t specifically invented for tiles, it does a better job than other expensive tile cleaners around.

Mr Muscle

We can’t leave out Mr Muscle, because it’s one of the UK’s most popular cleaning brands. The companies power cleaner is ideal for tiles because it gets rid of tough stains and grime on porcelain and ceramic surfaces.

When compared to other tile cleaners, you might need to use more elbow grease with Mr Muscle, but if you’d prefer a familiar brand that you know you can trust, then you can’t go wrong with the power cleaner.

Groutrageous Step 1 Tile Cleaner

While many tile cleaners can be used on grouting, they don’t have a substantial effect for tough to clean areas. We always advise that you start with a professional grout cleaner to get the best results.

You can use this cleaner as a base because it powers through tough stains and dirt. With its concentrated acidic formula, you can rest assured that Groutageous will do the job well.

Afterwards, it’s best to follow up with another tile cleaner to make the floor shine.

Tile Cleaning Machines

tile floor and cleaning machines

Tile cleaning machines are easy to use and make the process of removing stains a lot easier. If you suffer from mobility issues or don’t want to struggle on your hands and knees, these machines are great for polishing your tiles and giving them a shiny look.

Instead of choosing a rotary cleaner, you should use an electric mop. Most come with steam cleaning functions and can cut through stains easier than traditional mops.

Here are some of the functions you should look out for:

  • Lightweight design, so the mop is simple to move around
  • Different steam settings
  • Cleaning pads with grips to pick up dirt and stains

If you don’t want to use an electric mop, then microfibre pads can be ideal. They’re great for cleaning and shining surfaces, but you’ll probably need to use a specialist cleaner to remove stains first.

If you’re interested in learning the art of tiling and would like to build a successful career, then you might want to consider investing in floor tiling training courses. With a range of one day and intensive courses, anyone can learn how to make money in a trade that offers them a promising professional future.

What Tiles Are Best Fitted For Bathroom Walls?

Which Material?

The majority of bathroom tiles come in either porcelain or ceramic materials. While both have many similarities, two distinct differences should define the type you choose for your bathroom walls.

There’s no avoiding the fact that your bathroom walls are going to receive a lot of splashback. Whether you use a shower or bath, it’s a natural occurrence and protecting your tiles should be your top priority.

Tiles are expensive, so the ones you fit should last a long time and be water-resistant. Porcelain tiles are best for bathroom and kitchen walls because the material will do an excellent job of sustaining against continuous water damage.

While some people choose ceramic tiles, we always recommend porcelain tiles for their ease of use and the fact that they’ll last a lot longer.

Size Does Matter

When it comes to bathroom tiles, size is everything. If you’re lucky enough to have a large bathroom to work with, then it’s easier to experiment with a range of tile sizes and styles. But small bathrooms almost always look best with small tiles.

Large tiles on a small bathroom can reduce the space even more and create a cluttered look, which isn’t ideal. Small tiles fit the room and won’t overcrowd it.

The only issue you might have with smaller tiles is that they take longer to fit. But when the jobs complete, it looks fantastic and will last for years. With so many tile designs available, you can get creative without worrying about overcrowding your bathroom.

The Colours & Style Should Fit Your Needs

The best thing about tiles is their sheer versatility. There are so many colours and styles; many people don’t know where to start. A simple way to think about which tiles are best for your needs is to look at the rest of your home.

Do you prefer lavish, high-end style decor, or are you more of a minimalist? Is your home tailored towards your children? How often do you plan to use the bathroom?

These points are all important because they should define which tiles are best for your needs. There are plenty of mosaic versions available if you prefer the elegant theme, but minimalists should use simple themes.

People with children can get away with bolder tile themes, and small touches like this make bath time a fun experience. If you’re the kind of person that jumps in the shower every day, then is there any point in spending a lot of money on your tiles?

These things all matter because they’ll define how much you spend on your bathroom and the tiles you choose. Ultimately, you should think about which are best for your needs and consider your budget.

Here are some of our favourite tiles to choose from.

Metro Tiles

Yes, metro tiles are those little rectangles commonly used in train stations during the 20th century, but they’re now making a comeback as a retro treasure. They’re incredibly durable, easy to apply and great for households with children.

Brick Tiles
bathroom with window, big mirror and brick tiles

New York City is one of the world’s style capitals, so it’s only natural that we take inspiration from the big apple for everything from clothing to home decor. If you’re a fan of the brickwork look, you can replicate it with porcelain tiles in your bathroom.

There are plenty of manufacturers that offer a range of stylish designs, including authentic-looking bricks.

Mosaic Tiles
blue and white mosaic tiles

Undoubtedly one of the favourite tile types, mosaics create an authentic look that people worldwide enjoy. The main issue with mosaics if you often have to follow a pattern, which can be a problematic aspect of tiling in general.

Luckily, plenty of UK tiling courses are available for beginners to learn the art of laying tiles. Whether it’s for your home renovation project or you want to embark on a tiling career, knowing the right skills will give you the confidence to perfect a range of techniques and tile patterns.

Mural Tiles

Mural tiles give any bathroom the wow factor it deserves. Each tile forms a pattern, which can be scenic backgrounds or even a famous person’s face. Attempting this form of bathroom tiling requires strong attention to detail and the ability to follow a pattern.

Hollywood Tiles

golden hollywood tiles in shower room

Hollywood style tiles are ideal if you want to add some glamour to your bathroom without going over the top. The colour theme you should follow is black, white and gold (and trust us – it works).

Try to go easy on the gold and focus more on the black and white. Ultimately, the gold should inject some Hollywood glitz but not overtake your bathroom.

Grouting

Every tile job should have grouting that will act as a joiner between tiles and keep everything in place. Luckily, there are plenty of colours to choose from, which means no matter what your style preference is, you’ll find grouting to match.

If you’re going for a minimalistic look, try to keep your grouting simple using a white or grey colour. Children’s bathrooms can have a bit more colour added to them, and some suppliers offer glitter grout.

Remember to keep your grouting in line with your tile design and take time to complete the job correctly. If your grouting looks terrible, it will impact the whole bathroom, so don’t rush it because people will notice.

Final Thoughts

Hopefully, this post has given you some ideas on what tiles are best fitted for bathroom walls, and you can set about choosing the right tile type for your needs. The main things you should consider are:

  • Whether you want to risk using ceramic tiles for your walls, they attract more moisture and won’t last as long as porcelain tiles.
  • The right design for your bathroom. Ideally, tiles should last for years, so you should focus on a design that grows with your family.
  • How much are you willing to spend? There are plenty of tiles available for all budgets, so know what you can afford to pay before you make a purchase.

The Best Wall & Tiling Advice From UK Pro Tiling

Tiling is one of those tasks that we all think is easy – until we attempt a weekend of DIY. From unstable surfaces to wonky finishes, there are a host of issues that come with tiling. Luckily, with some basic knowledge and tips, you can revamp your bathroom in no time at all.

In this post, we’ll reveal the best wall and tiling advice from UK Pro Tiling.

Planning Tips

Tiling can be a complicated process for beginners, and many forget about the planning aspects of the job. In this section, we’ll reveal some excellent planning tips to keep you on track and ensure you get the best result for your bathroom or kitchen.

Define Your Budget

Before you even think about choosing your tiles, you should decide on a budget. There are so many tile types available, and it’s easy to get carried away. By looking at what you can afford, you’ll be able to find the right design and material for your needs.

Most people choose ceramic tiles because they’re a cost-effective option and come in a range of designs. If you install them correctly, ceramics enhance the aesthetic appeal of your bathroom without creating a significant dent in your budget.

Natural tiles are an excellent choice if you’re going all out and want a luxurious bathroom. However, they are expensive, so before you use natural tiles, it’s crucial to think about your experience.

An excellent way to guarantee you’ll stay within your budget is to use a tile calculator. Most DIY shops have them on their website, and they remove any ambiguity about how much you’ll spend.

When you use a calculator, always make sure you add an extra 10% to your quote to compensate for any breakages.

Decide on Tile Sizes

Your tile size is an essential consideration, and both small and large tiles work well in bathrooms. If you have a larger surface area, then large tiles are ideal because they take less time to install and are less fussy.

Smaller tiles create a more uniform and high-end look, but if you’re a beginner, then you might find them too difficult to navigate. Think about your needs and experience before choosing the size of your tiles, and you can be confident that your wall or floor will look as you expect it to.

Choosing a Design

With so many tile designs available, you can pretty much create any look you desire. Popular choices include mixing colours to create a dramatic effect or patterned tiles to follow a particular theme.

Moroccan tiles are trendy because they come in a range of patterns to create an exotic look perfect for any contemporary bathroom. Another popular option s to combine plain tiles with imagery such as dolphins – which is particularly popular for family bathrooms.

Whatever you choose, make sure you’ll be happy with the bathroom and design, as it should last a few years at least.

Preparation Tips

Remove Fixtures, Fittings and Waterproof Your Walls

The last thing you want is to be handling paste and removing wall fixtures and fittings such as screws at the same time. Before you begin tiling, make sure the area is free of any obstructions, including old plaster.

You should also make sure you remove any moisture from the walls and floor so the tiles will stick properly.

Prepare The Surface

Unfortunately, many people find that the surface they plan to tile on is uneven, which causes many problems. You can identify bumps in the wall or floor by placing a large ruler or wooden plank on the wall and running it across the surface.

One option is to install new drywall to create a uniform surface, but this takes a lot of time. You’ll need to let the surface dry completely, so it’s not ideal if you want to complete the job in one weekend.

The most effective solution is using tile board backers. They’re durable, create a uniform surface and are great for preventing moisture. The one issue? They’re expensive – but an excellent investment for a bathroom that lasts for years.

Make Sure Your Tile Adhesive is Suitable

Beginners usually choose ready-mixed tile adhesive, but professionals use powder. While the mixed bond is easier to handle, it doesn’t have the durability that powder offers, but that doesn’t necessarily mean you should head straight for the powder.

If you’re a complete beginner, then you’ll probably achieve better results with ready-to-use adhesive because you might struggle to get the right consistency with powder. If you’re more comfortable with pre-mixed adhesive, then it will still do the job.

An alternative is to consider learning how to tile from professionals. Whether you want to complete DIY jobs or think about a career change, there are many tiling courses to choose from.

Laying Your Tiles

Laying your tiles is the final step, but it’s also the trickiest. As long as you stay focused and keep the area stable, you’ll be able to complete the job. There are two major things you need to consider when you lay your tiles.

Use a Straight Edge to Keep Things Even

Imagine spending ages laying your tiles only to discover that they’re wonky! Believe us; it does happen. Luckily, there’s a simple solution to keep everything uniform; use something with a straight edge.

If you’re tiling walls, you should start at the bottom and work your way up, making sure each tile lines up perfectly. Boards are ideal for floor tiles, as they don’t disappear underlines of chalk or pencil.

Clean As You Go

You should never leave cleaning until you lay every tile because it can cause more issues down the line. Adhesive sticks fast, and it has to be strong to secure each tile, so try to make sure you remove any residue after each tile.

Utility knives are excellent removal tools, and they’ll cut through any excess adhesive. If you leave the clean-up until after your tiles are complete, you run the risk of residue staying on the tiles, impacting the overall look.

Is your home missing some luxury? Check out our blog on laying luxury tiles here.

Who Can Become a Professional Tiler?

For many people, learning a trade allows them to have a long and happy career with excellent prospects. Tiling is a trade that will always be in demand, and for people that prefer practical work – it’s a stable option.

The role requires a lot of skill, but it’s ideal if you want the opportunity to move abroad – because tiling is a consistent feature on Australia’s skills in demand emigration list.

In this post, we’re going to answer the question of who can become a professional tiler?

What Do Tilers Do?

Tilers have a diverse set of responsibilities, but their primary role is to work with various materials to create aesthetic features for a property. Take a look at your home, the properties of friends and family, and public bathrooms – you’ll notice the majority have tiles.

Tiling isn’t just for aesthetic appeal; it can also protect walls and is a better alternative for households with children and pets because tiles are easy to clean.

A typical day for a tiler might involve:

  • Looking at floor plans to evaluate the scope of the work
  • Measuring surfaces to work out material quantities
  • Removing old tiles and preparing surfaces for retiling
  • Applying tiles and maintaining the chosen pattern
  • Using a range of tools to create the right look
  • Removing current grouting and applying new grouting
  • Installing waterproof systems

As you can see, it’s a varied role and no day will be the same. Many tilers choose to become part of a construction company, while others prefer to work on a self-employed basis.

What Skills Do Tilers Need?

While tiling careers offer fantastic progression and business opportunities, they’re not suited to everyone. As with many jobs, there is a distinct set of skills that could define your success as a tiler.

If you don’t have these skills, then there’s always the chance to learn them – which is vital to remember.

With the right mindset and commitment to improving their skills, anyone can become tiler and enjoy the rewards the career provides.

Mathematical Skills

Before you click away and decide tiling isn’t the career for you, we mean basic maths skills. You don’t need to be Russell Crowe in a Beautiful Mind, but you do need to be able to take measurements and work out how many materials you’ll need.

Providing you have basic maths skills, you can transfer them to your tiling career. If maths isn’t your forte, you can quickly learn how to measure an area and calculate the amount of materials you’ll need.

Attention to Detail

If you’re the kind of person that always notices when something isn’t symmetrical, then tiling could be the right career for you. Attention to detail is everything because tiling is an intricate job, which requires a lot of precision.

Not Afraid to Work Alone & With Others

Even tilers that work for construction companies find that they’re often alone. It’s an ideal set-up for introverts, but if you thrive on the company of others, then you might find working alone challenging.

For larger projects such as commercial or property development, you’ll probably work in collaboration with others -n which means you need to respect their space.

Responsible

People expect their contractors to arrive on time and complete the job by the agreed-upon deadline. The running joke that builders are always late and never finish a job is true in some cases. But contractors now know that people want to hire responsible tilers and if you can define yourself as one – you’ll get a lot of work.

It’s essential that you’re able to manage your workload and balance your time appropriately. If you’re the kind of person that’s always late and leaves a job unfinished, then tiling probably isn’t for you.

Knowledge of Computers and Mobile Devices

In today’s age of technology, it’s very unlikely that you don’t know how to use a computer or mobile device. Working alone means you’re responsible for arranging appointments and sending invoices.

You might also need knowledge of computers to work out the cost of materials and manage your diary. Most people have no problem with this part of the job, and there are plenty of useful apps around to make life easier.

Practical Ability

We’re all different, and while some people are more academic, others prefer practical work. Anyone can learn tiling techniques, but you might have a problem utilising them – especially if you’re not good with your hands.

How to Become a Tiler

There are many opportunities to embark on a tiling career, depending on your age and prior experience. The good thing about tiling is that plenty of people choose to change careers later in life, which shows that a college qualification in tiling isn’t always essential.

Some people become apprentices and work their way up into a professional career. Others might have a lot of experience with DIY tiling and decide to put that to use by taking the professional route.

The most cost-effective way to gain a recognised qualification is by using a specialist tiling training provider. You can learn at your own pace or attend an event led by experts.

It’s best to look at tiling courses online to get an idea of the type of training that suits your skills and experience.

Things to Consider

Tiling can be an enriching career, and with the business and emigration prospects it offers, it’s easy to see why so many are choosing to skill themselves up.

The most important thing is to find the proper training for your needs and check it’s going to let potential employers and clients know you’re reputable.

Please don’t settle for cheap training, because it probably won’t cover all bases and the money you do spend will be a waste.

Here are the main points to consider:

  • Do you have the necessary skills, or are you willing to put the work in?
  • Are you ready to commit to a career in tiling?
  • Is a short term investment worth the long term benefits?

Tiling is one of those careers that will always be in demand. So, make the right choice and enjoy a world of opportunities.

Which Tile Adhesive Should I Use?

So you’ve finally found the right tiles for your renovation project and can’t wait to see the finished result. Don’t get too comfortable because there’s one vital thing you need to consider; which tile adhesive is right for you?

Whether you’re an amateur or professional, you’ve probably asked yourself which tile adhesive should I use? Well, have no fear, because, in this post, we’re going to go through the vast array of adhesives so you can decide which is best for your needs.

Tiles are most commonly applied to walls and flooring, especially in bathrooms and kitchens. According to HASpod, uneven tiles are the second biggest cause of trips, which shows why it’s vital to apply them securely.

Tile adhesive is the best way to ensure they stay in place and avoid accidents in households or work environments. Let’s take a look at the different types of adhesive available.

The Types of Tile Adhesive

While there are several brands of tile adhesive available, you can usually split them into two types:

  • Powdered Adhesives
  • Ready Mixed Paste

Powdered adhesives are usually mixed with water to form a paste-like consistency. It takes more time to mix the powder correctly, but you can configure the paste to the thickness you require, giving the tiles more support.

The ready-mixed paste is the more convenient option, as it often comes in a tub, and you can use it straight away. The main issue with ready mixed brands is they lack the strength for larger tiles and extensive projects.

In general, if you need to apply a small number of tiles, then ready mixed paste would be ideal. Bigger projects should always use powdered adhesives because they offer more stability, and you can make a large batch to save time.

More About Powdered Adhesive

For professionals, a powdered adhesive is a go-to option for securing tiles onto a surface. But there are so many powdered adhesive forms, and it’s vital that you know the differences between each one.

Strength

Where you’re planning to lay tiles can define how long they’ll last. For example, in areas such as the kitchen or bathroom, there will be a lot of foot traffic which puts higher strain levels on the tiles.

If you have underfloor heating, it’s essential to find an adhesive that can absorb some of the stress, ensuring your tiles last longer. The majority of tile adhesives are rated as S1 or S2.

In moderate or minimal foot traffic areas, an S1 adhesive will be sufficient, but high traffic areas of homes should find a certified S2 adhesive.

Underfloor heating is another defining factor in the tile adhesive you use. When the floor temperature changes, it can cause cracks in the tiles, so a flexible S2 adhesive is essential to protect the flooring.

Colour

When you look at most powdered adhesives, you’ll notice they either come in grey or white. If you have a light grout, then it’s best to use white glue. The opposite applies to darker grouts.

The Setting Time

You can choose from a rapid or standard-setting tile adhesive, and both have advantages. Rapid setting adhesive is an excellent way to get the job done quicker, and professionals prefer to use it when they’re working on large building projects.

The main disadvantage of using rapid setting adhesive is that you need to complete the work quickly. If you’re a novice tiler, then rapid adhesive might be too intense for you, and it could impact the overall quality of the job.

Standard-setting tile adhesive might take longer to set, but it gives you the time to make sure you lay the tiles properly. It’s also a better option if you’re working on intricate patterns or with small tiles.

Things to Consider

Whether you prefer powdered adhesive or ready to use paste, there are some vital things to consider before you make a decision.

Which Surface Are You Sticking The Tiles To?

Tiles are most commonly used on floors and walls, but the adhesive you use depends on the surface.

Wall Plasterboard: If you’re applying wall tiles to plasterboard, they’re probably small enough to use ready-made paste. But if the tiles are 30 x 30cm or larger, it’s best to use powdered adhesive. Porcelain tiles should always be applied with powdered glue, too, regardless of their size.

Concrete or Screed Flooring: You must wait for six weeks before you tile newly laid floors. Powdered adhesive allows you to configure the paste’s thickness, so it’s better for a sturdy foundation.

Timber Floors: For the best results, you should place a level of plywood onto timber floors and tile over it. Use powdered adhesive to get the best results, and try to avoid placing tiles directly onto timber wherever possible.

Experienced Are You?

Tilers come from a range of backgrounds, and it’s a profession that attracts many people. Depending on your experience, you might not feel comfortable using ready mixed paste due to the small amount of time it leaves for you to apply the tiles.

While the powdered adhesive is the better option, a ready-made paste is ideal for smaller jobs. Luckily, there are some excellent tiling courses to help you improve your skills and offer a more comprehensive selection of services.

Final Thoughts

Tile adhesive is an essential part of the tiling process, and in most cases, a powdered adhesive is the better choice. Not only does it offer more flexibility, but you can also mix it to your requirements. Complex jobs that need to be completed with precision also benefit from the use of powdered adhesive.

While powdered is the better choice, it doesn’t mean ready-made paste is useless because it’s perfect for smaller jobs. The most important thing to remember is to make a decision based on the surface you’re tiling, your experience and the complexity of the job.

Do you know which tiling mistakes are commonly made but easily avoidable? Find out here. You can also find more expert guides on tiling by signing up for our newsletter.

Easy Cleaning Tips For Ceramic and Porcelain Tiles

If you have tiles in your bathroom or kitchen, then you know how they can brighten up your home. With so many varieties to choose from, including porcelain and ceramic tiles, it’s clear to see people choose them when they’re redecorating.

While tiles are easy to maintain, you must take the time to clean them. Not only does this make them look nicer, but it also protects them from a range of substances and debris. In this post, we’ll reveal some easy cleaning tips for both ceramic and porcelain tiles.

Porcelain Tiles

kitchen tiles

Porcelain tiles are one of the most popular tile types because of their aesthetic appeal. While they’re used for both walling and floors, it’s more common to see porcelain floor tiles. There are so many styles available, and some porcelain tiles are made with feldspar and sand to create a more robust and more stain-resistant finish.

Whether you’re cleaning walls or floors, there are some essential things you need to know.

Remove Dust and Dirt

Dust and dirt build-up is a natural part of life. Whether you’re working on somebody else’s home or renovating your own, the tiles are bound to get dirty. Luckily, they’re easy to clean, and you should ideally remove dust and dirt every day.

A dry mop or vacuum cleaner are the best choices because a brush can damage the tiles. By doing this regularly, you’ll save a lot of time and energy on cleaning the build-up of debris.

Try to Avoid Chemicals

While many believe that using chemicals is the optimum way to clean, it’s the opposite. Most chemical substances have corrosive properties, which can result in damage to porcelain tiles.

Porcelain tiles are heated to fuse them, which gives them similar properties to glass. If you clean them with chemicals regularly, you might make the tiles less resistant to water which means they’ll damage easily.

Chemicals also harm the grout, causing it to waste away, which means water can get under the tiles resulting in dampness. To avoid these effects, all you need to do is clean porcelain tiles with a mop and water.

If you need to remove stains, add a small amount of detergent to the mixture and gently wipe away the stains.

Don’t Forget to Wash Tiles Properly

Using detergent is a simple way to spruce up your tiles, but it’s essential to wash it away correctly. Never let your detergent dry because it can damage the surface of porcelain tiles. You should only use a small amount of detergent, but textured tiles might require a bit more.

Cleaning Tough Stains

Accidents are bound to happen, and while the above steps will work for general tile maintenance, there might be times when you have stubborn stains that require removal with chemicals.

Always read the label of any specialist cleaners and make sure the substance won’t damage your tiles or grout. Make sure you use protective equipment and lock pets and children out of the room.

Ceramic Tiles

a person lays the tiles

Ceramic tiles are similar to porcelain in their aesthetics, but there are some vital differences you should know about. For starters, ceramic is a lightweight tile, and it has a soft clay appearance with lots of design choices.

While there are many advantages of using ceramic tiles, it’s important to mention that they’re not as strong or water-resistant as porcelain tiles. With an abundance of colours and styles, ceramic is a popular choice and relatively easy to clean if you know what you’re doing.

The Simple Way to Clean Ceramic Tiles

To clean ceramic tiles, all you need to do is follow these steps.

Prep Your Tiles

In some cases, your tiles might not need a proper clean, and it’s always best to avoid using water unless you need to. Check for loose dirt, sand and debris on the tile and use a broom or vacuum cleaner to remove it.

If you find sticky stains on the tile surface, use a putty knife or spatula to scrape it away gently.

Cleaning The Tile Surface

You can use soap to clean your tile surface but try to keep it to a minimal amount. Too much soap can make your tiles look dull. Fill a bucket with hot water, and add up to half a tablespoon of washing up liquid and half a cup of vinegar.

Make sure your mop is clean, then use the mixture to clean your tiles. Once completed, rinse out your mop and bucket, refill with hot water and rinse the mixture off each tile.

Instead of leaving your tiles to air dry, use a clean towel or cloth.

Cleaning the Grout

Tile grouting can get dirty, and most people find they need to use a different method to clean it properly. Here’s what you’ll need to do.

Rent a Machine

If you’re professional providing tiling services, you can rent a grout cleaner from hardware stores. It enables you to provide a professional service, and specialist cleaning machines protect grouting from harmful chemicals.

Manual Cleaning

Fill a bucket with hot water and mix it with powdered oxygen bleach. It’s essential that you use powdered bleach because it’s safer for grouting. The instructions on the bottle will tell you how much to use.

Use a spray bottle or a small brush and apply the mixture to the grouting. Leave it for 30 minutes for minor stains and up to six hours for a thorough clean. Use a brush to scrub the grouting and remove any debris.

Rinse your grouting with clean, cold water and use a towel to dry them. You can also use a grout sealant if you want to reduce the amount of time you spend cleaning your tiles.

The Takeaway

Once you learn how to take care of porcelain and ceramic tiles, you can preserve them longer without too much work. Regular maintenance means you’ll spend less time on stubborn stains.

Tiling is one of the most lucrative trades to get into, and there’s a lot of competition among professional tilers. If you want to equip yourself with the knowledge you require, then signing up for tiling courses can help you learn how to install and care for tiles.

Essential Things You Should Consider When Purchasing Tiles

For many people, tiles are an invaluable solution to their decorating problems. Durable, attractive and available in various colours, tiles are excellent options for your flooring or walls.

When purchasing tiles, there are many things to consider, and we’re going to look at them in this post. Whether you’re planning on decorating your bathroom and kitchen, or want to make your flooring more appealing, these are the things you need to think about.

Which Tile Types Are Available?

There are so many tile types around; you’re spoilt for choice. But it’s essential to know the pros and cons of the most popular tiles before you make a final choice. Let’s take a look at them now.

Ceramic Tiles: Most homes incorporate ceramic tiles because they’re so easy to source and lay. There are hundreds of styles available, and ceramic is durable enough for households with children and pets.

Porcelain Tiles: The second most common type of tiles are popular because they can look like stone, brick or wood. While many homeowners love the look of porcelain tiles, they are more challenging to apply, which is why ceramic is more popular.

Cement Tiles: If you’re searching for a timeless classic, then cement tiles might be ideal for you. They’ve been around since the 19th Century, and come in a wide range of patterns.

Glass Tiles: Glass holds the vital benefit of being stain-resistant, which means the tiles are easy to clean. However, glass also chips easily, so it’s not a good idea for households with pets and children.

Mosaic: If you’re a fan of Moroccan, Roman, and Greek-themed bathrooms, then it’s impossible to forget mosaic tiles. They come in a range of patterns, colours and sizes. These tiles also look incredible.

Marble Tiles: The essence of upper-class decor, marble tiles are more expensive than most other variations, but they give any space a classic appeal.

Stone/Rock Tiles: Rustic decor or more traditional buyers have plenty of tiles to choose from. Options include granite and limestone, both of which are effective for improving your home’s aesthetic appeal.

Metal Tiles: One of the newer tile types is metal, but it’s not for everyone. While metal tiles are more durable, some people find the overall look of them is too much.

How Small Is Your Bathroom?

The size of your bathroom impacts its aesthetic appeal. While there’s nothing wrong with smaller spaces, it can look crowded if you don’t utilise the right decorating techniques. One of the biggest mistakes we see people making is purchasing the wrong size tiles.

Large tiles take less time to install, but they’re also the easiest way to make your small room look even tinier. In fact, it’s a common bathroom mistake we see all too often.

Opt for smaller tiles to give the impression that your bathroom is more spacious. You’ll feel more at home and avoid the cluttered effect.

Which Colours Will You Use?

Decorating is a fun job for everyone, but many people get caught up in the latest trends. It’s perfectly normal to want a modern decor theme, but you should think about how your tiles will fit in with the rest of your home.

There are plenty of things you can do, but try to consider the needs of your household. For example, if you’re tiling your bathroom and you have a young family, it’s best to have a bright decor scheme to make spending time in the room more appealing.

Older families should try to incorporate their tastes into the overall design of their bathroom or kitchen. If your home generally follows a themed decor scheme, such as Moroccan or Boho Chic, then you’ll want to continue it with your tiles too.

Black and white tiles can be a popular choice, but many people find them too familiar. You should only use children’s tiles if the room is specifically for your little ones. They might love the design, but it’s probably not the best idea if guests will use the room too.

Are You Buying Online?

In these uncertain times, online shopping has become a convenient way in which we source items. There are many benefits to buying tiles online, but you should always make sure the company is willing to send you a sample first.

If you can’t get a sample, check to see whether there’s a returns policy. The tiles you choose might look fantastic from behind a computer screen, but very different in person. To ensure you don’t have to worry about wasting money, always have a back-up plan.

Factor in Extra Costs

Most people budget for their tiles but forget about the essential tools to lay them correctly. Before you choose an expensive design, make sure you factor in the cost of:

  • Spacers
  • Grout
  • Adhesive

If you’re tiling a shower area, it’s essential to check the adhesive you use is suitable. Planning will save you a lot of money in the long-run, so work out how much you can afford on the actual tiles before you spend money.

There are plenty of retailers that sell specialist tiling tools at low prices. Remember, once you have the necessary tools, you’ll store them for future use.

Measure Up

Never – and we mean never – forget to measure how many tiles you’ll need. The simple way to do this is by multiplying the length by the height of each wall you’re planning to tile.

Add the number of tiles you’ll need from each wall together, and add an extra 10% to account for breakages. Most retailers cost their tiles based on square meters, so it should be easy to work out how much you’re likely to spend.

The Bottom Line

With so many tiles available, you can find ones that suit your decor scheme and practical requirements. Instead of making an immediate decision, shop around and enjoy the experience. With a little time and an open mind, you’ll find the perfect tile type, design and colour for your home.

Tiling Staircases

Staircases are not always the most glamorous installation in your home unless you live in a grand, luxurious large home where the staircase makes a big impression on opening the front door. Tiled staircases can really make an incredible, practical, long lasting impact on an interior and many luxury hotels or commercial businesses will have impressive tiled staircases installed.

Applying Wall Tiles

So, what type of tile would you need to use on a domestic interior staircase and how do you tile a staircase compared to tiling a wall or a floor? Well, the process of tiling stairs is pretty much the same as for any tile installation, but there are a few things to consider.

Tiles

The tiles to use would need to be slip resistant and suitable for floors.

Preparation

With tiled stairs there is a lot of preparation involved for both internal and external tiled stairs. Firstly, it’s important to get the measurements correct in order to work out the square meterage required and to do this you would need to measure both the length and width of the stair and the vertical riser of each stair. Once you have calculated the square meterage then remember to allow for an extra 10% – 15% for breakages, cuts and wastage. Once measured and the tiles ordered, you are ready to prepare the staircase for tiling.

Most internal staircases are constructed of wood but if your staircase or steps are concrete then the same preparation applies except there may be a need to use levelling compound if you find the stairs are not level.

Ensure the area is flat, clean and dust free. If the staircase to be tiled is constructed of wood then it is key to make sure there is no movement and that each stair is completely secure. If your staircase is not solid and secure after the tiles have been applied, it will result in cracking of the grout and the tiles. You may also have to reinforce the stairs to take the weight of the tiles.

Each stair will also have a nose board on the front of it – this will need to be cut flush to the riser – make sure the cut is smooth and free of any dust. Once you have completed all your preparations you are ready to apply the tiles.

Applying your tiles

For a successful, professional job start at the top of the staircase tiling the vertical stair risers. Use an L square on both sides to ensure the tiles are plumb (remembering to leave a gap for the grout). Start from the centre of the stair and work outwards. It is important to leave a gap of around 3mm and to keep this consistent use 3mm tile spacers to give an even gap around each tile. This is absolutely necessary to avoid any future cracking of both the tile and grout on the staircase. Once you have worked your way down the staircase and with all the tiles in place, the grout will need to be applied.

Grouting

As with most tiling jobs it is advisable to leave grouting the tiles for at least 24 hours after the tiles have been installed to allow enough time for the tile adhesive to dry properly. When choosing the grout you will need to take into consideration that it will need to be able to withstand the wear and tear of constant use, be durable and flexible.

So, job done nearly…

Finally

After leaving the finished grout to dry for a further 24 hours, good tiling practice requires the tiles to be cleaned to remove any excess grout to reveal a beautiful tiled staircase.

Tips for Tiling a Bathroom

Bathrooms are surely the no.1 choice to decorate using tiles, with tiles having the most practical, hardwearing and waterproof properties as well as a huge choice of styles, colours shapes and sizes.

Tiling Course StudentHow easy is it to tile a bathroom? With obstacles such as sink and toilet pedestals, showers, windows and door frames to consider there is a lot of planning and preparation involved to create the perfect tiled bathroom.

So, first of all what tools do you need? Well, the checklist below is a lists the tools you are likely to need:-

  • Pencil
  • Level
  • Tape measure
  • Sponge
  • Bucket
  • Tile cutter
  • Tile nipper
  • Notched Trowel or Spreader
  • Square
  • Rubber grout float
  • *Sander
  • **Piece of timber

And importantly for your own health and safety:-

Safety goggles

Dust mask

Gloves

Knee pads (depending how good your knees are!)

There are additional tools such as a contour or layout tool that can be included in your list for those awkward cuts or you can go back to basics and use card or paper to make a template.

So, with your tools and safety wear sorted, next is to measure the area that needs to be tiled (remembering to allow 10% for breakages and spares).

Whatever the job, the key to a successful and professional looking finish is always in good preparation. Walls and floors to be tiled need to be flat and clean – some areas may need *sanding so be sure to remove all dust before applying the tiles.

Planning how to apply your bathroom tiles

One way of ensuring the tiles run symmetrically on the wall is to try using a ‘gauging stick’ to mark out where the tiles will need to be placed. This is where the *timber in the tool list comes in. Lay the timber (which should be just over half the width of the wall) and put the tiles and spacers along its length and mark with a pencil. A second piece is used to place tiles widthways.

Measure the width of the wall and draw a vertical line at the midway point. Do the same for the height. Use the ‘gauging sticks’ to mark out a grid where the tiles will start and end. Adhesive is applied to the tile and tiling starts at the bottom of the wall, working in an upward direction, not forgetting to cut any tiles required before applying adhesive.

For the floor just as for the walls, preparation is all important. Ensure the floor is clean, dry and level. If the floor is constructed using floorboards it will need to have something like a ply covering to level it.

Using the same method of measuring to find out the midpoint of the floor as for the wall and start by dry laying the tiles working outwards towards the wall or first piece of bathroom furniture (bath, loo or sink pedestal). Mark the position of the last complete tile and draw a line from one end to the other. Lay your tiles along this line (you could use battens if working on a plywood base) checking regularly the tiles are flat and straight.

Cutting tiles around those awkward shapes.

Depending on your chosen tiles you can use a tile scorer or a tile cutter. For porcelain or natural stone tiles over a 15mm thickness a tile saw is better. And for those awkward curved cuts around a toilet or a pipe you can choose a tile nipper or tile saw to create a neat curve. If you don’t have a contour tool or layout tool then make a card template to mark out on the tile where the cut needs to be and remember to wear safety goggles!

After grouting and cleaning the tiles, your finished bathroom will look amazing.