Category: Tiling News and Blog

Tiling in Tight Spaces – Tips and Tricks for Small Bathrooms

Advice on choosing tiles and techniques for small or awkwardly-shaped bathrooms

Embarking on a bathroom revamp can feel like you’re navigating through a labyrinth, especially when the space is as compact as a broom closet. But fear not! The art of tiling can transform even the most cramped water closet into a seemingly spacious sanctuary. So, let’s dive into the nitty-gritty of tiling in tight spaces, shall we?

The Illusionists: Tile Selection for Small Bathrooms

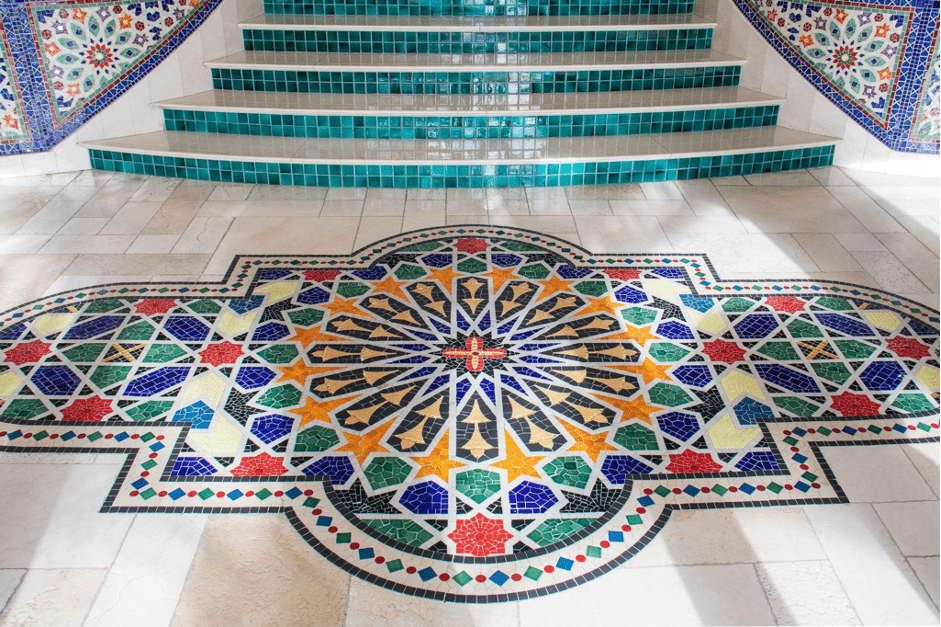
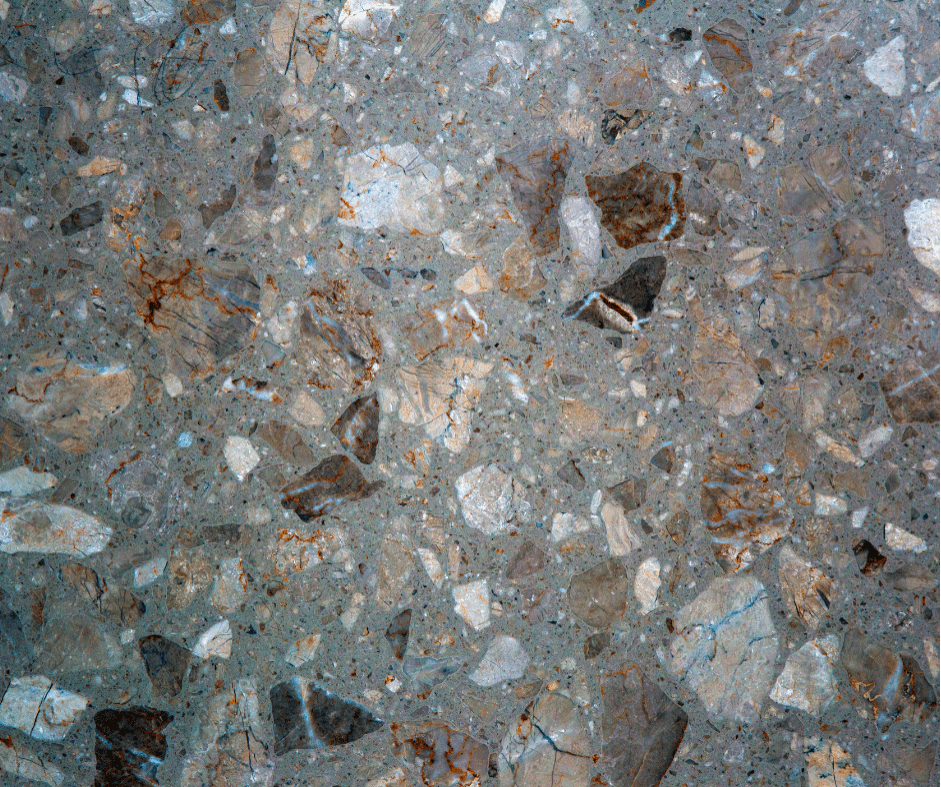
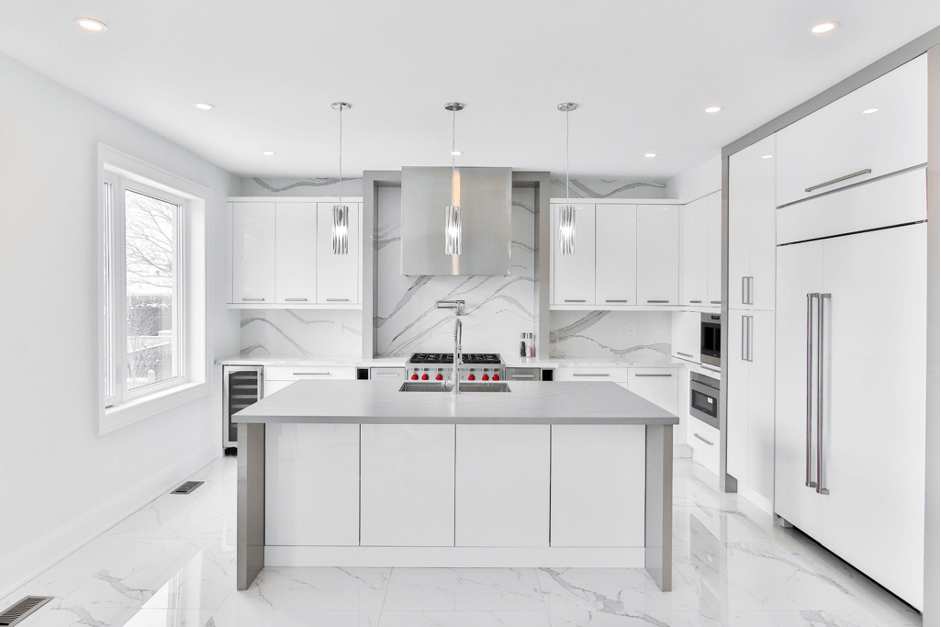
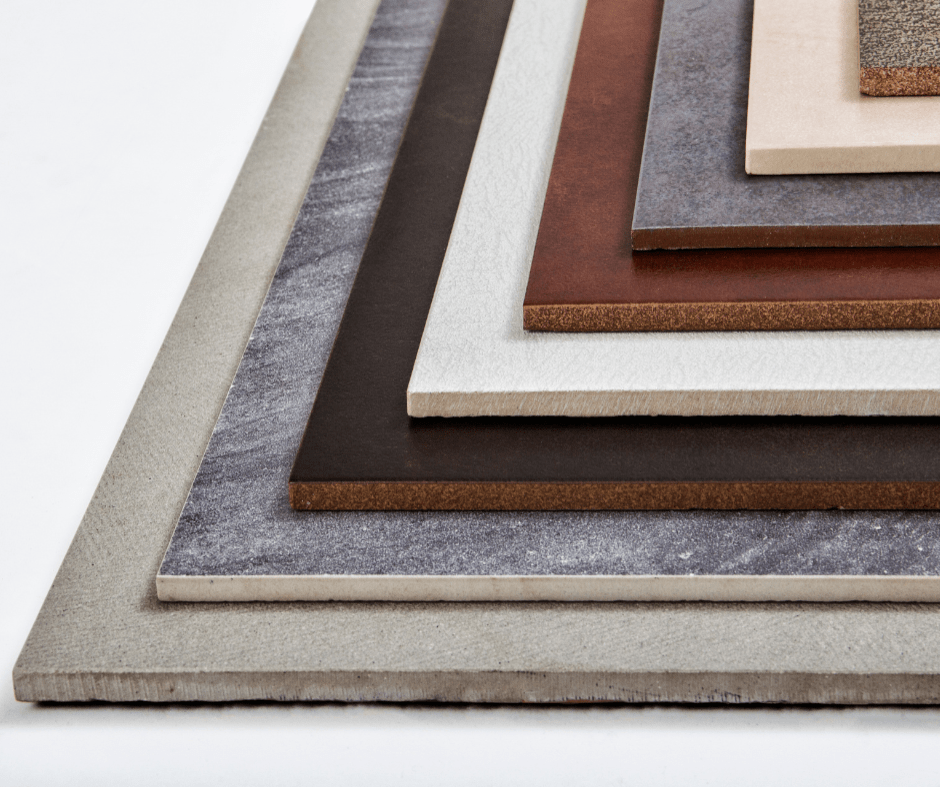
First off, the tiles you choose are like the opening act of a magic show. They set the stage and, if chosen wisely, can create an illusion of space. For instance, large-format tiles with minimal grout lines can give your tiny bathroom a seamless look, tricking the eye into perceiving a larger area. On the flip side, if you’re a fan of the mosaic look, those tiny tiles can add character without overwhelming the space, as long as you keep the color palette restrained.

Now, let’s talk color. Light hues are your allies in the battle against claustrophobia-inducing walls. Whites, creams, and pastels reflect light, making your bathroom feel airy and open. But don’t shy away from dark tiles if they tickle your fancy! A well-placed strip of darker tiles can create depth, or even a focal point, drawing the eye and adding dimension to the room.

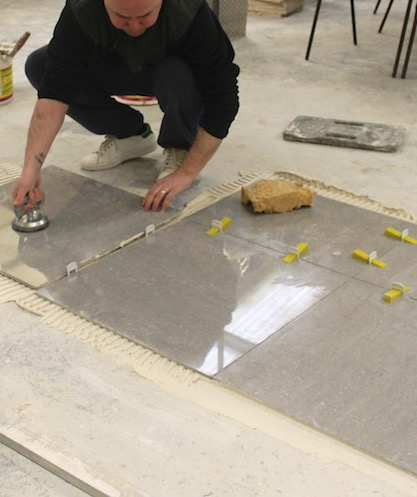
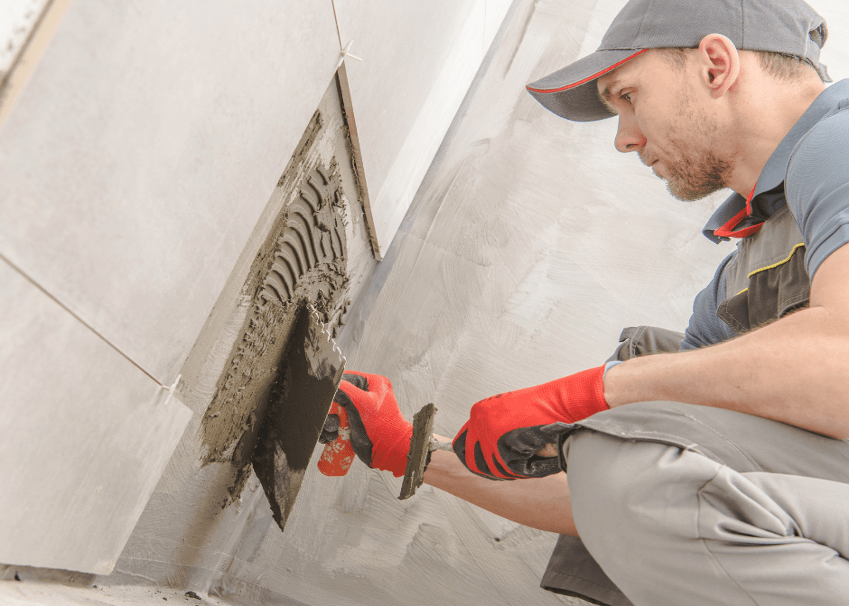
The Craft: Tiling Techniques for the Spatially Challenged

Moving on to the actual tiling process, it’s akin to playing Tetris on expert mode. Every piece must be meticulously planned and placed. For the corners and edges, where a full tile might not fit, you’ll need to cut tiles to size. This is where a quality tile cutter becomes your best friend, allowing for precision cuts without the risk of fracturing your precious porcelain.

But wait, there’s more to it than just cutting tiles to fit. The direction in which you lay the tiles can perform visual alchemy. Vertical patterns can heighten low ceilings, while horizontal layouts can stretch a narrow space wider. And if you’re feeling particularly bold, diagonal patterns can add a dynamic energy to the room, leading the eye on a merry dance across the floor.

The Secret Sauce: Grout and Finishing Touches

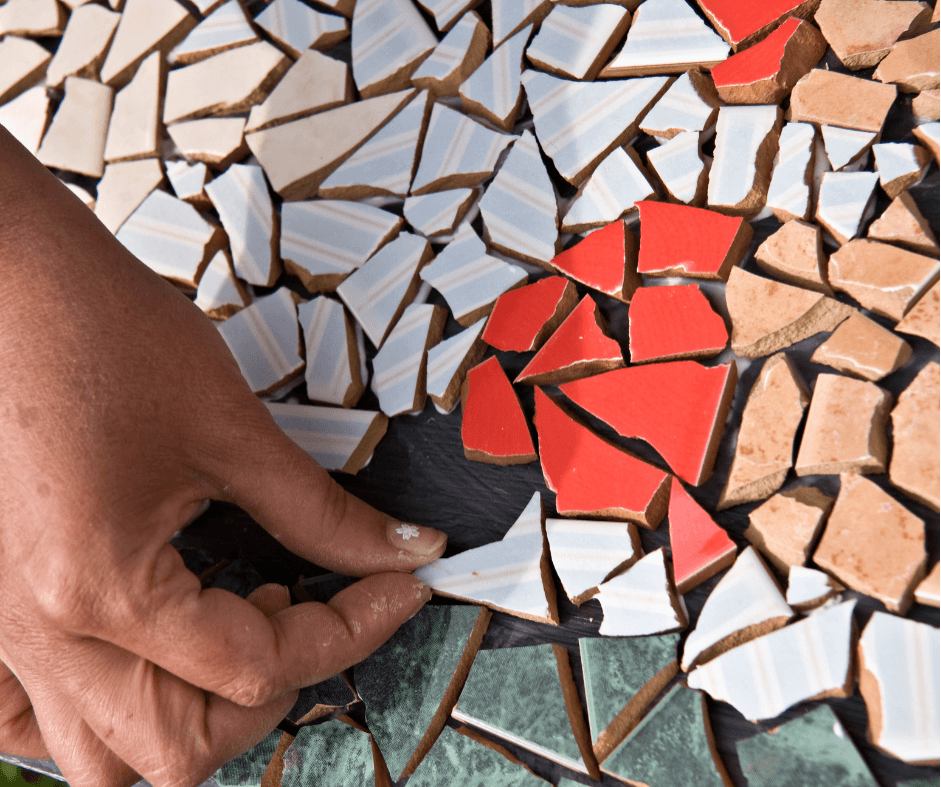
The grout might seem like a mere afterthought, but it’s actually the secret sauce that can make or break your tiling project. A grout color that contrasts with your tiles can frame each tile, creating a grid that may make the space feel busier and smaller. On the other hand, a grout that blends with the tiles can unify your design, contributing to a more expansive overall effect.

And let’s not forget the finishing touches. Trim and edging can give your tiling work a neat and professional look. They’re like the punctuation at the end of a sentence; they may seem small, but they’re essential for making sense of the composition.

The Final Act: Maintenance and Upkeep

Lastly, maintaining your newly tiled bathroom is crucial. After all, what’s the point of all that hard work if it’s going to be hidden under a layer of soap scum? Regular cleaning keeps your tiles sparkling and your grout from turning into a science experiment. Plus, it ensures that your bathroom remains your personal oasis, no matter how small it might be.

Should you find yourself in need of further guidance or seeking to sharpen your tiling skills, consider exploring the wealth of knowledge and courses available at Tiling Courses. From beginner tips to advanced techniques, they offer resources that could elevate your tiling game to professional heights.

In conclusion, tiling in tight spaces is a challenge, but it’s far from impossible. With the right tiles, techniques, and a bit of creativity, you can turn your cramped bathroom into a masterpiece of design. Remember, it’s not the size of the canvas that matters, but the magic you create within it. So go forth, wield your tiling tools with confidence, and make that tiny bathroom a testament to your ingenuity and style!

Waterproofing Essentials – Preparing for Bathroom and Wet Room Tiling

Bathroom renovations bring a unique sense of excitement! Whether you’re sprucing up your existing bathroom or starting from scratch with a wet room, one thing’s for sure: waterproofing is an essential step in the tiling process. Sure, it may not sound like the most thrilling aspect of the project, but trust me, it’s crucial if you want to avoid future water damage and leaks.

In this blog post, we’ll explore some key waterproofing essentials to ensure your bathroom and wet room tiles stay looking good and dry for years to come.

1. Assess Your Space:
Before diving into the world of waterproofing, it’s important to assess your bathroom or wet room space thoroughly. Take note of any existing water damage, cracks, or areas prone to moisture build-up. This will help you identify the areas that require extra attention during the waterproofing process.

2. Select the Right Waterproofing Products:
There are various waterproofing products available on the market, but not all are created equal. When choosing your waterproofing materials, make sure they are specifically designed for bathrooms and wet rooms. Look for products that are flexible, mold-resistant, and capable of withstanding constant exposure to moisture. Talk to an expert at your local hardware store for recommendations based on the unique needs of your space.

3. Seal the Foundation:
Before installing your tiles, it’s essential to ensure a waterproof foundation. This means properly sealing any cracks in the walls or floor using a high-quality waterproof sealant. Pay close attention to corners and joints, as they are common trouble areas for water seepage. Be generous with the sealant to create a watertight barrier.

4. Apply a Waterproof Membrane:
To provide an extra layer of protection, it’s advisable to apply a waterproof membrane on the entire surface that will be tiled. This membrane serves as a barrier against water penetration and helps prevent any potential leaks. It’s recommended to use a liquid or sheet membrane, depending on your preference and the specific requirements of your project. Don’t forget to apply the membrane to the walls, floor, and even the shower niche if applicable.

5. Ensure Proper Sloping:
Proper sloping is crucial for effective water drainage in your bathroom or wet room. Without it, water may pool instead of flowing towards the drain, leading to potential damage. When preparing your subfloor, ensure that it slopes towards the drain, allowing water to naturally flow away. This will prevent stagnant water and potential mold or mildew growth.

6. Test for Leaks:
Once you’ve completed the waterproofing process, it’s essential to test for any leaks before proceeding with tiling. Fill the shower tray or wet room floor with water and let it sit for at least 24 hours. Check for any signs of leakage, such as water seeping through walls or floors. If you notice any issues, address them immediately before moving forward.

While the idea of waterproofing may not initially excite you, it’s a vital step in ensuring the longevity and functionality of your bathroom or wet room tiles. By taking the time to properly assess, select the right materials, and follow these essential waterproofing steps, you can prevent water damage, leaks, and future headaches. So, next time you embark on a tiling project, remember to prioritize waterproofing – your tiles will thank you!

Preparing A Surface for Tiling: Tips and Techniques

If you’re ready to upgrade your space, whether it’s a big room or a small alcove, tiles are an excellent way to revamp your home’s look.

But it’s not as simple as throwing a few tiles on the wall and calling it a day. Prepping your surface is crucial to ensure your new tiles look great and last for years. From thorough cleaning to using the right adhesive, your tiling job is going to be much more successful with a good foundation to work with.

We’ve got why prepping a surface before tiling is critical to success, and a step-by-step guide to ensuring your tiling is the best DIY job in your home.

Let’s dive in.

Why does a surface need to be prepared before tiling?

Surfaces come in varying qualities, so preparing them as best as possible before tiling ensures a maximum chance of success.

A fully prepared surface means there’s less chance of the tiles breaking, slipping or cracking after placement – and your hard work can stay preserved for longer. A properly prepared surface can also help to prevent moisture from seeping underneath the tiles, which can cause damage over time.

Taking the time to prep the surface before tiling can also reduce maintenance in the long run. Grout replacement or tile reinstallation won’t be as frequent on a fully prepared surface before tiling.

And, of course, a properly prepared surface will have a more aesthetically pleasing finish. The tiles will be properly aligned and evenly spaced, and the grout will be sealed and protected from any dirt and grime getting in.

A step-by-step method for prepping any surface

So now you understand the basics of why we prep surfaces before tiling, let’s move on to the process you need to ensure your next tiling job is a success.

Here’s where to start.

Plan the layout

Planning ahead before you begin will save you time and money when it comes to preparing a surface for tiling. Measuring the surface area and budgeting for the materials accordingly will help you stick to a budget.

You’ll also need to account for the tile material and its thickness, what kind of spacing you need and whether a pattern is needed. Once you’ve decided the details, your tiling project will go more smoothly.

Clean surface thoroughly

Even if a wall or floor looks clean, hidden dirt and grime usually compromise the quality of your tiling job if not taken care of beforehand.

Sugar soap is one of the most effective ways to clean a surface before tiling. Available from most DIY shops, it’s a powerful cleaning solution that is specifically designed to remove grease, grime, and dirt from surfaces.

Once you’ve wiped down the surface with sugar soap, be sure to let the wall or floor completely dry before moving ahead.

Repair any damage

A damaged surface can compromise how well the tiles stick, so making any repairs needed before proceeding is vital. Cracks and holes will need to be patched with filler, while an uneven surface might need a thin layer of plaster to make it workable.

Sometimes a surface is too damaged to work with. If the surface is severely cracked or crumbling, it may need to be replaced entirely before tiling can begin. You should call in professional help as needed to solve the problem.

Make the surface level

If you’ve added some self-levelling compound to make the surface smooth, you may need to do some extra prep, like sanding, to give you the best possible surface for tiling.

If you’re working with existing tiles that you need to tile over, you either need to use a chisel to remove them or grind down the surface, so it’s rough enough to hold new adhesive.

Time for primer

Once the surface is fully cleaned and repaired for tiling, you can add some primer to it. Applying primer will help the adhesive to stick better to the tile, making the finish last longer.

The type of primer used will depend on the surface being tiled and the adhesive being used. Be sure to check the manufacturer’s instructions before using. You may need to apply more than one coat of primer, depending on the type of surface being tiled and the adhesive being used.

Apply the adhesive

The adhesive is literally the glue that holds everything together with tiling projects! If you can nail the adhesive application, you’ll have a great tiling job.

Beware: different adhesives are designed for use with different types of tiles and surfaces, so do your research ahead of time before you tile. Use a trowel to apply the adhesive, and smooth out the glue to ensure there are no air pockets or gaps between the tiles and the surface.

You might have excess adhesive while you’re applying the tiles to the surface. Using a damp sponge or rag, you can wipe away any excess as you work.

Seal the grout

Once you’ve grouted the tiles, it’s important to seal it closed. Grout is a porous material that can absorb any moisture or dirt over time, so sealing it helps to prevent discolouration and staining.

Apply the sealer to the grout lines, taking care not to get any on the tiles themselves. Use a small brush or roller to apply the sealer evenly, working in small sections. After the sealer has dried, you can apply a second coat if desired. This will help to ensure maximum protection for the grout.

Now you have a fully prepped and beautifully finished tiled surface, which not only looks great but will stand the test of time.

Wrapping up

Preparation is key to ensuring you have a successful and long-lasting tiled surface. With our tips and tricks, you’ll tackle your next tiling project in no time.

Thinking about making tiling a full-time thing? Our NVQ tiling courses are great for those just starting out in their career, while our professional tiling course is an advanced crash course that will have you from DIY to professional in no time.

Bathroom Tile Trends 2023

A new year has arrived, and with it comes the interior design trend announcements that are set to dominate the bathroom looks and designs of 2023.

From earthy tones to bold marbled finishes, this year promises to be interesting with the wide array of styles that are set to find their way into bathrooms, cloakrooms and wetrooms across the land.

You can use these as a point of inspiration for helping clients envision their ideal bathroom, or go all out with these trends – the choice is yours. Whatever you go for, each tile choice is sure to transform the bathroom.

Let’s dive into the top bathroom tile trends for 2023.

Handpainted tiles

Those looking for a more unique finish will be after artisanal touches in their bathrooms, including handpainted tiles. These can range from the subtle to the bold as clients opt for more eco-friendly and sustainable tile options.

These can be used anywhere in the bathroom, but work especially well as a feature in the room – so best not obstructed by bathroom furniture. A handpainted tile is sure to make a statement in any bathroom.

Colourful marble

Marble has always been a popular choice for bathrooms, but the in-vogue look has changed this season. Gone are the days of a fairly neutral marble tile, in favour of bolder colour choices that highlight the flecks in this luxurious natural stone.

The 2023 trend will see pinks, browns and even gold marble tiles enter the scene, the perfect choice for the client looking for an elegant, yet bold finish.

Pastel glass tiles

Having grown in popularity in the last few seasons, glass tiles have become the darling of social media bathrooms – especially in neutral or pastel colours. The trend has even extended out to pearlescent glass tiles which have a truly beautiful finish.

Pale pinks and blues have been a favourite of those looking to update their bathroom with glass tiles, but this type of tile works well with bolder colours too such as emerald green or navy. We definitely haven’t seen the last of this trend.

Terrazzo

Terrazzo has dominated interior design trends in recent years and shows no signs of abating this year. The look has expanded to include maxi-sized terrazzo chips in tiles for a real statement piece as well as bolder colour schemes being used.

These are a great choice for clients who wants a bold look in their bathroom. Whether they opt for a neutral backdrop or go all-out terrazzo, the finish will certainly be eye-catching.

Earth-toned hues

If your clients are looking for a natural finish to their bathroom, then they’re in luck as earth-toned hues are having a major moment in 2023. While the traditional neutral bathroom will never go out of style, new tiles in dusky pinks and sage greens are set to be big this year.

Earthy hues work well with natural stone or marble for an opulent contrast. They can also be used to create a contemporary setting or retro vibe – the options are endless with this trend.

Geometric patterns

Clients may be asking for geometric tiles to be incorporated into their bathroom designs for 2023 as the trend takes hold. This is set to be a popular option as the trend suits a variety of different bathroom styles.

Geometric patterns are completely customisable, from colour schemes to the pattern that clients decide on. From a central feature space in the bathroom against plain tiles to a subtle finish on floors and walls, this trend is set to stick around for some time.

Fluted tiles

The last few seasons have seen fluted curves enter the home, starting off in wood and furniture pieces, and now making their way into more permanent materials like tiles. These curvy tiles add glamour to any bathroom.

Fluted tiles add an interesting feel to any space, working well in a colour-blocked scheme to let the texture do the talking. They also work well in modern bathroom designs as they add some drama to the room without having to opt for bold colours.

Checkerboard

We’ve seen the checkerboard trend slowly spread through interior design in recent times, now entering the bathroom in a major way for 2023. These classic tile choices add a luxurious feel to any bathroom and can be incorporated into a wide range of bathroom designs.

The checkerboard pattern usually features on floors and walls, with one accent colour paired with white tiles for contrast. This adds some visual interest while still remaining neutral, depending on how bold the client wants to go with their colour choices. Overall, the checkerboard pattern gives a sophisticated finish to the space.

Morrocan

The rise of the Morrocan-themed bathroom comes following the popularity of Portuguese-style patterned tiles in recent years. Ranging from subtler finishes to all-out colour, Moroccan-inspired tiles can add warmth and pizzazz to any bathroom remodel.

A traditional Morrocan design often involves arches, so clients may be looking for tiled archways of all sizes and shapes to be added to their bathrooms. The tile designs for a Morrocan-themed bathroom can be unusual in shape or have intricate patterns printed on square tiles for the same look.

Art deco

Now it’s 2023, we’re well into a repeat of the Roaring Twenties era. As a result, art deco styles have been waltzing their way back into homes, including the bathroom.

An art deco-inspired bathroom would include bold contrasting colours, like black and gold for a classic feel. Tile shapes will be unusual as well, with scalloped edges reminiscent of the Golden Age. The result is a visually striking, yet classic finish suitable for any bathroom size.

Final thoughts

We hope you’ve enjoyed running through the hottest trends in bathroom tiles for 2023. While trends come and go, these beautiful options to refresh your space this year will last the test of time.

Want to learn how you can turn tiling bathrooms into a career? Our tiling courses are designed to take you from novice to professional in no time. Get in touch to find out more.

How much adhesive do I need for floor tiles?

If you’re about to lay a tiled floor, knowing how much adhesive to use and which type is best is crucial to the success of the job.

The last thing you want is having a tile slip from its place on the floor because there wasn’t enough for it to stick to. Likewise, you don’t want to have too much leftover to reduce your costs.

Then there’s the tile itself – which adhesive is right for tiling a floor? And what about the room itself? There’s a lot of different factors involved that could make or break your project.

Our top tips below will put you on the path to success with laying your tiled floor.

Types of adhesive

It’s important to get to know the different types of adhesive: ready mixed and powdered. Which is best for your floor tiling project comes down to a few factors. Let’s take a look at the differences between the two types and which is best for tile flooring.

Ready mixed adhesive

This type of adhesive is traditionally used for smaller tiles and walls. Ready mixed is more expensive as it’s premixed and easier to work with if you’re inexperienced with tiling.

Ready mixed adhesive is better for wall tiling, though the technology is moving on quickly. There are now some ready mix brands available that say they’re suitable for floor tiling as well as walls. For the moment, we’d recommend powder adhesive for tile flooring.

Powder adhesive

This type of adhesive is the gold standard for floor tiling and larger tiles. This is because you mix the powder with water yourself, controlling the level of moisture that’s in the mixture. Anything too wet won’t dry properly, and the floor tiles risk moving around after being laid and eventually cracking.

We’d recommend using a powder adhesive for floor tiling. Aim for a good quality one if you can afford it – powder adhesive is usually cheaper than ready mixed, but there can be a difference in quality. Some brands have fast-dry technology, which means you can get to grouting after just a few hours of the tile being laid.

Room considerations

Something else to consider is the room itself where your new floor is going to be.

First off, you need to consider the room you’re tiling and its use. Is it a busy hallway in the centre of a house, or in an upstairs cloakroom that doesn’t get a lot of use? Floor tiles will be subject to more movement than a wall tile, so you may need more adhesive than you think to make sure the tiles won’t budge out of place.

Another thing to think about is the moisture levels of the room. A bathroom or wetroom would have more moisture hitting the tiled floor than a dining room or kitchen. This is where the type of adhesive you decide on matters. Powdered adhesive is recommended for floor tiles generally, but especially so when there’s a wet environment where the moisture can’t evaporate as quickly.

Do different tiles need different adhesives?

There’s not a significant difference in which adhesive you need for a floor tile, though there can be some variation with how much adhesive you need. A porcelain tile, which is denser than a ceramic tile, will need more adhesive to stick.

You should also consider the size of your tile before applying adhesive to your floors. A lighter tile, such as a ceramic one in a smaller size, won’t need as thick a layer of adhesive. On the other hand natural tiles like stone, or anything in a larger size will need more depth in the adhesive.

How much adhesive do I need?

To work out how much adhesive you need to buy, you’ll need to know the total square metres of the floor being tiled and how far apart the tiles are being spaced from each other. A rough guide is that you’ll use 5kg per square metre when you’re tiling a floor. This can go up or down depending on the type of tile and how far apart they’re set from one another.

Working out how much adhesive you need doesn’t need to be a hard calculation. You can find different calculators online to help you work out how much adhesive you’ll need. Also, most adhesives will have instructions on them and tell you how much it will cover.

When in doubt, buy slightly more than you need to account for mishaps and to avoid an unexpected trip to the shops.

How to apply adhesive

You will need:

–  A floor trowel
–  Bucket
–  Mixing paddle
–  Protective equipment: eye goggles, mask, gloves
–  Spacers

To start, you’ll need to mix your adhesive. Follow the package instructions to find out how much water you’ll need to mix with the powder. Be sure to mix thoroughly with the mixing paddle until there are no lumps.

Use your floor trowel to spread a layer of adhesive over the areas you’re tiling. Start off with a small section first, as the adhesive can dry quickly depending on which brand you’ve chosen.

Push your tiles into the floor with the desired spacing in between. Be sure to place the spacers to maintain the distance while they’re drying. Be careful not to move the tiles while they’re still wet, as they may dry slightly crooked.

Once the adhesive is completely dried, you’re ready to grout. This could take anywhere from a few hours to a couple of days, depending on the room and tile.

Then, you’re all finished and your floor is fully tiled!

Wrapping up

By now, you should feel confident in understanding the different factors that come into laying a tiled floor, and how much adhesive you need to properly lay your tiles. You can always come back to this guide if you want to brush up on your knowledge.

Fancy sharpening up your skills even further? Our professional tiling courses will give you all of the expertise you need to lay a fantastic tiled floor.

Epic Outdoor Tile Ideas To Make Patio Areas Shine

Patios are so popular in the UK because they’re easy to maintain, don’t require the care that grass does and will also stand the test of time. You can do much with a patio, including using it for dining, enjoying working outside or just socialising in the garden.

But let’s face it; the average patio can be boring. Grey paving stones might be cost-effective, but they don’t exactly ignite the imagination, do they?

Luckily, there are plenty of alternatives to traditional patios, including using tiles to make yours stand out.

In this post, we’ll reveal some fantastic ideas for your patio.

Quirky Ideas

Tiles can be sophisticated, minimalistic or quirky, depending on your goal. Here are some fantastic ideas for quirky tiles that never fail to make an impression and add an Avant Garde element to your outdoor space.

Chessboard Tiles

Chessboard tiles are a great choice if you want to add an artistic feature to your patio. You could use black and white porcelain tiles for the checkers, creating a more traditional look, or opt for bolder colours that contrast with the background.

There are plenty of large chess pieces too, which turn a standard patio into a fun-filled game.

Geometric Tiles

Geometric tiles are perfect if you’re looking to create an impactful pattern on your patio, and they come in all shapes and sizes. You can find triangular shapes, circles and squares, and zig-zag patterns that add dimension to the design.

You could create a modern theme using white or grey geometric tiles, which come alive with vibrant foliage and plants. Or, use bright colours for a more daring look that stands out against the greens of nature.

Animal Print Tiles

If you want something unique, why not go for animal print tiles? They’re not for the faint of heart but boast an eye-catching style that’s sure to make your patio stand out – whether you opt for bold leopard prints or subtle zebra patterns.

Remember that these tiles will always become a focal point, so you might want to think before turning the patio into a tribute to classic prints.

Modern Designs

Modern tiles can create various styles, from minimalistic to classic and even a bold and beautiful finish. You can do so much with these tiles, so don’t be afraid to experiment.

However, modern designs also need to streamline with the rest of the outdoor space because they’re all about creating a common theme that doesn’t clash with other elements.

Tiles In Neutral Tones

Neutral tones are timeless and create a peaceful atmosphere perfect for relaxing with friends. To create an eclectic style, the tiles can be the same colour or all different shades of brown, grey and white.

The great thing about neutral tones is that they’ll look beautiful in any season, so you won’t need to change them up depending on the time of year.

Slate & Mosaic Combo

Slate and mosaic tiles are an excellent combination for any patio because the slate will provide a strong base with added character. The mosaic pieces can create designs that add an extra touch of style – from geometric shapes to swirls and abstract patterns.

These designs also work well around a centrepiece, such as a BBQ or a firepit, providing an eye-catching frame.

Metallic Tiles

Metallic tiles will make your patio look like it’s from the future and come in various styles. There are so many shades to choose from, including silver, gold and bronze, and you can mix them up for an exciting design.

Just be sure to balance the metallic tones and other elements on the patio – such as plants and furniture – so that they complement each other instead of clashing.

Traditional Tiles

Remember that traditional designs still have their place and look fabulous in rustic and country-style gardens. Here are some fantastic tile options if you prefer to keep your present in the past.

Natural Stone

Natural stone will add a timeless look to any patio and comes in different shapes and sizes. You can find bolder tones for an impactful design or choose light colours for a subtle style. There’s much to love about natural stone, but people are often put off because it’s challenging to work with.

However, natural stone lasts for so long, so it’s worth considering investing in tiling courses to learn to work with different tiles.

Terrazzo

Terrazzo tiles have added texture for a unique finish and are perfect for creating patterns on the floor – from herringbone designs to chevron styles that make curves around the patio area.

Also, terrazzo tiles come in all colours, so you can find something that goes with your garden’s overall theme.

Traditional Mosaic Tiles

For a classic look, mosaic tiles are a must. These come in all sorts of shapes and sizes, so you’ll be able to create an interesting design that brings the patio together with nature – not to mention they’re also straightforward to clean.

When you know how to work with mosaic tiles, you can make the most of their intricacy and create something unique to your outdoor space.

Just remember to choose complementary colours, such as blues and greens, that blend well with the rest of your garden. However, if you want to go all out and create something unique that catches the eye, bold colours with vibrant designs will work well.

The Bottom Line

Plenty of fantastic tile ideas will bring life to your patio area, adding colours and patterns that make it a unique outdoor space. With so many options available – from animal prints to geometric designs – there’s something for everyone.

So why not get creative and find one that works best for you? If you’d like to develop your skills, we offer in-house tiling courses designed to ensure you qualify as a tiler in a few days, rather than spending ages online taking a course or giving up your job to study full-time.

Feel free to contact us and learn more.

Comparing the Different Types of Tile Finishes

Tiles are ideal for homes and businesses because they look amazing and are easy to maintain. There are so many types available, and each has its benefits – but you probably know what they are already.

However, knowing your porcelains from your natural stones and ceramics is only one part of the puzzle; what about finishes?

With so many tile finishes to choose between, it’s difficult to know where to start – but we’re here to clear everything up.

Read on to find out which tile finishes are best for your needs.

Honed Tiles

Honed tiles are perfect for those who want a matte finish with contemporary appeal. A honed tile’s characteristics are a smooth finish, which is highly water resistant but not overly glossy.

Manufacturers achieve the look by gently polishing the surface until it wears down to create a smooth, subtly shiny aesthetic.

The most popular tiles with honed finishes include travertine, limestone and slate. Better still, they’re perfect for bathrooms and kitchens as honed tiles are easier to clean and can withstand water damage.

Polished Porcelain Tiles

Porcelain tiles are made from a denser clay, fired at a higher temperature, giving them a harder surface and enhancing durability. These tiles are highly popular, as they’re cost-effective and durable, as long as you take care of them.

While porcelain is available in a matte finish, many people love the polished finish because of its premium aesthetic. Manufacturers gradually polish each tile until it creates a permanent sheen, which will catch the eye and look impressive as a flooring option.

Tumbled Finish Tiles

Tumbled tiles are ideal for creating an aged look in any home. The process involves tumbling the tiles in a drum with small pieces of stone or ceramic, which gives it a weathered appearance.

The most popular types of tile with a tumbled finish include marble, limestone and travertine – but be aware that this type of tile needs a sealant to protect it from water damage.

If you want to bring some rustic charm to your interior design, a tumbled finish tile won’t let you down. Another bonus of these tiles is that each has its look, so they’re one of the more unique options.

Brushed Finish Tiles

A brushed finish is perfect if you’re looking for something with more texture. In many ways, it’s similar to the tumbled finish, but brushed tiles are more uniform and somewhere between rustic and contemporary.

Manufacturers achieve a brushed finish by sweeping diamond-tipped brushes over the tile. Limestone, slate and sandstone are popular options as they create an authentic look that is perfect for a business or restaurant.

Satin Finish Tiles

A satin finish is a happy medium between polished and matte. With this type of tile, you’ll get a smooth surface with a gentle shine that doesn’t show smudges or fingerprints.

A satin finish might be right for you if you’re looking for the perfect balance between contemporary and classic. You can find this type of finish on tiles made from limestone, marble, granite and porcelain – so there are plenty of choices.

Minimalists love satin tiles because they’re not as overbearing as polished varieties but still look beautiful.

Matte Finish

Matte tiles have a smooth surface but don’t reflect light the same way as other types of tiles. They’re perfect for those who want something understated and timeless for their property.

Ceramic and porcelain are the most common types of tile with a matte finish, but you can also find this type of finish on natural stone tiles. The best thing about matte tiles is that they’re easy to maintain; just use a damp cloth and gently wipe them when they’re dirty.

Riven Tiles

Riven tiles have a natural split surface, which creates a rustic look in any home. The finish reflects the look of natural stone, but it’s also suitable for individuals who want to buy cheaper tiles but still get the characteristic look.

Manufacturers dry tiles and split them along the natural fissures to create a riven finish. Natural stone tiles can also go through the process to bring out – and add depth to – their unique textures and patterns.

Choosing The Right Tile Finish For Your Needs

When choosing which tile finish is best for your needs, there’s no right or wrong answer. Instead, each has pros and cons, and it’s a matter of personal choice.

Here are some factors to consider:

Difficulty When Laying The Tiles

Some finishes, such as riven tiles, can be difficult to lay. If you’re not experienced in laying tiles, you can choose the simple option or train in tiling. There are plenty of flexible NVQ tiling courses, and you could develop a successful career.

The Look You Want To Achieve

As we’ve seen, each tile finish creates a different look, so consider the overall aesthetic you want for your property before making a decision. Polished and satin tiles are great for high-end interior designs, while matte and honed tiles are more rustic.

How Much Maintenance The Tiles Need

Some finishes require more upkeep than others; for example, tumbled tiles need sealing regularly. Consider how much time you’re willing to spend on maintenance before choosing a particular finish.

Budget

Riven and brushed tiles are usually the cheapest options on the market, while polished tiles tend to be the most expensive. However, they’re worth the investment if you want a high-end finish that oozes aesthetic appeal.

Final Thoughts

Now that you know all about the different types of tile finishes, it’s time to decide which one is right for you. Whatever kind of tile you choose, be sure to do your research to find a finish that works with the rest of your home.

With so much choice on the market, it’s essential to take your time to weigh up all options. When you lay them correctly, tiles can last for years and look beautiful in any building, so why not invest in a tiling course and enjoy a new career?

Professional tilers are highly sought after and have excellent career prospects for the future. Enquire about our courses today, and we’ll get back to you.

How to Plan a Tile Layout: Tips and Tricks for Optimal Design

One thing we can always be sure of is that tiles will never go out of fashion. From the lavish designs from Roman times to the retro 60s rooms and today’s more minimalistic options, tiles continue to be popular and an excellent choice for decor schemes.

While tiles can increase the value of a property and give it a unique design, you have to know how to make the most of them.

Planning a tile layout can be tricky. You want to ensure that you are enhancing and not crowding your space while creating a visually appealing design.

This blog post will share tips and tricks for planning a tile layout that will look great in any property.

Deciding The Room’s Function

The first step in planning a tile layout is to decide the room’s function, as it helps you determine what style of tiles would be most appropriate.

For example, if you’re tiling a kitchen or bathroom, you’ll want to choose durable and easy-to-clean tiles that can withstand water splashes. Floor tiles need to be slip resistant and durable, but if your tiles are more for decoration, you can have more fun with the selection process.

Once you know the room’s function, selecting the correct type of tile will be much easier.

Creating A Moodboard

Next, you need to determine the overall style of the room and what type of tile will complement it. You can do this by using a mood board, which will help you look at your room’s style and theme and choose tiles based on what will work best.

To create a mood board, start by gathering inspiration from magazines, design websites and Pinterest. Then, look at different colours, textures and patterns and see which is best for your needs.

Planning The Layout

Now that you’ve selected your tiles, it’s time to start planning the layout. There are plenty of ways to do this, but the most important thing to remember is the tiles should fit seamlessly into the room without compromising the rest of the decor.

Make Space

One thing to keep in mind is the size of the room and the furniture placement. You don’t want your tile design to be too busy or overcrowded, so be sure to leave some negative space, which can be used to highlight other design elements in the room.

Consider The Grout

Another essential element is grout, which fills in the spaces between tiles. There are many different colours and types of grout available, so be sure to select one that will complement your tile choice. If you’re unsure, you can always ask a professional for help.

Install The Tiles

Once you’ve planned your tile layout and selected the suitable materials, it’s time to install the tiles. If you’re not comfortable doing this yourself, there are UK tiling courses that will teach you everything you need to know about tiling.

Tile Layout Inspiration

The best thing about choosing tiles instead of other flooring types is their versatility. There’s so much you can do in terms of patterns and colours, including more traditional aesthetics or contemporary designs.

Herringbone

One popular tile layout is herringbone, which uses rectangular tiles to create a diagonal pattern. The design is perfect for those who want to add some visual interest to their space without being too overwhelming.

Chevron

Chevron patterns are also popular and fit well into traditional and contemporary designs. They use V-shaped tiles to create a zigzag effect and can make a small room look bigger.

Brick Pattern

Another tile layout perfect for small spaces is the brick pattern, which uses rectangular tiles in a horizontal or vertical design, similar to bricks on a wall.

The beauty of this design is that you can tailor it to your needs, with any size or type of tile, so you can really get creative with it.

Subway Tiles

Subway tiles are a classic choice that never goes out of style. They can be used in any room and come in various colours and sizes. While some think these tiles can look cheap, many love them for industrial styles.

Mosaic Patterns

Mosaic patterns are perfect for those who want to add a bit of personality to their space. They come in various colours and shapes, so you can get creative with them. Some people love creating intricate designs, while others prefer bold colours.

Mix Two Distinctive Colours

Mixing two distinctive colours is one way to make your tile layout stand out. For example, you could use black and white tiles to create a stark contrast or go for something more subtle, like blue and green.

It’s a great way to add some visual interest to your space without being too overwhelming, and when done right, it can add new dimensions to a room.

Modular Looks

Modular looks are perfect for those who want to create a more uniform design. The tile layout uses square or rectangular tiles laid out in a grid pattern, making small rooms look bigger.

You can get creative with this tile layout by using different colours, sizes and textures of tile. For example, mix large tiles with smaller ones for a more contemporary effect, or arrange smaller tiles around a larger one and replicate traditional designs.

Final Thoughts

Planning a tile layout doesn’t have to be complicated – follow these tips and tricks, and you’ll be sure to create a space that looks amazing. With so many fantastic designs available, you can get creative and add new dimensions to your decor.

Taking a professional tiling course can make the entire process more manageable. Many of our graduates go on to find a new career, giving them flexibility and the opportunity to be their boss.

We offer a range of tiling courses for beginners through to experts and pride ourselves on the professional experience we offer. If you’d like to discuss any of our courses, please don’t hesitate to contact us.

How to Become a Tiler: The Ultimate Guide

For many people, the idea of spending the rest of their working lives in front of a computer isn’t appealing. The days can be tedious, and the work can seem repetitive because an office environment isn’t for everyone.

If you prefer working with your hands, you might want to explore learning a trade. Electricians, plumbers and tilers are more in demand than ever, and these skilled professionals make good money.

Whether you plan to join a company or work for yourself, tiling is an exciting and varied career with plenty of opportunities to move up the ladder.

Better still, you don’t need to go to university, and many flexible courses are available, meaning you don’t need to study full time.

What Prospects Do Tilers Have?

Prospects

There are plenty of opportunities for tilers in the UK. The service will always be in demand due to an increase in new developments across the country.

With more homes being built, there’s a greater demand for tilers to fit kitchens and bathrooms.

Of course, it’s not just new builds that require the services of a tiler. Older properties also need upkeep, and many homeowners choose to renovate rather than move. Tilers that decide to specialise in refurbishments can also look forward to excellent prospects.

According to UK Talent, the average hourly earnings for a tiler is £17 per hour, which is significantly higher than the UK average hourly rate of £13.57. Experienced tilers can exceed £40,000 a year, and the earning potential for tiling businesses is unlimited.

How To Become A Tiler

Now for the important part; how do you become a tiler? Well, it’s not as challenging as you might believe. There are numerous options available, but your route will depend on your age and current qualifications.

Attend College

If you’re still in full-time education, you could consider studying for a tiling-related qualification at college. While this is more suitable for younger individuals, adults can take this route – though you’ll have to attend full time.

The best route to a tiling career through college is to take the Diploma in Wall and Floor Tiling course. However, to get straight onto the Level 2 diploma, you’ll need two GCSEs at grades 9 to 3.

The Level 1 Certificate is an entry path to the diploma, so that’s an option for people who don’t have the necessary GCSEs.

Apprenticeship Scheme

Another option is to join an apprenticeship scheme. These schemes give young people on-the-job training in their chosen trade. Apprenticeships are a great way to learn because you’ll be working with an experienced tiler, earning a wage while you do it.

There are three types of apprenticeship available in England:

Intermediate Level Apprenticeship: Equivalent to five good GCSE passes, this apprenticeship will take around 12 months to complete.

Advanced Level Apprenticeship: If you have two A-Level passes or other relevant qualifications, an advanced apprenticeship is for you. It will take between 18 and 24 months to finish.

Higher Apprenticeship: A Higher Apprenticeship is ideal for people who want to achieve a degree or HNC/HND whilst working. You can expect to spend two to four years completing a higher apprenticeship.

While some apprenticeships are suitable for adults, they often come with low pay and are challenging to find.

Tiling Courses

If the above options aren’t suitable for your needs, don’t worry; you have other options. Intensive tiling courses could give you vital qualifications in just 13 days of training.

The 13-day tiling course is designed to equip you with the skills and certifications you need to become a professional tiler. You can even ask for an NVQ assessor to visit you while working, but the certificates you get from the course will demonstrate your knowledge and help you to secure clients.

Are Tiling Courses Worth It?

Tiling Courses Worth It

Are tiling courses worth it? Yes – if you want to become a tiler. Tiling courses are a great way to switch careers later in life, and many people are making massive changes due to the impact of the pandemic.

A 13-day course is intensive and designed for aspiring pro tilers. However, there are plenty of alternatives for novices or people who want to tackle that home DIY project alone.

We recommend that anyone looking to gain work as a tiler takes our 13-day course because it covers everything, but you can take a shorter course first to decide whether tiling is right for you.

The Advantages Of Becoming A Tiler

There are plenty of advantages to becoming a tiler, spanning further than excellent earning potential. Let’s take a look at them.

Freedom And Flexibility

As a tiler, you have the freedom to work as little or as much as you want. Some people choose to work part-time and can take on small jobs to supplement their employment income, while others work on large projects that will keep them busy for weeks.

You might work with others, or you could work alone on projects, which benefits people who prefer being their boss.

Creativity

A lot of people don’t realise that being a tiler is a creative job. Yes, you’re working with tiles, but you also have the opportunity to be creative with patterns, colours and finishes.

While some projects will be pretty restrictive, other clients might ask you to create a pattern or design an exciting colour scheme. Many tilers work on refurbishment projects for residential and commercial businesses, and it can be very satisfying to see the finished result.

Independence

As a tiler, you’re likely to be self-employed, which means that you have the freedom to work when and where you want. You can take on as many or as few jobs as you like, and there’s no need to ask for permission to take time off.

Final Thoughts

Becoming a professional tiler is more accessible than many think, and there are plenty of opportunities to build a successful business once you qualify.

Whatever you decide, we’re confident you’ll love the convenience of our 13-day tiling course and everything it offers regarding professional growth and development.

Please don’t hesitate to contact us if you’d like to learn more.

Waterproof Paint vs Tiles: The Ultimate Showdown

When decorating a home, a few options are available, including tiles or waterproof paint. Both have advantages and disadvantages, so deciding which is the best option for your needs can be challenging.

In this blog post, we will compare waterproof paint vs tiles and help you decide which is the better option in terms of cost and longevity.

Let’s jump in.

What Is Waterproof Paint?

waterproof paint

Waterproof paint is a type of paint that is designed to resist water, and people use it in areas where there is a lot of moisture, such as bathrooms and kitchens. You can apply waterproof paint to walls, floors, and even ceilings at a relatively low cost.

However, this paint has its drawbacks, including its inability to last as long as tiles. Many people choose it because they need a roller and brush, which pretty much anyone can use.

What Are Tiles?

blue tiles

Tiles are thin pieces of stone or ceramic used to cover floors and walls. They’re popular in bathrooms and kitchens because they are easy to clean and maintain, but tiles require special skills.

The best thing about tiles is that they are durable and long-lasting, so you won’t have to replace them as often as you would with paint. However, they can be more expensive than paint upfront.

There are so many tile types to choose between, including:

Ceramic: Combination of clays and other materials. Ceramic is a highly adaptive tile and one of the most popular choices.

Porcelain: Similar to ceramic tiles in many ways, the clay is usually more substantial.

Stone: Natural stone tiles are a premium type of tile which use marble, granite, and slate.

Glass: Manufacturers make glass tiles by fusing silica with other minerals. They look great and are highly durable but come with a hefty price tag.

Cost Of Waterproof Paint Vs Tiles

When it comes to cost, waterproof paint is usually the cheaper option upfront (no surprise there) – although waterproof paint is usually more expensive than other types on the market. Tiles are more expensive, but they come in all shapes, sizes and styles, so you might find that some cost more than others.

For example, ceramic costs less than natural stone, and specific designs, including marble and terrazzo, will be more expensive than plain patterns (in most cases).

However, tiles are a better investment in the long run because they last much longer than waterproof paint.

Paint will eventually peel and crack, especially in high moisture areas like bathrooms and kitchens, so you need to not only perform regular maintenance – but repaint every few years.

Which Is Better?

applying tiles

When choosing between tiles and waterproof paint, it’s essential to consider the pros and cons of each. Let’s look at some of them in more detail and other factors that should influence your decision.

Mould Prevention

Mould can grow on tiles and paint, but it’s more likely to take hold in damp areas with little or no ventilation.

Waterproof paint contains chemicals that help to prevent mould growth, but it’s not foolproof. Tiles, on the other hand, provide a physical barrier that mould cannot penetrate, so if you’re worried about mould, tiles are the better option.

Ease Of Maintenance

Waterproof paint is easy to apply and doesn’t require special skills or knowledge – which is why many people choose it over tiles. However, it’s important to remember that waterproof paint requires reapplication every few years (or sooner if you live in a humid climate), which can be time-consuming and expensive.

Tiles, on the other hand, are straightforward to clean and maintain. You can either sweep or vacuum them regularly; if they get dirty, you can mop them with soapy water. The only drawback is that tiles can be trickier to install than paint (although this will depend on your DIY skills).

Longevity

As we mentioned earlier, waterproof paint does not last as long as tiles – in most cases; you need to reapply it. On the other hand, tiles are much more durable and long-lasting – in fact, they can last for decades with proper care.

The key to ensuring you get years of use out of tiles is to install them properly or hire someone to do it for you. Tiling is one of those skills that can open up other doors, and there are plenty of tiling courses to teach you everything you need to know.

Some people go on a course to tackle a home renovation project and then enter into a new career because there’s such a massive demand for tilers – and you can earn a lot of money.

Aesthetics

OK, some people might prefer the look of paint, and it’s entirely up to personal preference. However, while the paint is easier to change when you feel like it, tiles can create a more premium aesthetic, which enhances the rest of their interior.

If you’re undecided, we suggest looking at some examples online or in magazines to get an idea of what each looks like. Remember, paint inevitably fades, and even waterproof versions won’t achieve the premium look many people want, so it’s worth paying a little extra.

Cost

Finally, let’s talk about cost. As we mentioned earlier, waterproof paint is usually more expensive than other types on the market. Tiles are more expensive, but they come in all shapes, sizes and styles, so you might find that some cost more than others.

However, you can also tile the areas that need the most protection and save costs by using paint for places that don’t see much water.

The Bottom Line

OK, so we’ve looked at some key factors you need to consider when choosing between waterproof paint and tiles – but what’s the bottom line?

In our opinion, tiles are the better option for most people, as they’re more durable and easy to maintain, making them an excellent investment for your home.

Better still, you can take one of our tiling courses and tackle any job easily, ensuring you make the most of your property and learn a valuable new skill.