Year: 2020

Tessellation Or Tiling? The Genius Of The Tiling Pattern

Tessellations – that is a word that takes you back to your Maths classes! Do you remember looking at the different tessellations and coming across words such as vertex and polygons and working out the patterns? (Or maybe not!) So what is the definition of a tessellation (tiling pattern)? Well, this is when a surface is covered with a pattern of flat shapes so there are no overlaps or gaps. The shapes in the pattern don’t need to be the same but it must repeat.

Bathroom TilesThere are different combinations of tessellations (tiling patterns):-

Regular tessellation, semi regular tessellation, ‘other’ tessellations and vertex.

The regular tessellation (tiling) patterns are made up of three shapes – triangles, squares and hexagons and for the semi regular tessellation the rule of thumb is the pattern at each vertex (corner point) must be the same.

‘Other’ tessellations could include the use of curved shapes or circles – but that could make for some seriously complicated tiling pattern designs. Clever stuff nevertheless.

So, by taking a look at regular tile patterns using rectangles, shaped tiles, squares, pentagons of all sizes or mixing octagons and squares in a tile pattern, how can these be transferred to your tiled wall or floor designs?

The choice of tile laying patterns are wide and varied, and, when considering which pattern to lay, they range from patterns such as small format brick bond to staggered brick bond, horizontal herringbone, block herringbone, linear, hexagon, fan, and basket weave to make a few.

And each tiling pattern will take careful planning when working out your design and will depend on the tiling project. For instance, with your client choosing a diamond pattern, when measuring up and pricing up, you will need to consider that there is likely to be more cutting involved and more wastage.

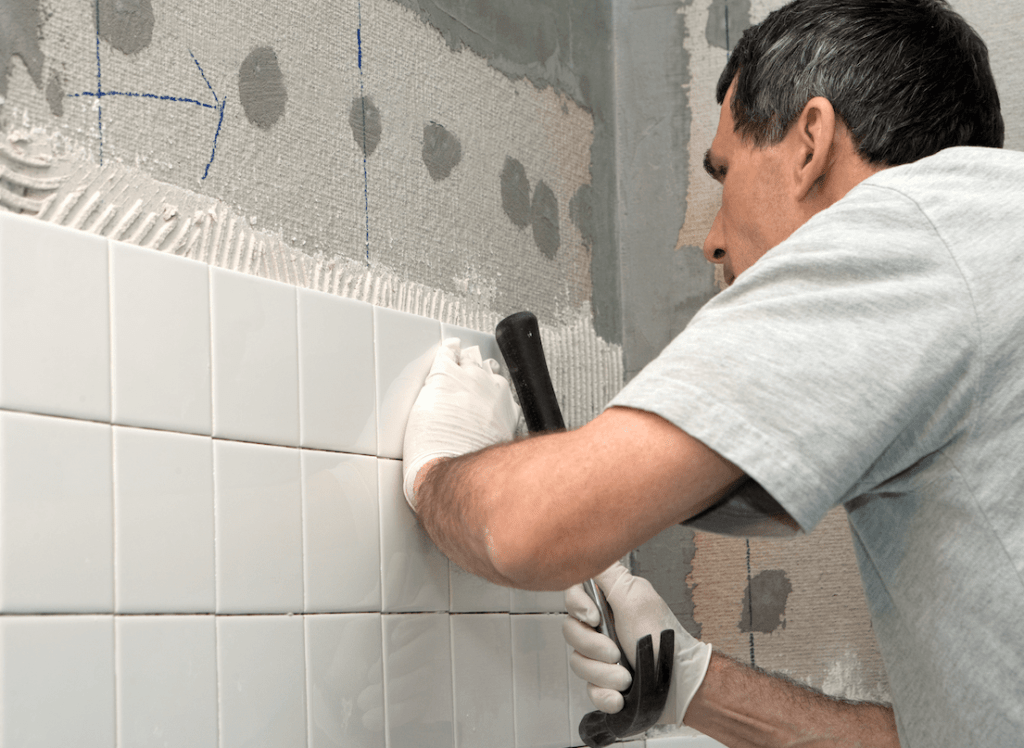
If your client is looking to have the basket weave pattern (which was made extremely popular back in the 1930s with the fashion for parquet flooring), it is worth considering when choosing the tiles that this pattern works better when you choose a tile with a rectified edge so that you get a 1mm grout finish. So what is a rectified edge tile? Basically, it is a fired ceramic or porcelain tile which is cut or ground down to an exact size mechanically and the tile edges are precisely cut at a 90-degree angle. With such a precise, clean and uniform edge it will result in a seamless look to your tile installation.

The tile pattern that is chosen will also give a different perspective on the size of the room to be tiled;  by using a vertical herringbone pattern it is likely to draw the eye upwards which will create an illusion of height in a low ceilinged room. Likewise, the horizontal herringbone will give the illusion of the room being wider. And using a pattern such as the horizontal herringbone it is likely you will need to calculate approximately for an additional 15% of tiles to take into account the additional cuts you will need to do.

So with all the different combinations of the tiling patterns and designs there is huge potential to create stunning tile installations that will continually test your skills from measuring up and working out how many tiles are required,  learning to minimise wastage from your design and maximising your earning potential. With tiling being an industry that is growing fast in the UK, providing a career that will bring challenges and rewards, tiling is indeed – genius!


Tiling A Barbeque Area

Class Tiling Scaled

What would your ultimate barbeque area look like? There are so many options – you could build a permanent structure, have a traditional barrel style coal burner, or opt for one of the more extravagant gas burning stoves. Whatever you decide to cook on, having a bright new tiled area for the barbeque could add that extra piece of style.

You don’t have to restrict yourself to concrete slabs for the floor, and decking may not be the most practical base for your cooking area.

Choosing garden floor tiles instead will give your barbeque area the feeling of being a real outdoor kitchen.

How to choose outdoor tiles

Some tiles have a particularly slippery finish, even in a bathroom this can be a potential hazard. When tiling outside, high gloss, shiny tiles will be lethal with drinks or grease spilt on them, or after a downpour of rain. Think about who will be using the area and make sure it is safe for everyone.

Porcelain tiles are often rated for use outdoors as well as inside. They are harder wearing than ceramic tiles and much less absorbent, so repel the water better. Choosing a matt finish, or even better, a textured finish will offer much more grip when used on a patio or barbeque area.

Preparing a barbeque area for tiling

Far and away the best surface to lay outdoor tiles on will be a concrete pad. As opposed to laying patio slabs which may be porous, a tiled outdoor area will need to repel water. The concrete should be laid as smooth as possible, with a gentle slope towards either a drain or a garden area which can cope with any water running off. This slope does not need to be dramatic, just enough to stop water pooling on the tiles.

Laying tiles outside

Ensure that your concrete slab is completely dry before starting tiling. Thoroughly clean the concrete area before applying a waterproof membrane or treatment to the base before the tiles.

When tiling outside, the entire base should be covered with adhesive. The adhesive should ideally be rated for outside use and waterproof. A polymer modified, dry set mortar will be perfect for the job.

Apply a primer to the back of the actual tiles too. Use neat cement or some of the adhesive mix itself. Allow to cure slightly before laying onto your wet bed.

Be sure to clean as you go to avoid leaving unsightly stains on the tiles.

Finally, use an outdoor rated, fully waterproof grout or all weather jointing compound. As with the adhesive, making sure that you clean as you go will help produce a perfect finish.

We’ve all found projects which need our attention at home during lockdown, quite often including tiling. Brush up on your tiling skills with one of our many courses.

Get in touch today and start learning a new skill.

UK Pro Tiling Quiz Night!

For the last few weeks we have had to adapt to a new way of living and working with some of us having to learn new skills (like how to home school the kids! ),new ways of working and communicating with each other. And new words like Zoom, House Party and Tik Tok that have found their way into our vocabulary and making a big impact on our lives. And as we begin to emerge from this forced lockdown period we will need to think a ‘bit outside the box’ as to how to manage and assess the risks of how we live, learn and work for the foreseeable future.

Tiling training will recommence in a few weeks, and like all businesses it will be a carefully managed return. So, if you have been working from home or maybe doing a bit of DIY, or just had more time to think about where your working future lies, maybe it is time to think about taking on a new skill or change of direction from your current job.

During the lockdown period and with all the social distancing measures in place, the nation has discovered a new found passion for quizzes. From online pub quizzes, to socially distanced quizzes with neighbours, we have been testing our knowledge on all manner of subjects. But haven’t come across a quiz about tiling and everything related to tiling or training – yet! All those professional tiling terms you may or may not of heard of, and are not quite sure how they apply to the business of tiling, we can take a look at some of the tiling terms used and start our journey to become a ‘tiling mastermind’!

UK Pro Tiling Training has a great set of resources on the website to refer to.

Question – So what is an NVQ?

This is a work-based assessment qualification and not a training course, and something that have been considering to undertake.

Question – What tiling tools should I need?

A tiler’s toolbox consists of a varied number of professional tools with the top tool being a good set of manual and electric tile cutters.

Test your knowledge! and see if you know what the following tools are and their function:-

Grout Float – flexible rubber pad with a ‘C’ shaped handle

Tile Levelling System – to help prevent tile slippage

Tile Trowel – important for proper coverage of adhesives

Spacer Wedges – used to space tiles at an equal distance

Question – How do you apply tile adhesive to walls?

The adhesive will need to be applied with the trowel at a 45-degree angle reducing slightly as the adhesive is applied up the wall.

Question – what adhesive should you choose?

Adhesive should be applied according to the room/ area you are tiling. For example, waterproof adhesive is a must around sinks, showers and bath.

For all the questions you may have about tiling, which course to undertake, whether to continue your professional development by completing an NVQ, or what not to do when it comes to good tiling practise – UK Pro Tiling Training will have the answers for you.

Social Media And Other Ways To Generate New Business

Many people will have been staring at the inside of their houses for a few months. It’s highly likely that lots will be looking to make some changes to brighten their homes.

As tilers, it is a great time to start letting people know that you are out there and raring to go.

Website

It may sound daunting but building and hosting a website can be a cost effective and simple process. Providers such as Wix, Squarespace and GoDaddy offer complete packages with simple to use templates. You’ll just need to provide a great description of your services and some quality images.

Facebook

It is still possible to have an effective Facebook page for your tiling business which is free. There are many options to pay to promote your page, and some are worth considering, where you only pay for the number of clicks your posts generate. Use your friends and family to share your page and remember to keep new content appearing regularly.

Blogging

A regular blog can be a productive part of marketing yourself. Do some research and read up on popular blogs kept by other sole tradespeople. You’ll find they are the ones which produce consistently regular material. They will also be the blog posts which aren’t all sell, sell, sell. Imagine your customers’ tiling quandaries and answer them before they are even asked. Articles about different types of tiles for different rooms are great for appearing on potential new customers’ searches.

Google

It is still free to have a Google business profile and you should absolutely have one. Set up a business account and you’ll find you can be found across searches and also via Google Maps. You can include images from your portfolio and give all your contact details. There are iOS and Android apps too to help you manage your business on the move.

Trade Directories

Paying to be featured on one of the new trade directory sites and apps could be lucrative. As with all digital promotion, fill your entry with as much detail and examples of your work as you can. Many of these trader directories are promoting via television and radio advertising on your behalf.

The Tile Association

An independent body which has a directory of tilers, and their logo can add some kudos to your marketing material. They can inspect work when a dispute occurs and support you through this. Being listed as one of their approved tilers puts your name forward to the thousands of hits their website gathers each month.

Pinterest, Twitter and Instagram

All social media sites are worth having a presence on. Most offer free entry level packages for business as well as more premium packages to push your brand. Only use the social media sites which you know you will have time to post regular content on. It might be worth investigating whether using a social media manager or marketing agency to post regularly on your behalf might be beneficial in the long term.

If you’ve been unable to work during this pandemic, why not consider refreshing your skills with one of our courses? Get in touch today and see how we can help you get your business back up and running.

Tiling Around A Window

Tiling large, flat space can seem straightforward, but its the slower, tricky areas, like around windows which could ruin the finish if care isn’t taken.

Windows present us tilers with a whole set of potential problems. Inevitably every tile around the window, and in the window reveal, will need to be cut. These cuts are the most important you will make, as tiled walls and reveals around a window, which aren’t square with the frame, will draw a critical eye from anyone walking into the room.

Adjusting Wall TilesSymmetrical tiling

There will be very few occasions when a window doesn’t look best sitting central to the tiles around it. Find the centre point of the window recess and use a wooden batten or similar as a temporary support as you work. If there is no sill, the lower edge will need to overlap (the thickness of a tile plus adhesive) to be able to fit the trim flush and square.

Laying the tiles

Work outwards. This way you’ll be starting with whole tiles, giving a much fuller, less ‘bitty’ look when finished. Remember, on all reveals, allow for a tile plus adhesive on the facing wall. Accuracy is so much more important than speed. Very few window reveals will be square, take time to measure all surfaces and work out which is the truest. Take your levels and measurements from the best surface and vary adhesive thickness to match the other sides. For complicated, multi sided cuts, its best to make jigs and get them 100% accurate before tackling the tiles themselves. Time spent getting this stage right will pay dividends and guarantee customer satisfaction.

Using trim

Wherever possible, use a decorative trim to the angles of the window recess. This not only gives a slick, professional finish, but also allows unsightly cut edges to be hidden from sight. The trim will need to be absolutely true, both vertically and horizontally. Mitre the joints at 45 degrees for a professional finish. Adhesive can be used to hold the trim in place whilst the tiles are set behind.

The top reveal

Gravity will be determined to play havoc with your beautiful tiling around the window. Be prepared before applying adhesive. Check and double check all the cuts and trim lengths. Using a board, or plywood and some supporting battens, the tiles can be stuck with adhesive and then immediately supported. Tiling the top reveal is best done before the sill, meaning you don’t need to worry about disturbing the sill when you wedge your supporting battens there. Take your time, the top reveal should be perfectly parallel with the top of the window.

Finishing off

Tiling around a window can be messy and fiddly, cleaning as you go is essential. Ensure all adhesive is cleaned off before starting to grout, taking particular care around the trim. Grout as normal, but, as we’ve said with the rest of the window project, take your time. A symmetrically tiled window which sits true to the rest of the wall gives an impressive professional image.

As you start planning getting back to work when restrictions are eased, why not consider one of our courses to expand, or just refresh your tiling skills. Get in touch today to find out more.

Tips For A Professional Finish To A Wetroom

Wetrooms (or walk in showers) have grown hugely in popularity over recent years in both domestic properties and commercial properties and have always been a popular choice for homes in mainland Europe. Wetrooms and walk in showers are an essential choice for hospital and care home settings but we are seeing more of these opulent walk in showers in more prestigious hotels and luxury accommodation.  And in domestic homes, more and more of us are looking for the luxury and practicality of a large shower room over, or in addition to,  the traditional bathroom.

Wet rooms can be installed on any floor of the building – not just contained to the ground floor and the great advantage of the wetroom is not having a step-in shower tray to negotiate as the floor is set at one level.

The key is to ensure the wetroom is waterproofed properly so when tiling the wetroom, it is important to remember not to compromise the contoured natural slope of the wet room base, otherwise the water will not drain away quickly enough.

So when it comes to choosing the best grout for your wetroom, an epoxy grout is probably the best option to go for, as epoxy grouts are fully waterproof, hardwearing and great for resisting those powerful jets of water, extreme temperatures and humidity.

To ensure that you get a professional finish to your tiles, make sure the grout lines are clean by using a damp sponge to clean the surface of the tile and the grout lines. Why? Because if the adhesive and the grout come into contact it could discolour the grout.

And it may seem an obvious trick,  but it is absolutely essential the adhesive has completely dried before you move on to removing the spacers and finally applying your grout.  Another consideration is that if you are going to be working in temperatures of over 25 degrees Celsius – just dampen the grout lines with clean water beforehand.

Before applying your grout, it is good practise to check for potential damage or staining, so it is advisable to to select a small ‘trial’ area to test whether there is any discolouration or if it is difficult to remove excess grout from the tiles.

When applying the grout in the wetroom, work in smaller areas completely filling the tile joint with your mixed grout and compact it well ensuring you remove any excess grout from the tile surface as you work.

After the wetroom has completely been grouted and you are ready to clean off all excess grout, use an emulsifying pad or scotchbrite pad with clean water working in a circular motion which should result in uniform grout lines. Then take a clean sponge and remove any further residue by cleaning diagonally to the grout lines.

The key to any professional tiled finish is not to leave any surplus grout or haze on your newly tiled surface for more than 24 hours, so clean the surface down with clean water and an emulsifying pad within this time frame.

Your finished wetroom will then need to be left for at least two weeks before it can be used.

Working with luxury tiles

It is, of course, possible to get a luxury tiled finish without breaking the bank. After completing your training with us, you’ll be looking for a perfect, classy finish to every tiling job. But, there are some tiles available which are guaranteed to attract admiring glances.

Let’s have a look at a few which you really wouldn’t want to drop or crack when cutting them.

What better place to start than with the LuxTouch diamond encrusted, mother of pearl laden beautiful floor tile. We haven’t seen one in the flesh unfortunately (they are reportedly only used in 5 settings around the world) but have no doubt they are something to behold. At $1,000,000 per sq. meter, they are unlikely to be popping up in your local DIY store.

That extravagance may seem ridiculous to us, but we can look to offer an exclusive look without needing a lottery win.

Italian Marble – Marble has a history of adorning palaces and the residences of the rich and famous. Originating in mountains and sliced, processed and polished to become the fine tiles we end up working with. Being completely natural, there will not be two tiles which are exactly the same. This gives customers the feeling of exclusivity when their homes sport some beautiful marble. Installation needs to be perfect the first time, removing and replacing marble tiles is unlikely to go unnoticed. Floors should be protected and sealed to prevent moisture ingress, staining or scratching.

Colored Tiles
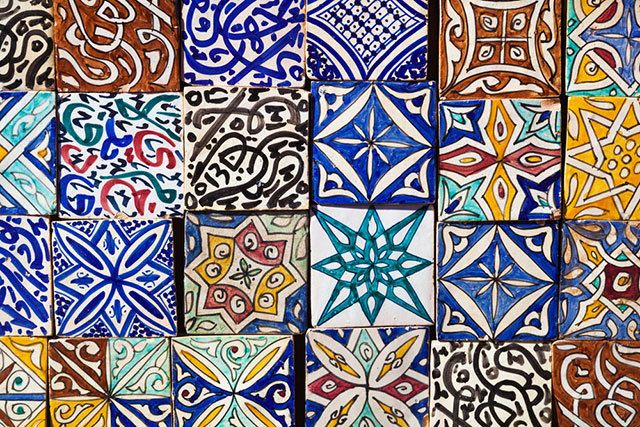
Granite – High quality granite tiles are also farmed naturally and therefore offer a level of individualism. Granite might not quite have the deep lustre of Marble, but there are so many variations in colours and patterns naturally occurring, they can feel just as special. Granite is tougher too, a lot less prone to chipping or scratching. That said, polished granite will need to be treated and re-polished periodically to preserve its luxurious appeal.

Brazilian Black Slate – Slate is naturally non-slippery and can be used for indoor or outdoor projects. The primary method for creating slate tiles is to split and then cut huge pieces of quarried slate. This can produce uneven and unpredictable sizes, making laying the tiles more awkward. The very best slate is machined to achieve a more uniform size and less variations in the thickness of tiles. Slate needs to be treated and coated as it is naturally porous and likely to stain. Slate not only works well on floors, a feature wall of slate can add another dimension to a bathroom or kitchen.

Whatever price range the tiles you lay come from, the ultimate goal is to achieve a faultless, top drawer finish. Any of our courses will get you on the way towards reaching that goal.

Get in touch today  to book onto one of our comprehensive tiling courses.

Adhesives and Grout – Applying Tiles Successfully

Adhesive is an integral part of laying and applying your tiles, securing them for years to come. Your choice of adhesive will depend on the area the tile will be applied too. And depending on where the tiles will be applied, will also depend on the adhesive required such as water-resistant adhesive which is a must for those areas where water will be present such as bathrooms, showers, cloakroom and kitchen sink areas.  Another consideration when selecting your adhesive is to choose one with ‘non slip’ properties as you don’t want your tiles to be slipping down at any point.

Window TilesSo what about floor tile adhesive – is it for internal flooring or external flooring? Is there underfloor heating to consider? And for application to walls is there plasterboard or painted wall? Maybe wood or tile backerboards or adhesive for a tiled worktop. Once the area to be tiled has been established, choices of adhesives range from powder form to ready mix. 

For floor tiles it is often a more practical solution to choose an adhesive in powder form as they tend to be harder setting so that they can take the weight that will eventually apply to the tiled floor.

So what is the difference between using ready mix and powder adhesive? Well, ready mix adhesive dries more slowly and is not suitable fixing floor tiles or porcelain tiles because of the way it dries. Ready mix dries via evaporation whereas powder tile adhesives dry chemically.

Student TIling Courses Scaled

Powder adhesives are available in many grades and are usually the choice of the professional tiler. Once mixed they dry by a chemical reaction. So for example when tiling floors internally or externally choose an adhesive that is flexible where movement is likely. When choosing an adhesive for your tiling project, whether a powder or a ready mix, it is important to be aware of the different classifications of the adhesive. For example:-  F indicates it is a fast setting adhesive,  T indicates reduced slip used for applying larger or heavier tiles and E for adhesives that won’t set too quickly – again great for larger projects. 

Ready mix adhesives are great for doing smaller jobs quickly (such as a kitchen splashback) and areas that are unlikely to have too much exposure to moisture. 

Mixing the tile adhesive correctly is important and requires certain tools including a bucket, mixing paddle, and some PPE (personal protection equipment) in the form of goggles, face mask and gloves. Useful tips on how to mix adhesive is a handy guide to help get the most out of the adhesive – reducing waste and maximising time.

Once the tiles have been applied, the finishing touch is to apply the grout. There are many choices of grout available including cement, sanded and unsanded (smooth or coarse), latex grout and epoxy (no cement) grout. It is better to select a grout that is anti mould. Cement grout is a low cost option and can be used for interior and exterior projects but it is porous and requires regular sealing. A grout which contains latex will increase water resistance. Epoxy is considered a superior choice as it is durable, stain and chemical resistant and can be applied internally and externally on ceramic and porcelain tiles. So when applying the grout to a tile project, considering the type of tile and the width of the tiling joint will determine the type of grout to use.

Tiling – It’s Never Too Late To Learn

“You can’t teach an old dog new tricks” the saying goes. Well we don’t think there’s any truth in that. In fact, people with experience from other professions and areas of life may well find that some of their skills are transferable and they are well prepared to learning tiling.

Maybe, with the extended free home time you might now be having, you have discovered a love for DIY as you tackle those jobs at home which have been put off for months. You might have tackled your own bathroom tiling, or laid a new tiled floor in the conservatory. If you find yourself thinking that it might be nice to try and tile for a living then you’ve come to the right place.

From quick courses to give the eager DIYer the basics through to advanced and specialist courses, we have something for everyone.

Class Tiling ScaledWorking on construction sites

If you do decide that tiling is the career for you, then you’ll need to decide whether or not you are going to think ‘big’ and head for large construction projects. If you do, then you’ll need various pieces of evidence of competency and health and safety awareness. You’ll need to pass a CITB (Construction Industry Training Board) site safety course alongside a relevant qualification, to even get access to a commercial site.

We offer a fabulous, comprehensive course which will leave you with the required skills ready to be assessed for your NVQ (National Vocational Qualification). The NVQ would be your recognised qualification required. It would be helpful if you could get to work alongside an accomplished tiler, both as an ‘on-the-job’ way of furthering your skills, but also in order to be assessed for your NVQ.

As a side note, if you are an experienced tiler but don’t have the NVQ or you can use the EWPA route (Experienced Workers Practical Assessment) to get the necessary qualification.

Working in private homes

If you decide to work on smaller, private projects, it still might be worth teaming up with another tiler if you possibly can. Maybe offer to do free or ‘mates rates’ work for friends and family. This will help you build a portfolio of completed work to help with getting new clients.

If you are moving from employment into self-employment then there are so many other skills you’ll need to learn. Our courses are designed to prepare you for this daunting transfer. You’ll learn bookkeeping, tax and NI, marketing skills, how to use trade suppliers, tips for motivation and even advice on choosing a name for your new business venture.

These are difficult times for all, but it could be the opportunity to change direction and learn new skills, whatever age you are, or what type of work you currently do.

We’ve been offering career changing courses for over 15 years and our owner has over 30 years of experience to share with you.

Get in touch today and plan the start of the next stage of your life.

From Patio to Pathway – Creating Exterior Tiled Floors and Walkways

With Spring officially arriving in March, many homeowners and businesses will be turning their minds to considering sprucing up their slightly neglected exteriors. The use of practical porcelain tiles can make an exterior area such as a pathway, patio, porch or pool  look cool, classy and clean.

The longer days that follow the coming of Spring gives the opportunity to make use of exterior spaces and tiles are so very versatile offering warm, natural tones right through to vibrant colours and patterns.

Cleaning Floor TilesWhen planning an exterior tiled surface, consideration needs to be taken such as:-

  • How the surface is to be used – for example, heavy footfall, a non-slip surface, private garden or public space
  • The type of tile to be used, the colour and pattern required
  • How the exterior space links to the interior – maybe a tiled garden patio leading out from a kitchen
  • The fixings that will be required to lay the tiles and any special cutting tools required
  • The tile to suit all climates

So what to choose? Porcelain tiles are a dense, strong form of ceramic, so when looking to lay tiles on an exterior surface, it is important to select tiles that are rated to be used for exterior floor installations such as a patio or pathway. Avoid installing tiles that have a high glossy surface for exterior use – these will become extremely slippery when wet, choose tiles that have a matt or textured finish. Porcelain tiles are ideal for exterior use and for applying to commercial establishments too because porcelain is such a hard, dense, solid composition. Because of the hardness they can be susceptible to cracking so to prevent the tile from ever cracking it is crucial to ensure the sub-floor is solid and absolutely waterproof.  Well laid tiles can take many years of foot traffic, but if water freezes or expands in or under the tiles this can turn a perfect patio or pathway into a crumbling mess.

Tiles can be applied to a pre-existing sub floor – it is key to make sure that water runs off it and any that existing cracks are stable and level and the surface is clean. The existing or new sub floor will need to be properly prepared before applying the new tile installation.

Designing the new installation will need to take into consideration how the space is going to be used and it’s practical and visual impact. The use of tiles in any space gives tilers and clients the opportunity to be as creative as possible. Using natural simple designs and colours will give the exterior project a clean visual image but no less gorgeous than a highly coloured and patterned project.

Creating new exterior tiling projects just as an interior project requires quality tools and quality materials,  so it is key the tools and materials selected are of a quality to cut and lay the tiles without creating waste and with perfect finish.

Tiles are not just for bathrooms and kitchens and with continued improvements in tile production and the materials to lay them, colder and wetter climates can make the most of using the strong, versatile and timeless tile – outside!