Year: 2018

What Is The Best Type Of Tile To Use In A Bathroom?

When it comes to choosing the walls and floors for a domestic bathroom, tiles tend to be the choice that comes out on top.

After all, the bathroom is a place that is bound to get wet and, therefore, non-waterproof flooring, like carpet and real wood floors, are often disregarded (and with complete sense!) when choosing a bathroom surface.

Now we’ve established that tiles work well in a bathroom in comparison to other types of floors, let’s answer the question of which type of tile is the best for use in a bathroom?

When choosing the type of tile to install in your bathroom, you should consider a few different options.

bathroom

Important! Consider the following when choosing your bathroom tiles

Quality of tiles: What is the tile’s vitreosity?

This is less about the price and quality of the tile material, however, more about the fact that you should be using tiles that do not absorb water in wet areas.

Vitreous tiles do not absorb water and are ideal for outdoor areas and for use in bathrooms. Ultimately, if the tiles are not vitreous you’d be best to install them in dryer areas of the household.

If you don’t understand vitreosity, we’re about to tell you more.

What does vitreous mean?

Vitreous essentially means that the bathroom tile has been glazed so that it has an absorption rate of equal to, or less than, 7 percent. This means that in most cases, the tiles are frost-proof (completely ample for a bathroom then, of course!).

When looking at ‘Vitreosity’ in detail, you can separate it into the following categories:

  • Non-vitreous tiles- Non-vitreous tiles offer a low density and have a water absorption of more than 7%
  • Semi-vitreous tiles- Semi-vitreous tiles have a water absorption of over 3% and less than 7%.
  • Vitreous tiles- Vitreous tiles offer a higher density and have a water absorption of over 0.5% but less than 3%.
  • Impervious tiles- Impervious tiles are extremely dense, with a water absorption of 0.5% or less. This is where good porcelain tiles for bathroom use are generally categorized.

Bet you’re now wondering what types of tiles are vitreous and, therefore, suitable for a bathroom.  

The following types of tile can be used in a bathroom:

Glazed ceramic or porcelain tiles- Porcelain tiles are generally impervious when they have been glazed and are, therefore, ideal for use in bathrooms.

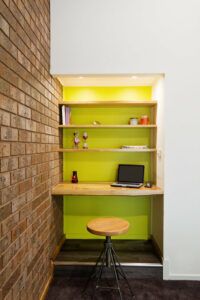
Glass- Glass tiles have a clean, hygienic look and feel. They are easy to wipe over after use and popular in modern homes. They are best used on the walls or low-traffic areas of the floor. Tiles make a great option for a feature wall.

Quarry- Quarry tiles can be semi-vitreous or vitreous, so make sure you investigate the type of tile you are buying. The more vitreous the tile for a bathroom, the better.

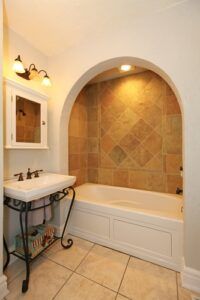
Natural Stone- Natural Stone tiles have a rustic and modern aesthetic. While they generally withstand water well when used in a bathroom, they will need a waterproof membrane applied beneath them as they are not completely waterproof – we teach a fantastic 1 day stone tiling course to help tilers learn about natural stone tiling.

Tub with arch and stone tiles and sink natural bathroom design.

Types of Natural Stone:

Marble- Marble originates from limestone and can be treated for use in bathrooms. Marble is favoured for its interesting colours and patterns when used in a bathroom.

Granite- Granite is harder than other tiles and is often used in areas of high-traffic on the floor.

Slate- The great thing about slate is the fact that it is slip-resistant and, therefore, a popular tile for use on the floors.

Limestone- Limestone tiling is suitable for use on the floors of a bathroom. When light in appearance, limestone makes great floor tiles for small toilet rooms, making the room light, airy and spacious.

Now: You’ll also want to consider the bathroom wall tile sizes

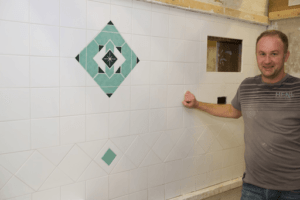
If you have a large bathroom, you could opt for larger tiles across the whole of your wall and floor space. Smaller tiles, such as mosaic tiles, tend to work best on feature walls or in smaller bathrooms.

Here at UK Pro Tiling Training, we train our tilers so that they can advise what will work best on particular projects. Whether you are looking for small bathroom tile ideas, or want to re-tile a grand ensuite, we’re confident that a tiler trained with us will know exactly what to recommend for each project.

It gets better.

Learn how to tile your own bathroom

If you would like to learn how to tile a bathroom or create a feature wall for a bathroom, then sign up to a course with UK Pro Tiling Training.

10 tiling tools no tiler should be without

Whether you are completing a DIY tiling job or are working as a professional tiler, there are certain tiling tools that no project can be completed without.

More importantly, professional tilers should ensure they have the right equipment on hand to ensure a first-class finish. After all, a mediocre, DIY-like job is not going to cut it in the tiling profession.

Once you are trained in tiling and have the skills for tiling, you’ll need to make sure your equipped with the right tools before embarking on any paid project.

As well as a pencil, a tape measure and other obvious DIY essentials like a spirit level and PPE, such as safety goggles and safety shoes, you will need a handful of tools established purely for the tiling field.

As tiling experts and passionate about the industry, UK Pro Tiling Training share 10 tiling tools that no tiler should be without. We explain what they are and why they”re used.

Most of the tools can be bought from various stores online, including ScrewFix, Toolstation and Wickes.

Here’s our checklist of 10 tiling tools no tiler should be without:

  1. Grout Float

A grout float is used once the tiles have been applied to press the grout between the gaps in the tiles. It looks similar to a trowel and feature rubber “squeegee-like” parts that manipulate the grout.

Grout floats do not last for long due to the malleability of the rubber but are not hugely expensive to buy.

  1. Grout Sponge

A grout sponge is a dual-purpose sponge that is made specifically to remove any leftover grout from the tiles.

Use the grout sponge as you go to keep the tiling job looking professional. After all, when the customer is popping in and out of the room, they won’t want to see a whole wall of grout-marked tiles. Using the sponge can keep the room looking fairly polished and the customer feeling happy. At the end of the project, using a grout sponge will give the project a clean and professional finish.

  1. Notched Trowel

A notched trowel is essentially the only way to spread adhesive on your tiles. Made from steel, you’ll need to choose the right type of notched trowel for the tiling job in hand. A curved notched trowel is best for walls, while square notched trowels are usually used for floors. All notched trowels feature a notched edge and a smooth edge.

  1. Tile Nipper

Perfect for awkward edges and irregular areas of tiling applications, tile nippers are hand held, plier-like tools that allow you to cut the tiles into chunks in a controlled fashion.

  1. Rubber Mallet

A rubber mallet can be useful when gently knocking the tiles into place.

  1. Tile Cutters

One of the best type of tile cutters is the rail tile cutter that can be bought in various sizes to suit various types of tile. It is unlikely you’ll get any tiling job which does not involve cutting tiles, There are also electric tile cutters which are used for cutting sections out of tiles.

  1. Tile Spacers

Tile spacers are small pieces of plastic that are used to help you evenly space the tiles on application. Most spacers are cross-shaped and come in 1mm-6mm sizes. Use between tiles to ensure correct spacing.

  1. Mixing Paddle

Mixing paddles are designed to fit to most paddle drills and are used for mixing adhesive and grout. Any alternatives will not give a professional touch to your job, therefore always turn up to a tiling project with a mixing paddle, even if you think you could get away with using another stirring device.

  1. Bucket

Turning up with an old ice cream tub or washing up bowl is far too DIY when you”re a professional in the tiling industry. A bucket is essential for mixing and will save you a lot of time when it comes to clearing up any mess made. For everyday projects a 10L bucket will suffice, for bigger jobs, you’ll undoubtedly need a 25L bucket.

  1. Tile Drill

A tile drill is the only type of drill that will allow you to drill a hole into the tiles without breaking them.

More information on tiling tools from UK Pro Tiling Training

We offer extensive information on tiling tools at our courses at UK Pro Tiling Training. We are also on hand following the course if you have any questions about tiling tools, such as where to buy and which tools can be useful for particular projects.

What Is A Tiler?

Here at UK Pro Tiling Training, we are experts in tiling and take pride in educating those new to tiling, about the tiling industry and how exactly how to become a tiler.

For us, a tiler is more than somebody applying tiles to a wall. In fact, a tiler is a craftsman, a construction worker, a business man, an artist and more.

At UK Pro Tiling Training, we teach our students every aspect of what it takes to be a tiler, from running the basics of your business, to the actual tile applications.

Dictionary definition of a tiler

The Oxford English Dictionary of a tiler is: “A person who lays tiles”.

At UK Pro Tiling training, we use all our knowledge and expertise to educate the next generation of tilers to be as professional as they can possibly be. There is a clear difference between our professional tilers and those completing a DIY tiling job at home.

What entry requirements are there to become a tiler?

There are no official set requirements to become a tiler unless you want to work on a building site where an NVQ and a CSCS card would be required. In terms of Domestic tiling there are no qualifications required to work in people’s houses.

Younger people setting out in a career in tiling, could find an apprenticeship which would provide on-the-job training.

If you want to work on a construction site? What are the entry requirements for this?

You will need to enquire at the site you wish to work on if you are looking to become a tiler on a construction or building site. Some sites require tilers to carry a CSCS card (this stands for Construction Skills Certification Scheme card). This CSCS card proves that a person looking to work on a construction site, has the relevant health and safety skills to do so. The NVQ qualification is an assessment of your tiling skills, of which a card will be issued to prove this.

What skills do you need as a tiler?

As well as a tiling qualification, you’ll need an array of skills in order to become a tiler. These include:

  • Being able to follow a design
  • Patience to tile patterns
  • Practical skills
  • The ability to complete a job accurately
  • Pay a good level of attention to detail
  • Maths knowledge- calculating materials and costs, as well as for measuring up a job and cutting tiles
  • Creativity
  • Customer service skills
  • Self-employment knowledge/basic business knowledge

How much can you earn as a tiler?

Self-employed tilers can earn anything between £25,000 to £60,000.

Those new to the tiling industry should expect to earn £25,000 in their first self-employed year. Highly experienced tilers could earn between up to £60,000. Essentially, the more experienced you are as a tiler, the more potential you have to earn more. You may grow your business to recruit other tilers, for example, so that there are more hands-on deck to complete customer projects.

What should be expected from the working patterns of a tiler?

Tilers often work between 37-45 hours a week, Monday to Friday. If you own your own business, your hours may be more flexible than if you work for another company.

Weekend work may occasionally be required by some customers, but this is not always the case. If you are working on a project out of your local area, you may need to stay away from home.

Some tilers may indeed work part-time to fit in with their lifestyle, although would still need to meet customer deadlines.

Types of tiler

A tiler will probably lay different types of tiles during their career, including wall tiles, floor tiles, ceramic tiles, porcelain tiles, mosaic tiles, tiles for kitchens, bathrooms and outdoor tiles, and more.

Instead of progressing and specializing in one type of tiling technique, material or project, career progression usually involves becoming a trainer or assessor in tiling.

Find out more about out tiling courses here at UK Pro Tiling Training

We have a variety of tiling courses available to suit your particular situation, whether you are looking to study full-time or begin your tiling career alongside a current part-time role. Whatever course you choose, you’ll be trained in all aspects of tiling, from business basics to applying various different tiling materials.

Does a tile need sealing

Does a tile need to be sealed?

Most people overlook this treatment when applying wall and floor tiles.

It is really important to understand whether the tile you have bought needs to be treated with a sealer to block the small particles in the surface of the tile.

Failure to treat a porous tile will result in the grout penetrating the tile surface leaving nasty stains that cannot be removed

There are various types of tile that are on the market available for you to tile your projects.

Ceramic Tiles

These types of tiles have a glass glaze on the top of the clay back which provides a non porous surface as the glass will not let anything penetrate it, unless it is un glazed.

There is no need to seal this tile.

Porcelain tiles

A porcelain tile has been fired at a higher temperature than ceramics and this is called the vitrified process, this means these tiles are non absorbent on the front back or sides of the tile.

This is fine on most porcelain tiles but some porcelains have been mechanically polished to give a deep high shine, this leaves the surface of the porcelain tile to have tiny pours which the grout will penetrate. A sealer would need to be applied if it has a glossy look

Natural Stone Tiles

Most natural stone tiles are porous and are made from natural rock. When grout is applied to the surface of the tile to fill the joints it also penetrates the surface like polished porcelain above, this will also leave nasty marks on the stone that cannot be removed.

How to tell if a tile needs a sealant

The best way to check whether a tile is porous and will stain is to use a dry wipe whiteboard marker to test them.

In a small area of one tile apply the ink marker to a corner and leave for a few minutes, once done wipe off the ink, if there is a stain where the ink has penetrated the tile then the tiles will need sealing, if all the ink wipes off with no marks left then there is no need to seal.

The tile shops sell a range of sealers applicable to the type of tile you have bought, simply follow the instructions on the can, leave to dry and grout as usual.

Training

UK Pro Tiling training offers advice on their fast track tiling courses on all aspects of tile installation. For more info please visit www.tiling-courses.co.uk for more info

How to create a feature wall with tiles

Feature walls come in many variations and essentially consist of a room with one wall that particularly stands out, or better known as the focal point of a room.

Some people opt to have wallpaper on their feature wall, either patterned or plain, or a bright, boldly painted wall, others opt for an interesting collage of pictures or perhaps a stencil pattern. Here at UK Pro Tiling Training, we are familiar with a variety of homeowners wanting a feature wall made with tiles.

More and more often nowadays we are approached by customers and professional tilers looking to find out more about creating a feature wall with tiles.

Therefore, we’re created a blog on how to create a feature wall with tiles! Read on to find out more.

Lime green feature wall study nook in contemporary living room

Why choose a feature wall?

Feature walls are incredibly fashionable and are associated with contemporary homes. What’s more, when chosen well, feature walls can work to make a room look bigger.

When it comes to tiled feature walls, these can be popular in kitchens, bathrooms and garden rooms.

Why tile your feature wall?

There are a few reasons why choosing tile as the material for your feature wall is advantageous.

Firstly, tiling is a very popular option in kitchen and bathrooms because it is easy to clean and is generally more resilient to damp air and steam that may come from your shower, bath or sink taps.

What’s more, there are many different patterns you can create with tiles. Whether you opt for detailed patterns with mosaic tiling or larger tile displays, the options are endless and can suit a variety of customers.

What variations of feature walls can you create with tiles?

As we have just mentioned above, there are a number of different variations you can offer for feature wall tiles.

Mosaic tiles are among the smallest types of tile available and can be arranged to create a detailed pattern to suit your customer’s ideals for a feature wall.

What’s more, you may be asked to lay a checker board pattern and wall tiled in one block colour, as well as fish tail patterns, large tiles and more.

Your feature wall may be a tiling pattern on one wall that contrasts with the tiles on the other walls of a room.

How to tile a feature wall?

Tiling a feature wall is fairly similar to tiling a wall normally, however, you will of course want to consider the pattern your customer would like and make sure that your tiles will fit the wall area.

You will also want to consider how other obstacles like shelves, baths, sinks and other obstacles may affect your feature wall.

The following article may be useful to read before planning your tiled feature wall: A brief guide to 6 common tiling patterns. After all, it is important to abide by the basic standards of patterned tiling in order to create a high-quality and successful feature wall.

More advice from UK Pro Tiling Training

If you would like more information from UK Pro Tiling Training about tiling a feature wall, then please contact us at UK Pro Tiling Training.

Is tile and grout waterproof?

Here at UK Pro Tiling Training, we hear a complete variety of questions about tiling and grout. Although we work with professional tilers, we also work with those completely new to tiling and are familiar with being posed basic questions, all the way to more complex ones.

One of the questions we are often asked by customers and those tilers new to the industry, who are perhaps attending one of our tiling courses, is: Is tile and grout waterproof?

Water ripples on blue tiled swimming pool background. View from above.

The answer to the question is, surprisingly, no. Tile and grout is not totally waterproof and neither is cement board, backer board, sealers and cement adhesives, they absorb water but do not block penetration.

Even if you don’t work in the tiling industry, you may be familiar with the sight of mould and mildew growing on the edges of tiles and baths in bathrooms where there is insufficient ventilation or in bathrooms where users have many showers, although the bathroom has been built for mainly having baths.

So why is tile and grout used in kitchens and bathrooms?

Most tile and grout products are moisture proof which is, of course, not the same as being a waterproof product but does mean the materials can be used in kitchens and bathrooms.

There are other methods that can be adopted to make shower rooms and other wet tiled areas, waterproof such as latex tanking systems.

This is where tilers, builders and plumbers can work together to ensure a shower area is completely waterproof.

How can tile and grout be made waterproof?

Grout sealer is a fundamental part of the tiling installation process and helps prevent water getting into the grout and under the tiles.

Essentially, most grout is made of sand and once dried and in place between the tiles, is ready and set to absorb water.

Grout sealer can be applied to grout in order to deter it from absorbing the water.

Ultimately, grout sealer is a highly important part of the tiling installation process and should be applied in the majority of projects.

Remember: Grout and grout sealer can be a laborious task. The smaller the tiles, the longer the project will take to grout. Mosaic tiles, for example, are best applied by professional tilers who can carry out a professional application.

Also, you should only apply grout sealer to grout that is 100% dry.

Is grout sealer always needed in a tiling project?

The only case whereby you will not need to use grout sealer is when you are using epoxy grout.

Epoxy grout does not need any further additives in order to prevent the grout absorbing water as it also features water repellent properties, this would be used in swimming pools or any place that could a high level of cross bacteria contamination such as a professional catering kitchen or hospital.

Methods of apply a grout sealer

There are three main methods to apply grout sealer. These are:

1. Using a brush for the application.

Brushes tend to be the first method you think of when applying grout sealer. Although they are easy to come by, many tilers find that brushes are hard to use when applying grout sealer, due to issues of the solution running of the tip etc.

2. Rolling on the grout sealer.

Rolling is a convenient way of applying the grout sealer, it is best to roll in a downwards motion and make sure you stick to the seam. Many tilers prefer rollers to brushes.

3. Spraying on the grout sealer.

While spraying seems to be the quickest way of applying grout sealer (the spray, in theory, shouldn’t soak into the tiles, only the grout), you will need to clean the tiles down later on to make sure there is none leftover on your tiles.

More information from UK Pro Tiling Training

If you have a tiling project coming up and would like to investigate the best grout sealant for your job, then please do not hesitate to contact us at UK Pro Tiling Training.

How do you mix grout?

Grout is an essential element of any tiling project and how the grouting part of a project is completed makes an overall difference to the end result.

After all, you can purchase the best tiles and apply them evenly, and then ruin the overall look with a poor grout application.

rsz_charlie

Follow these steps on how to mix grout for a superior tiling project:

Choose your grout wisely

There are four different types of grout available for ceramic tiles and you should choose the one most suited to your particular project.

The main types of grout are:

  • Fine sanded grout
  • Unsanded grout
  • Epoxy grout
  • Quarry type grout

Fine sanded grout tends to be suitable for applying to wider spaces between tiles (between 1/8 and 3/8 inch wide), while unsanded grout is better for narrower gaps between tiles. Unsanded grout is suitable for gaps that are less than 1/8 inch wide and smaller.

Quarry type grout contains a courser type of sand and is best for tile joints between 3/8 to ½ inch wide.

For larger spaces between tiles, particularly when working with polished stone, an epoxy grout is probably the best grout type. Epoxy grout is highly resilient to stains and chemicals, and is ideal for surfaces like kitchen counters.

Epoxy grout features an epoxy resin and hardener, and can be more difficult to work with than other grout types.

Mixing the grout

If the grout you have bought doesn’t feature a polymer grout additive, then you may want to consider adding one before the mix is applied. Adding such an additive can help with the grout’s durability.

Read the instructions

Below is a general guideline for cement grout, however, it is always highly necessary to read the product information carefully before working with the grout.

Epoxy grout is slightly different so please do read the information on your grout packaging as carefully as possible.

Materials you will need

Make sure you collect the following items and have them accessible and handy for the whole of the project.

  • Gloves
  • Empty bucket
  • Sponge
  • Container of water
  • Pointer trowel
  • Margin trowel
  • Mixer paddle drill (if you have one)

rsz_job_complete

Here are the steps on how to mix the grout:

  1. Place the amount of grout powder you require in the bucket. The amount of powder you need for the space you are covering should be clear on the packaging.
  2. Add ¾ of the total amount of water needed for the area you”re working on.
  3. Use a trowel or the mixing drill to stir the grout.
  4. Stir the grout mixture into a thick paste that contains no dry lumps, it may help to tilt the bucket towards you and frequently scrape the sides. Take care not to create too many air bubbles.
  5. Use the sponge to drip in extra water, take care to get an accurate consistency (not too watery).
  6. Leave the grout for 5 to 10 minutes to strengthen and then give it a stir before applying.
  7. Use a grout float to apply the grout.
  8. Clean with sponge and fresh water
  9. You should make sure you use the grout immediately as most grout sets in around 60-90 minutes. If you are tiling a particularly large area, you may want to make half the grout at a time.

More advice on how to mix grout from UK Pro Tiling Training

 Should you require any further information on how to mix grout, then feel free to contact us at UK Pro Tiling Training.