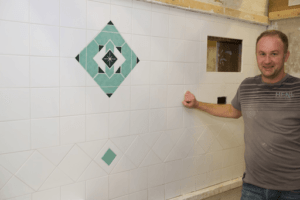
Here at UK Pro Tiling Training, we hear a complete variety of questions about tiling and grout. Although we work with professional tilers, we also work with those completely new to tiling and are familiar with being posed basic questions, all the way to more complex ones.
One of the questions we are often asked by customers and those tilers new to the industry, who are perhaps attending one of our tiling courses, is: Is tile and grout waterproof?

The answer to the question is, surprisingly, no. Tile and grout is not totally waterproof and neither is cement board, backer board, sealers and cement adhesives, they absorb water but do not block penetration.
Even if you don’t work in the tiling industry, you may be familiar with the sight of mould and mildew growing on the edges of tiles and baths in bathrooms where there is insufficient ventilation or in bathrooms where users have many showers, although the bathroom has been built for mainly having baths.
So why is tile and grout used in kitchens and bathrooms?
Most tile and grout products are moisture proof which is, of course, not the same as being a waterproof product but does mean the materials can be used in kitchens and bathrooms.
There are other methods that can be adopted to make shower rooms and other wet tiled areas, waterproof such as latex tanking systems.
This is where tilers, builders and plumbers can work together to ensure a shower area is completely waterproof.
How can tile and grout be made waterproof?
Grout sealer is a fundamental part of the tiling installation process and helps prevent water getting into the grout and under the tiles.
Essentially, most grout is made of sand and once dried and in place between the tiles, is ready and set to absorb water.
Grout sealer can be applied to grout in order to deter it from absorbing the water.
Ultimately, grout sealer is a highly important part of the tiling installation process and should be applied in the majority of projects.
Remember: Grout and grout sealer can be a laborious task. The smaller the tiles, the longer the project will take to grout. Mosaic tiles, for example, are best applied by professional tilers who can carry out a professional application.
Also, you should only apply grout sealer to grout that is 100% dry.
Is grout sealer always needed in a tiling project?
The only case whereby you will not need to use grout sealer is when you are using epoxy grout.
Epoxy grout does not need any further additives in order to prevent the grout absorbing water as it also features water repellent properties, this would be used in swimming pools or any place that could a high level of cross bacteria contamination such as a professional catering kitchen or hospital.
Methods of apply a grout sealer
There are three main methods to apply grout sealer. These are:
1. Using a brush for the application.
Brushes tend to be the first method you think of when applying grout sealer. Although they are easy to come by, many tilers find that brushes are hard to use when applying grout sealer, due to issues of the solution running of the tip etc.
2. Rolling on the grout sealer.
Rolling is a convenient way of applying the grout sealer, it is best to roll in a downwards motion and make sure you stick to the seam. Many tilers prefer rollers to brushes.
3. Spraying on the grout sealer.
While spraying seems to be the quickest way of applying grout sealer (the spray, in theory, shouldn’t soak into the tiles, only the grout), you will need to clean the tiles down later on to make sure there is none leftover on your tiles.
More information from UK Pro Tiling Training
If you have a tiling project coming up and would like to investigate the best grout sealant for your job, then please do not hesitate to contact us at UK Pro Tiling Training.