Year: 2016

Merry Christmas from UK Pro Tiling Training!

It’s nearly Christmas and we hope you are enjoying the festive season here at Pro Tiling Training! We want to wish all our tilers and learners a very Merry Christmas and a Happy New Year!

We hope you have had a great year and wish you all the best for 2017! And, if one of your New Year’s resolutions is to make an improvement to your career or personal tiling business in 2017, then perhaps we can help at UK Pro Tiling Training?

Whether you are looking to embark on your first tiling course, would like to complete a course with us to expand your knowledge, or would simply like to refresh your tiling business” image, take a look at our tips below on achieving that New Year’s resolution to tweak your career.
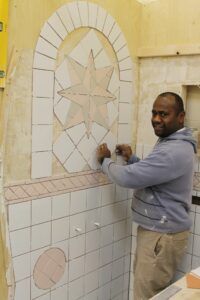
Become a tiler

Ultimately, here at Pro Tiling Training, we can help you make that complete career change to become a professional tiler and equip you with the skills and expertise to start your own tiling business.

Therefore, if your New Year’s resolution is to make a complete career change, become a tiler and be in charge of your own time, earning your income through your own business, we can help here at Pro Tiling Training.
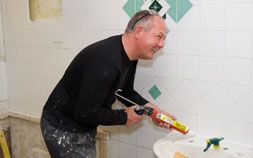
Go self-employed

Perhaps you are already a tiler and are looking to go self-employed in 2017? Our 1-Day Natural Stone and Business Start-up Course is the ideal course to help you begin your own business.

The course is a follow-up to our 5-Day Fast Track Tiling Course and will inevitably teach you how to start your own tiling business, so that you can go self-employed in 2017.

Improve your time management skills

Investing in the time to reflect on your time management skills over the past year, during the upcoming Christmas period (particularly if you are currently running your own tiling business) will be beneficial for 2017.

Perhaps you could have started on a project earlier in the morning, or after rush-hour, to avoid the time lost from waiting in traffic? Or perhaps you could have visited quotes more efficiently, perhaps grouping quotes in similar locations together, so not to waste time and fuel?

Ultimately, looking back on the past year, may leave you with a few starting points for improvement to make 2017 even more successful.
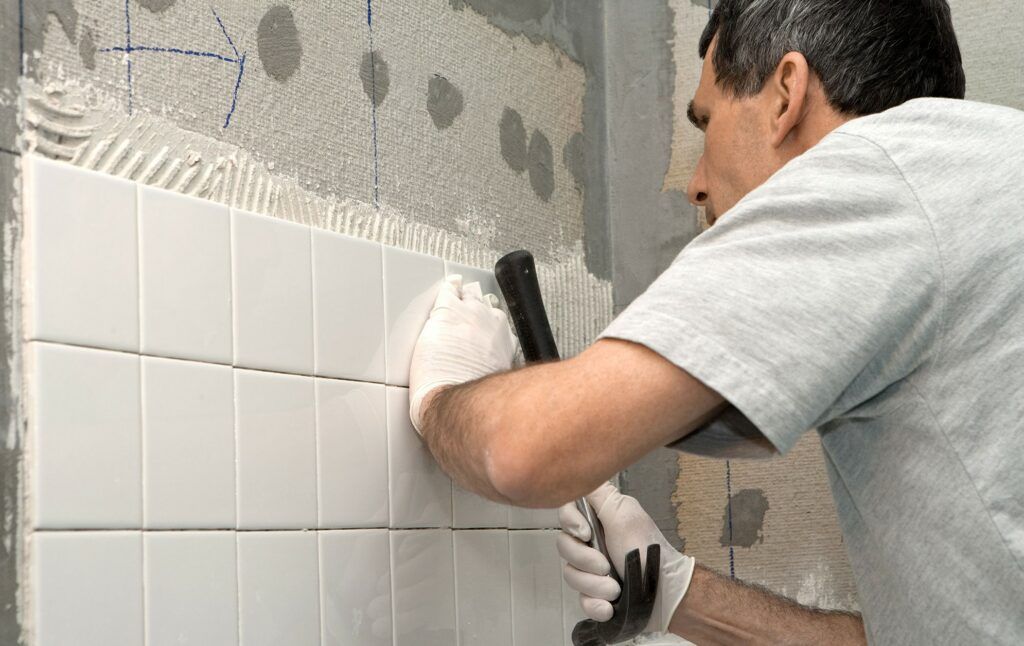
Try a new technique

Whether it is to embark on practicing a new, more advanced tiling pattern or perhaps join one of UK Pro Tiling Training’s 2017 courses to learn something new. Gaining in new skill in 2017 will continue your professional development and help you gain confidence.

Contact us at UK Pro Tiling Training

If you are interested in any of the courses from UK Pro Tiling Training and would like to fulfil your career goals in 2017, then please do not hesitate to contact us at UK Pro Tiling Training.


Tiling With Lasers

Tiling With Laser levels.

There are many different types of lasers.

Cross Line Laser

First is a cross line laser, these cross line laser project a horizontal and vertical line at the same time, this can be very useful if you are working to right angles fixing tiles or kitchen cabinet etc. The biggest problem a tiler can run into is their tiles starting to run off, this can result in a different height when the tiles eventually come back to meet the wall you start from.

Rotary Lasers

A rotary laser level can be really useful when undertaking any tiling projects and can be more accurate than an ordinary level.
Rotary lasers can produce a 360 degree red laser line around the room making them ideal when tiling walls around a bathroom.

Straight Line Lasers

Straight flooring lasers can also be very useful when tiling as this can shoot a straight line down the room and can project where the tiles are going to end up, unlike a chalk line that can disappear once the adhesive has been troweled on, the laser line will still show on top of the adhesive so you will never loose your tile line to follow.

Layout Lasers

Layout line lasers are used by many floor tillers as they have two lasers set out at 90 degree angles, this can be useful when tiling on a 45 degree angle such as herringbone and diamond bond patterns.

Tiling Training

At UK Pro Tiling training we run professional tiling courses and cover the use of all different types of laser when completing tile installations, this ensures the accuracy of the work produced by the students.
More details of the various tiling courses can be found at www.tiling-courses.co.uk

A Brief Guide to 6 Common Tiling Patterns

When you begin training as a tiler, you’ll come across a range of common tiling patterns. In fact, you’ll probably recognise a few of the following tiling patterns whether you are a professional tiler or not.

On our tiling training courses at UK Pro Tiling Training, we cover all the essential elements of tiling, including many tiling patterns you may come across in your career.

Take a look at some of the common tiling patterns below:

The straight lay tiling pattern

The straight lay is the simplest of tiling patterns and looks great in a range of homes. It is a brilliant tiling pattern to master when you first start tiling. That said, it is important to concentrate on creating clear, well-grouted lines to differentiate between a DIY and professional tiling job.

The straight lay tiling pattern works well with a range of tiles and property styles, it doesn’t matter what colour the tiles are or where they are going to be laid, the straight lay tiling pattern never fails to look sleek and impressive, when tiled flawlessly, of course.

The diagonal/diamond tiling pattern

The diagonal, or diamond-shaped tiling pattern is another simple tiling pattern to install in many properties and can, in fact, make rooms look wider.

The diagonal shape of the tiles tricks your eye gaze towards the tile borders, subtly making the room look wider.

In addition, professional tilers may want to suggest to customers that the diagonal tiling pattern works well alongside other tiling patterns, particularly when applied as a border.

Opus Pattern or random

The opus pattern is made up of 4 or 5 different size tiles that can be laid totally random or follow a repeat, tile sizes are usually 150 x 150, 300 x 300, 450 x 450, 600 x 300 and 600 x 600.

All the sizes fit together as they are all multiples of the 150 x 150, it looks a complicated pattern to work out where to start but its quite easy once you have a plan to follow and use the correct setting out methods.

The brick tiling pattern

The brick tiling pattern is also referred to as the running bond, or offset tiling pattern, and is another tiling method that makes a room look wider. What’s more, it works well as both floor and wall tiling.

The brick tiling pattern pretty much speaks for itself, it has a brick-like appearance and forms a pattern just like brickwork on a property’s exterior.

The herringbone tiling pattern
In our opinion, the herringbone tiling pattern does indeed appear to have a fish-like appearance! When you use your imagination, you could see how the pattern could roughly reflect the scales of a fish skin.

In a more technical sense though, the herringbone features small, rectangular tiles lined up in a parallel line at a 45-degree angle, with another row of tiles lined up in a mirror image next to them.

The checkerboard tiling pattern

Not for the faint-hearted, the checkerboard tiling pattern is simple to install but can overpower a room. It basically features tiles in the straight lay pattern, with alternating colours.
More tiling patterns

During your career as a tiler, you will no doubt come across a range of different tiling patterns throughout your working life.

You’ll also come across many tiling patterns during our professional tiling courses at UK Pro Tiling Training. More tiling patterns include: The pinwheel pattern and the French pattern. Sound interesting, right?

Contact us at UK Pro Tiling Training
If you would like to find out more about tiling patterns, or indeed anything else about our tiling courses, please contact us at UK Pro Tiling Training, www.tiling-courses.co.uk

UK Shortage Of Quality Tilers

Shortage of tilers across the UK.

In the UK there is a massive shortage of skilled tradesman due to the amount of new build property developments. IMG_5433
Many people are currently looking to remodel their own properties but with an average wait time of around 4-6 weeks to find a wall and floor tiler they will be paying a premium due to supply and demand.

Now could be the right time to cash in on your own DIY skills and maybe think about turning your hobby into a new lucrative business.

Tiling as a living

Tiling is a great way to make a living especially when your self employed, high earnings, freedom to work when you want and nobody to answer to, these are just some of the reasons to why so many people are retraining and finding a good quality tiling course that can fast track them with the correct knowledge and skills to do the job.
There are a few tiling courses in the UK to choose from but not all tiling courses are the same, some offer basic DIY skill levels of learning whilst others can provide a full on professional fast track course teaching you all the tricks of the trade which has taken many years to acquire, these key skills can be passed on within a matter of weeks with no prior tiling experience necessary.

What do tilers do

Tilers complete a varied amount of work from kitchen splash backs and kitchen floors, bathroom walls and floors to swimming pools if your lucky enough to have one. Tiling is also very satisfying as once the project is finished the room is usually transformed beyond belief much to the appreciation of the customer.

Rates of Pay

With tiling rates of pay reaching £20-30 per meter, some tillers are earning well over £1000 per week and enjoying a healthy lifestyle.

What skills are required

To be good at tiling the following skills would be useful

– A keen eye for detail IMG_5382
– Basic math’s for working out areas of rooms and materials
– Good marketing skills
– Good sales skills
– Be fit and able to carry tiles and tools
– Have a creative flair to advise customers
– Be confident to working on your own

Where can i train

At UK Pro Tiling Training we understand what it takes to be good and make your way in the tiling world, which is why we offer comprehensive tiling courses designed to get you working for yourself fast.
All of our intensive courses cover full business start up advice so you will not only learn all the practical aspect of professional tiling you will learn how to market and sell your tiling services to your potential customers.
Our courses have run for over 13 years and many people who have attended the course are now running their own successful tiling businesses, many people come with no prior experience which is better because you are not coming with any bad habits so let us show you the corrects methods and all you have to do is replicate them, we have a huge proven track record with hundreds of 5 star positive reviews. Course run between 1 and 3 weeks and start from as little as £375, a small investment which could change your life.

Anyone looking to go on a professional tiling course then visit UK Pro Tiling Training by clicking this link  www.tiling-courses.co.uk

UK Pro Tiling Training Testimonial

Testimonial; UK Pro Tiling Training

Hi I have just returned from a two week course at uk pro tiling training, I IMG_2287
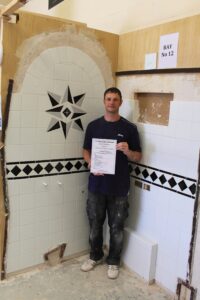
travelled nearly 500 miles round trip to attend having read all the excellent reviews, from here i new this was the place to go. Darren who owns and delivers the tiling course is a master at his craft and the tiling courses he runs are nothing short of unbelievable.

I have previously done a lot of teaching myself as education was my main job for many years but Darren’s teaching methods are at another level, in fact a level I have only seen before from experts at the top of their game, he uses a lot of NLP (Neuro Linguistic Programming) to get the information over to you so you can remember the vast amount of it, this skill takes many years to master but he has managed to do it and does it very well.

Course
The course is very practical and covers all the main essential skills required to do tiling work, all the techniques are explained very clearly and demonstrated well, you immediately replicate the same on your tiling bays.

Prior Experience

Before the course I had no prior tiling experience, not even put 1 tile on the wall but by the end I was tiling to professional standards. Everone on the course completed the same work and looking around they all did a fantastic job, this can only be down to Darrens teaching.

Business Skills

The business side of the course pulls no punches either, Darren gives you the full extent of his life experience and what’s in his business brain, this surely opens your mind of what you need to do after you leave the course.

Summary

To summarise the course was excellent from first talking to Tracey to accommodation to the time on the course. Loved every minute of it. Highly recommended. Like me if your thinking of doing a tiling course give Tracey or Darren a ring
www.tiling-courses.co.uk

How to measure up a tiling job

How to measure up a tiling job

In order to work out how many tiles you need for your tiling project, you need to work out the metre square of the space to be tiled and we are going to guide you through how to do just that. The correct planning is essential to achieve the perfect finish.

1] Measure the total area of the room / space to be tiled

Firstly measure the width of the area (a)
Secondly, measure the height (b)
Multiply the width with the height (a x b) to calculate the total area of the wall /floor

2] Measure the area of obstructions

You definitely do not want wastage when doing a tiling job. In order for your business to be efficient, you need to order the perfect amount of tiles for your job with a few surplus thrown in for good measure. You do not, however, want to have too many tiles left over. For this reason, it is important to take out any obstructions, such as a window or a door or any other fixed feature of a room or floor.

Calculate the area of the fixed features (door, window etc) with the same method as above

3 Work out the total area minus obstructions

X (total area)  –  (total obstructions) = Total Area Metre Square

Remember to add 10% to allow for cutting waste, breakages and a few spares.

4] Adding markers

It is essential to set out a tiling job correctly to ensure that you have good cuts, remember if you end up with a thin piece of tile anywhere it will look terrible and be hard to do. Try and calculate where the tiles will end up, don’t start with a full tile on the floor or in the corner of a room as these are unlikely to be square or level.

If you are thinking about a change in career, and a move to tiling where you can be your own boss and create satisfying jobs for your customers, then our 13 day Ultimate Tiling Course will teach you everything you need to know. You will learn from Darren, the owner of the business, who will teach you all the tricks of the trade that he has learnt from his entire career in the tiling business. You will not only learn the skill of tiling great jobs but also the intricacies of business and marketing and generating customers. If you want to speak to Darren about the course first then he would be more than happy to discuss anything with you.

Tiling On A Plaster Wall

Tiling on Plaster

If you have a tiling job to do in your bathroom and the walls have been skimmed with plaster you have to follow a few guidelines when installing tile to make sure you do not have a failure resulting in all the tiles coming off the wall.078-682x1024

Firstly check the condition of the plaster skim, it should be fully dried out and a light pink colour.

You must also check that the plaster does not have a shine on it, this is caused by over trowelling the plaster when applied, if it has then a wire brush is needed to roughen up the surface.

Weight Ratio

It is important to check the weight of your tiles as plaster skim has a 20kg per square meter weight ratio therefore your tiles and adhesive should not exceed these weight otherwise failure could occur due to the skim de bonding from the wall, cement adhesive will usually weigh about 4kg per meter squared plus the tile weight.

Chemical reactions

If using a cement powdered adhesive you must put a barrier between the gypsum based plaster and the cement adhesive otherwise a reaction can go on between the two products, when these two products meet a layer of ettringite crystal can form which causes the failure. To stop this happening a diluted mix of 2 parts water to 1 part acrylic primer or SBR must be applied to the plaster to create a barrier between the two products.

Grouts

Once the tiles have been applied a suitable grout must be applied between the joints of the tile, this grout locks everything into place and stops water from getting between the tile joints into the backgrounds.

Tile Training Courses

Looking to learn more about tiling, UK Pro Tiling Training run fast track intensive courses. All courses cove the correct methods of installation of tile and also full background preparations.

For more info visit www.tiling-courses.co.uk

How To Tile With Metro Tiles

Metro tiles, also referred to as subway tiles, can truly transform your kitchen and offer contemporary appeal that makes a home sophisticated, sleek and clean.

AdobeStock_18015976

The name subway or metro tiles stems from the tiles featured on the London and New York City subway stations in the early 1900s.

Although metro tiles tend to suit more modern and contemporary properties, it doesn’t mean you should avoid metro tiles completely if you’ve got a more traditional style of property.

In fact, metro tiles come in a great variety of different colours and therefore suit a variety of kitchen designs and styles. You can opt for bright and vibrant tiles, or clean black and white ones, as well as neutral shades. Metro tiles also work incredibly well with wood furniture.

When it comes to how to lay metro tiles, it is useful to know that metro tiles are usually ceramic and therefore more or less follow basic tile installation practice.

How To Tile Metro Tiles

What you will need

PPE (Personal Protective Equipment)
Metro tiles
Tile adhesive
A 6mm notched trowel
Grout
A sponge
A small bucket for water
A cloth
A grout shaper
A tile marker
Tile spacers
Tile file
Tile cutter (manual and electric)


How to tile a wall with metro tiles in a brick bond pattern

Because metro tiles are often ceramic, in most cases when laying metro tiles, you can use any type of adhesive. Simply lay the first row of tiles on the worktop and then measure the length of the metro tile.

Once you have measured the length of the tile, make a mark at the half way point of the top and bottom of the tile with a tile marker.

Then, the idea is to place this half way mark on the joint on the second row (B) so that the second row is exactly half way over the first.

Once this row is in position, tile this row and then start row (A) again on the third row, matching the joint on the first row.


How to tile metro tiles in a wrap return
A wrap return is when you start tiling the return wall and make it look as if the tile has bent round the wall and the tiling pattern started again.

To start the return wall, you’ll need to make sure that you use a tile that is roughly the same size as the piece you cut off against the internal wall, this gives the look of the tile bending around the wall and starting on the next one.

Once you have tiled the whole room, you can then apply the grout to the tiles, being careful not to leave any grout marks on your carefully positioned tiles.

Design Patterns with Metro Tiles

Subway
Herringbone
Double Weave
Vertical Brick
Horizontal Brick

Grouting your Metro Tiles

You can follow our How to Grout tiling guide when it comes to grouting your metro tiles. Remember to allow plenty of time for the tiles to dry before grouting them. Also, you may want to use clear white grout, or a colour variation, depending on the look you are aiming for.

How to cut metro tiles

Cutting metro tiles in the same as ceramic tiles when the method is applied to ceramic metro tiles. You will need to mark how big you need the tile with a pencil, then cut it using a tile cutter.

Choosing metro tiles

Metro tiles can be used on the walls and floors, and are a particularly popular choice for use in kitchens and bathrooms.

If you would like some more information on how to lay metro tiles, then please contact us at UK Pro Tiling Training.


Tiling With Quartz Tiles

Tiling with quartz dsc00752

Quartz tiles can look beautiful especially with the mirror glitter pieces in which can catch the light and give a twinkle across the whole floor, it is a very impressive tile indeed and comes in a multitude of colours, however dealing and installing this tile can be troublesome.

How they are made

Quartz tiles are unlike a normal natural stone tile such as marble, which will be pure 100% marble, a quartz tile is usually about 93% quartz and the other 7% will be a resin to bind the tile together.

Adhesive when fixing quartz

Quartz has a very low porosity, which means the tile does not absorb very well, due to the curing process of cement adhesives, this causes a problem for a standard adhesive to work and stick to quartz. Water is not to be used in the mix when using a cement adhesive therefore a two part adhesive is required to make the adhesive flexible, this will add extra grip to bond to the tile. A two-part adhesive will consist of a 20kg bag of standard cement and a 5 lt bottle of liquid latex.

Under Floor Heating

When using quartz tile it is not recommended to use this tile with underfloor heating, this is down to the resin content in the tile, the heat from the floor can cause the tile to warp and cause lippage between tiles.

Preparation

Prime the floor with a diluted acrylic primer and leave to dry until the prime has gone tacky.

Use a 10mm – 12mm notched trowel and serrate the floor area, apply the quartz tile making sure that the tile comes into contact with each of the ribs of adhesive.

Sealing the tile, even though quartz has low porosity, it is still advisable to use a suitable stone sealer in case the grout stains or dulls down the surface of the tile.

Use a 2-3mm grout joint and use a flexible grout.

Hard Wearing

Quartz is an extremely hard surface and will last and look good for many years.

Tiling Training Courses

Thinking of doing your own tiling projects then UK Pro Tiling Training runs fast track professional tiling courses and a dedicated natural stone installation course, please check out our website www.tiling-courses.co.uk to find out more

Are you a Plumber and Missing Out on Tiling Work?

Are you a plumber looking to learn how to tile? IMG_22871-900x600

Plumbers

If you are a plumber and do not currently tile you could be missing out on some serious cash.

Most customers would prefer 1 tradesman to complete the whole job without having to rely on multiple tradesman who can let them down at the last minute. If you are already an existing plumber then why not offer your customer a full bathroom installation service and watch your earning dramatically increase.

Customers are generally prepared to pay a lot more for 1 tradesman to complete the full installation.

Wet Rooms

Wet rooms are becoming quite mainstream in properties all over the UK, from trendy apartments to elderly and disabled bathrooms, again your plumbing skills coupled with tiling skills will see you completing these kind of jobs with ease, again your earnings will rise very suddenly.

Training

UK pro Tiling Training are fast track tiling specialists, we have had lots of enquiries lately from plumbers looking to add tiling to their skills.

On the course you will cover huge amounts of practical exercises and product / background information and see what is entailed to tile like a professional, acquire the know how of what is required to install a wet room along with tanking systems and aqua trays etc.

Contact

Anyone interested in learning to tile professionally in the fastest possible time can visit our website, to find out more please visit www.tiling-courses.co.uk.